Pages

5.28.2009

So you wanted an Online Fabric Stash

Sewers need to have their own Ravelry like site and believe me if this blogger had any coding knowledge I'd be working on that right now. There are sites like Burdastyle.com and Patternreview.com where sewers can post pictures and comments about finished projects. I'm glad those resources are out there but something was still missing for me... a web application to catalog my fabric stash.

A ball of yarn will readily tell me it's fiber content, care instructions and yardage through a label. But since cut lengths of fabric don't come with a premade label the details quickly fall out of my sieve like brain. Telling a silk from a wool is no problem, but remembering if it came with special laundry instructions? Good Luck with allllll that. I can't even remember how many yards of black twill were purchased at the beginning of this month (the ruler tells me 3).

Today through a serendipitous web search all my prayers were answered with a little site called dabbledb. The 8 min demo presents the product working like stereotypical database full of client information, but don't be fooled, you can customize all the columns and input what you like. In fact this product has compelled me share the magic with you through a little demo. If you're curious of how I turned this into a Fabric Stash DB read on. If not I'll be back soon with pictures of fabric and yarn and we can sniff them together.

So right up front, Do I have to pay to use this product? The answer is No, if you don't mind your DB being public. If you want your stuff kept private then it's 8 bucks a month per user. You'll get 30 days to try it before having to decide which plan you'll go with. I didn't see any harm in the public getting to see the fabric stash, so it's free for me.

I'll be showing the "Start from Scratch" method. If you are a far more organize person than me you can take a premade spread sheet and import all the information into the product. Are you ready? Cause awayyyy we go!

We've signed up to create a database and choosen the Start from scratch radio button. The application then will give us screen that looks like this:
Picture 4
This is why this application rocks, the field labels will be our column headers and they can be what ever we want. Some examples of what column headers are in my DB are, Yardage, Care Instructions, Fiber Content, Place of Purchase. This view only gives you 8 columns but we can add more later.
So here we are typing in our column headers:
Picture 11
The "Entry Cells" in our example are the fabrics in our stash. Each fabric will have it's own record which can be edited. We can type some of our fabrics in the entry cells now or add them later. Right now we're going to skip adding them here.

Now that we are done entering column headers/fabrics we click continue. The application takes us to new screen where the columns can be configured.
Picture 12
The configurations will change how the info is displayed in the fabric records. I'll be showing you some of the options in a little bit. All columns can be configured at any time so don't sweat it. I used the choices auto selected by the program and changed a few later.

After click "Finish" we'll have the regular database view. (But without pictures)
Picture 13

New fabrics can be added by clicking the new entry text on the left.
Picture 3

If we need more columns (Boy do we ever!) go to the right corner, click columns and select new field from the list.
Picture 14

All columns are searchable so once we've got a couple fabric recorded created we might want to make a few columns that will help us separate out our stash. If we have a pattern for a knit top we don't want to see any wovens, right? If we make a "Fabric Construction" column then each record will have a field where we can type in woven or knit. If we want to see all the knit fabrics in the stash, we'll go to the text entry area next to "Search" type in Knit and click the button. The DB will then show us only the knit fabrics in the stash.

Maybe this is a search we'll want to do often. If so it can be saved as a View. If we still have our knit results on the screen then above the column headers will be the words "Save, Revert, Save As."
Picture 2
These are our View edition options. To make a new view click Save As and type in a Name. We'll call it "All Knits." Then we'll return to viewing all the records by clicking on the category name on the right. If we want to see the "All Knits" view again, we'll go to the top left hand corner and click on the catagory name here to see a drop down menu.
Picture 16
If we click "All Knits" then the filtered view will return.

Let's talk about those column configurations now because with them we can change columns like "Fabric Construction" into Pop-up menus. Who needs to type the same thing over and over again when we can just select it from a list. Much easier, right? For this example we'll be making a column called "Fabric Type" that has a pop-up menu with different fiber choices.

Make a new column and name it "Fabric Type." In the main spreadsheet view click the column header and choose configure.
Picture 11
We'll get all these options.
Picture 2

Choose XYZ Choice. Then you'll see this.
Picture 15
Under enter new choices type in our pop up selections, Wool, Silk, and so on. Click "Add Choices" and they pop over to the right where they can be reordered or removed. Save all this to exit and return to the spreadsheet view. The pop-up won't show on the main spreadsheet page, but if we click on a record..... ehh ehhh, nice.
Picture 7

Now the real icing on the cake, a picture of the fabric in your db. I know we all have a flickr account cause we're on Ravelry, right? Let's say that we've uploaded some fabrics to our flicker account as well. Now we're going to hook flickr to the db too.
To start we'll make a new column and name it Fabric Pic. Then choose configure like we did earlier, but this time choose weblink from main configure field. When the Weblink options open here is what we'll pick.
Picture 8
Check "Links are to images," then choose "User specified text for each link" radio button. Save those settings and then click on one of our fabric records to open the edit view.
There will be a URL entry area like this.
Picture 4
We'll need to get the URL from Flicker and paste it in there.

Just in case we don't know where that is in Flicker:
1. Open up the Flickr photostream and click on the fabric picture.
2. Click on All Sizes above the pic.
Picture 10
3. Choose Thumbnail size and then select the path under "Grab the photo's URL".
Picture 12

Now we can copy and paste that URL into our DB entry area. Save and close the record.
Picture 9

Back to our main Db page and automagically, one picture in our stash record. It's like Buttua.
Picture 13

That's about it folks. There are other things we can do with dabbledb but this blog entry is already crazy long. But at least you got to see some cute frog fabric, right rightttt? Yeahh :)

5.19.2009

FO's Knitted and Sewn

My dear photographer has been very hard to press into service lately. Perhaps he's been burnt out by the Naknitsomodo challenge and the sweater model being a bit demanding about wanting close ups. It might be time to invest in a cheap tripod since finished sewn garments are starting to pile up.

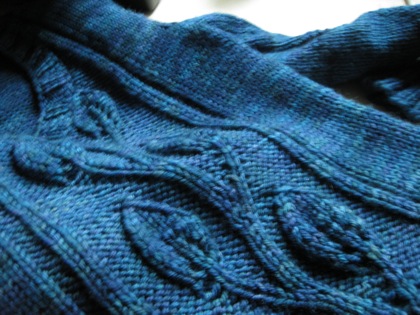
Between the reluctant photographer and the camera battery suddenly running out I have only one decent picture of the "Climbing Vines Pullover" to show you.
leaf pullover
(Hi, the rest of me is stockinette so use your imagination)

An easy knit except for a little confusion on where to start binding off stitches at the neck. The lace pattern changes stitch count and my row gauge was a bit off which meant I had to do that part twice. Second attempt worked perfectly and I was able to get the last leaf finished off with the neck decreases. Moral of the story there is math is easier in the morning than at 11pm.

Overall thoughts on this sweater.....
- Knitting a slightly smaller size is a good choice if you like a trimmer fit I went with the 34 which gave me an 1 of negative ease at the bust. It hugs my figure but does not bind in any way.

- This is a good design for a variegated yarn. Got to give other knitters on Ravelry the credit for showing me how great this sweater looks in Classy. I decided to go with with the "Don't be Blue" colorway (exclusive to The Loopy Ewe) since it color changes were very subtle. You can only see it in person but the yarn goes between a greenish hue and a purplish hue. Very nice and flattering.

- I'd classify this as boring to knit but easy to wear. One the plus side with the 3/4 sleeves and worsted weight you can bust out those all stockinette sleeves and back in a relatively small amount of time.

Now on to the sewing.....
With all my free time I started trolling the internet sites for sewing content and found a lot of great stuff out there.

First of all was the pattern company Hot Patterns. If you like their styles the head designer Trudy has made several Youtube videos showing some of the patterns sewn up and all kinds of variations. Most entertaining! Their stuff is not cheap but it comes on thick paper instead of tissue and you get the entire size range. I fell in love with the "Weekender Sunshine Top" and bought a copy. Then used my roll of trace to copy one size instead of cutting up the paper, thereby preserving all the sizes.

ST

Here is the pattern in a size 10, sewn up in a bamboo/cotton blend from Hart's fabric. The color is a very pale mint and the fabric is fantastic. It's no exaggeration to say it is the best knit fabric I've ever felt. (Some of the other colors available are on their way to me now)

The pattern gives you three lengths for the shirt, this is the shortest tank length. Instead of attaching the suggested 6 inch deep band, I made mine 7 inches deep and about 3 inches shorter then the circumference of the hem. Then the band was folded in half length wise (wrong sides together) and serged together to form a loop. The band then is folded with the right sides together, so you have a 3.5 inch band and serged to the bottom of the shirt. This gives it a bit of a blouson effect and the width balances the yoke nicely.
The sleeves were finished similarly but with a 3 inch deep band (for 1.5 inch finished) and the length was only an inch smaller than the sleeve radius.

Here's more of a close up.
Sunshine top
Planning to make some more but in different prints. Stay tuned!

5.14.2009

Baby Knitting Hooray!

The blog can finally announce that a nephew or niece will be joining my extended family sometime in November. Hooray! My inner knitter is cackling with glee over all the potential baby knits that could be produced, oh the mind swims with possibilities.

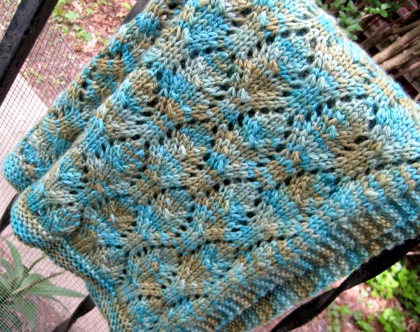
However the practical side of the the brain tells me to keep it simple and not swamp a poor non-knitter with a boat load of wool. To that end I give you the Baby Chalice Blanket.
IMG_1073
Lorna's Laces Shepherd Worsted Multi is your friend.

Many thanks to Lykkefanten for giving Ravelry this lovely free pattern. I was very taken with her sample knit in Huron colorway and decided to make mine the same. Since the pattern has the lace repeat written out line by line, I used the orangellous chart generator to create my own chart. If you do this I recommend creating the chart, printing out a copy and then use a highlighter to mark where the lace repeat is. After a few repeats you'll probably have the pattern memorized anyway.

IMG_1074
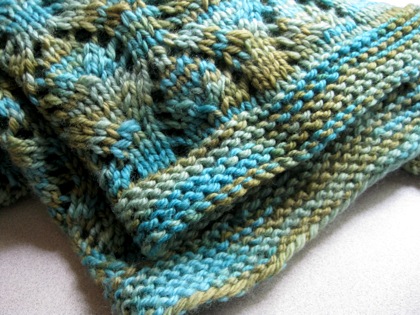
You know you want to squish my garter borders.

To complete the recommended 9 lace repeats and the garter edge I needed an extra skein of yarn bringing the total up 3. This was probably due to a slightly smaller row gauge. The finished blanket measures 24 x 37 but probably could have been blocked a bit wider. The amount of floor space available for a blanket to sit drying for a few days turned out to be rather narrow.

If you're looking to knit a great unisex blanket in the immediate future I'd highly recommend this pattern. The lace is easy to knit, the garter boarders add the perfect touch, and Shepard's Worsted has to be one of the best feeling yarns I've very had my hands on.

frog on blanky
Frog tested, Frog approved.

As you can see Frog can't keep his mitts off of it either.

5.09.2009

Are these the last cookies of the season?

Pretty soon it's going to be too warm to comfortable bake in our apartment. This realization always makes me a bit sad, but fewer cookies means you don't outgrow your pants.

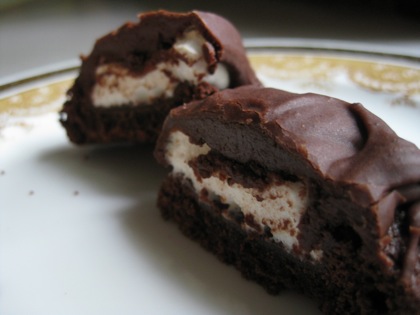
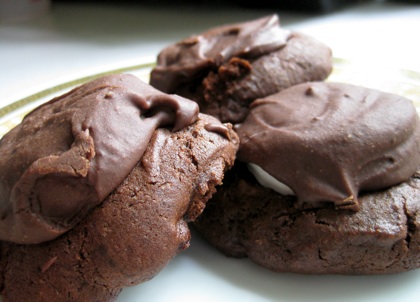
The Surprise Cookie from Martha Steward's Cookies book, is a bit out of my normal comfort zone. Once a recipe starts talking about frosting cookies I usually turn the page and just make some chewy chocolate chip. But Martha's cross section of this cookie totally sold me. It looks like this.
IMG_1037
What's that? Marshmallow?!

I tried to resist but come on, Marshmallow sandwiched between two chocolate substances... does that not sound delicious?
The cookie base is cakey but not too sweet, the marshmallow chewy and the frosting is sweet and fudgy enough to kick you in the teeth. Together they blend into a s-more like experience where you can't have just one. I'm hoping my husband finishes these off before too many of them join the other junk in my trunk.

Surprise Cookies
For cookies
1 3/4 cup - Flour
3/4 cup - Unsweetened Cocoa Powder
1/2 teaspoon - Baking Soda
1/2 teaspoon - Course Salt
1/2 cup - Unsalted Butter at room temperature
1 cup - Sugar
1 Large Egg
1/2 cup - Whole Milk
1 teaspoon - Vanilla Extract
About 15 Marshmallows Halved

For Frosting
3 cups - Confectioners Sugar
6 Tablespoons - Unsalted Butter at room temperature
1/4 cup plus 1 1/2 teaspoons - Unsweetened Cocoa Powder
1/4 cup plus 2 Tablespoons - Whole Milk
3/4 teaspoon - Vanilla Extract

Preheat oven at 375 degrees. Make cookies by sifting together, flour, cocoa, baking soda, and salt in a bowl. Put butter and sugar into the mixer bowl and beat at med-high speed for 2 mins until light and fluffy. Reduce speed and mix in egg, milk, and vanilla. Once these ingredients are incorporated mix in flour mixture 1/2 cup at a time until combined.

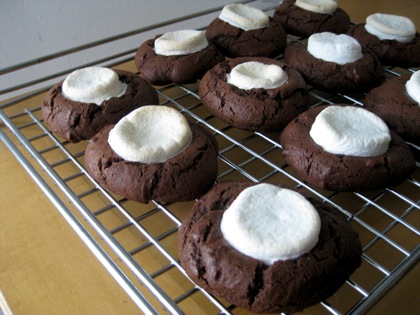
Using ice cream scoop or smaller spoon, droop dough onto baking sheets lined with parchment paper. Mounds should be about 1 3/4 inch. Bake cookies until firm 8-10 mins. Pull out baking sheet and press one half marshmallow into the center of each cookie. Return cookies to oven and bake 2 min more or until marshmallow melt a tad. Remove from oven and allow cookies to cool completely before frosting.

IMG_1015

To make frosting put confectioners sugar in a med bowl. Melt butter with cocoa powder in a sauce pan over low heat, stirring occasionally. Add butter mixture to cnfectioner's sugar and mix. Whisk in milk and vanilla.

Spread about 1 Tablespoon (or enough to cover the marshmallow) over the top of each cookie. Let stand about 10 mins to allow frosting to set, then cookies can be packed in a container. I placed some parchment paper between the layers of cookies which kept the icing from sticking to every other cookie it came in contact with.

IMG_1065
Enjoy responsibly as they are addicting.

5.08.2009

Remember These Socks?

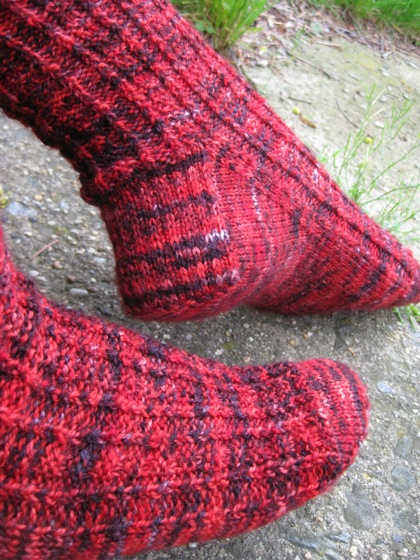
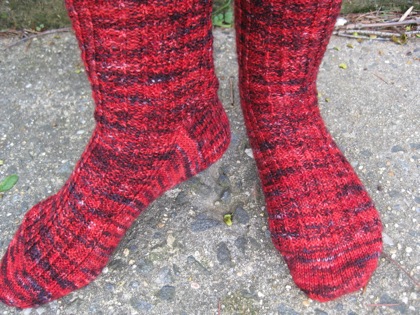
It was somewhat embarrassing to realize these poor Retro Rib socks where started all the way back in January. Second sock syndrome hit hard with these.

IMG_0998

Knitting thin weight fingering and number 1 needles is not by favorite thing. But I didn't know this until I bought a lot of thin fingering weight yarn. Curses!

IMG_0996

The cuff on the second sock was knit incorrectly, I didn't read the instructions right and repeated the wrong lines. Not like it's all that noticeable in this colorway... Black Rose by Sunshine Yarns. Even though the knitting was not all that enjoyable I'm very pleased with the finished socks. The fuzziness of the soft sock yarn base feels nice on my feet and a ribbed pattern always fits nicely.

IMG_0999

Down to one single sock hanging around in my bag. Whoopie!

5.05.2009

Score

It's raining today and it rained yesterday and it will rain tomorrow. It's like suddenly we're living in Seattle.

Overall this isn't too bad. Unemployment allows one to do all the fun rain day activities, napping, watching movies, knitting and baking.... all without having to get your shoes wet. The downside is that without sun there are no good FO pictures. Right now I'm holding out hoping some sunshine will appear when my camera operator is around.


<span class=

I'm all finished, can you tell? No, no you can't.


Don't know about you, but I've been waiting with bated breath for today so that a copy of the new Knit 1 could finally be mine. Angela Hahn's drool worth Leaf yoke top is zooming to the top of the "To knit next" mental list. Connie Chang Chinchio's Tie back shell is also a big favorite. As I page through there are several other little projects that are very appealing. Sock patterns from, Yarnissima, Cat Bordhi, Cookie A, and Grumperina, good show ladies, good show. Got to hand it to Knit 1's editors, they've made the only spring/summer magazine with patterns that make me want to knit now!

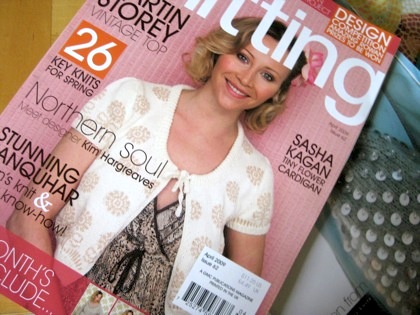
The other mag purchase of the day was one I've never noticed before, the British mag Knitting. The little cardi on the cover.... the only thing I wanted to knit from the new Rowan mag. Now I've got the pattern for substantially less money, Score!

<span class=