Did a quick rummage through the pattern stash and Simplicity 2311 seemed like the perfect starting point. I traced off the single breasted, short length version and began by redrafting the collar. McCall's 6519 was used as a guide to make the collar wrap around the neck. For the wider lapel I just did a free form drawing while referencing the screen caps.
Since there are no good shots of the back of the original coat I decided to have a little fun and add a decorative yoke. Simplicity 2311 comes with a yoke piece so that was traced, increased in length a tad and given a curvy edge. I cut one yoke out of self fabric and another out of lining. Sewed the two together, understitched the curvy edge and then overlaid the decorative yoke over the regular one before setting the sleeves.
Speaking of sleeves, simplicity only gives you a one piece sleeve in this pattern. Shame Shame!! Lucky for me the sleeves from Colette's Anise fit right in the armholes, no drafting of my own required. I did reduce the sleeve circumference by an inch to make them a bit sleeker looking. Did this by cutting own the seam allowance on the forward most seam.
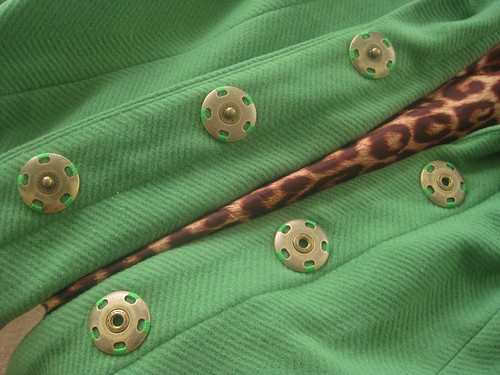
The pushing daisies coat has no visible closure other than the belt. At first I thought about making a hidden button placket, but that didn't seem like a good idea with my rather thick wool. Instead some beautiful large snaps were purchased from the wonderful Waechters.
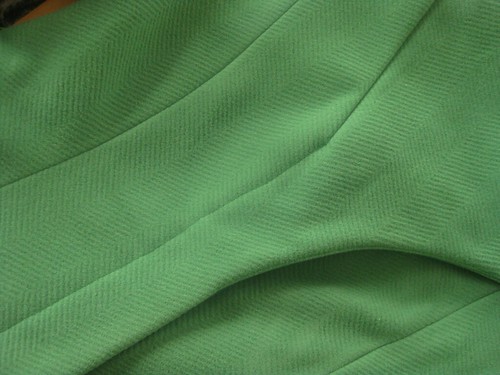
A little decorative topstitching was added to mimic a placket. In this picture you can see I topstitched from the bottom up to the point of the dart in the undercollar. This wasn't planned but it looks nice and tidy.
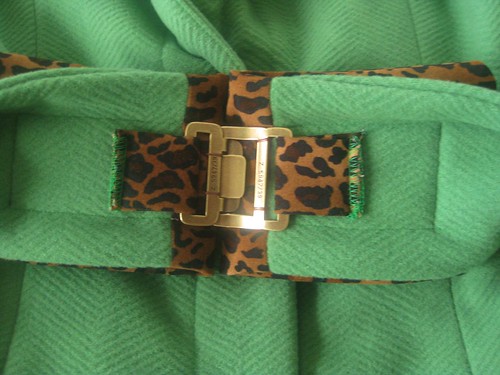
For the belt I just kind of flew by the seat of my pants. The main part is simple, more self fabric the length of my waist measurement/4"wide, with some topstitching added. The leopard print portion is some light weight suede cloth that needed some extra body. To beef it up I took some hair canvas from the stash and sandwiched it between too layers while sewing the seam allowances. This was attached to the ends of the green wool and given it's own topstitching. I really wanted a 4" belt buckle but lo and behold this is something that seems to be only made for RTW clothing. If I'd had this "bright idea" at the beginning of the month maybe I could have found a cheap one to cannibalize, but my local Target yielded nothing. With limited time to finish the coat for the PR contest I had to resort to Plan B - get creative with a 2" belt buckle.
The belt buckle (also from Waechters) was attached behind the belt with loops of the suede cloth. They were just sewed on with the machine since the stitches would be hidden. I then folded the leopard belt ends back and secured them with another row of topstitching. Finally the belt buckle pieces were secured by hand to the belt to keep the front from popping out away from the body. It actually looks pretty good from the right side.
Here's my PR review if you're interested in what fitting changes were made. Generally I had to take the coat in but that may have been because I started with with wrong size. Big 4 ease sometimes confounds me.
Be sure to check out all the beautiful entries in the RTW contest and if you feel like casting a vote my way that would be great. Now excuse me, I must get my note to Oscar Vibenius.


So cute! Love this!!
ReplyDeleteThanks Ginger. Now all I need is Lee Pace and some pie. :)
DeleteGorgeous!! The belt buckle fix looks great. You're a genius.
ReplyDeleteThank you! Hooray for our creative brains, I didn't think it was going to come up with a buckle fix but it did.
DeleteLove the colour, and love the collar! And a wee bit of animal print never went astray. This looks positively cosy! Gorgeous :)
ReplyDeleteThank you. Animal prints are the best, right? :) The wool is nice an cozy, I'm wearing it inside. hee hee
DeleteIt looks so professional! The color is very cheery, too. Nice work, and good luck with the contest!
ReplyDeleteThanks Becky, cheery colored coats for everyone!
Delete