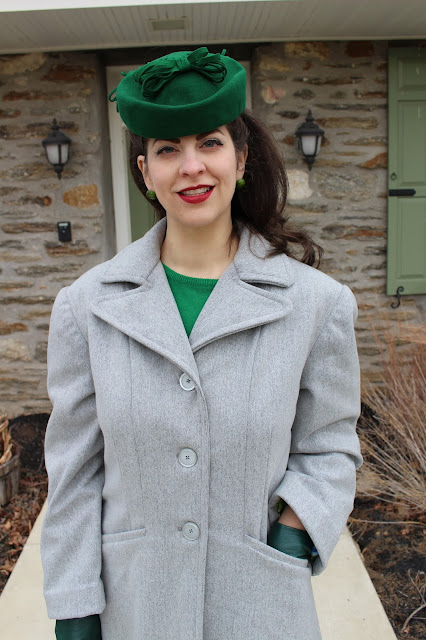
Now I don't rely on directions that heavily, but they do come in handy on non printed patterns. I use them while tracing a copy of the pattern to correctly label all the pattern pieces. It's also nice to have a reference for things like top-stitching and any sort of vintage sewing technique that has fallen out of fashion. I was also a little concerned about the pockets on this design. I've sewed a lot of garments, but never one with pockets that look quite like this. After mulling it over for a day I decided to give it a shot.
Between several years of coat sewing experience, 1 year of familiarity with non-printed patterns and an excellent fashion illustration it all worked out. When sewing the muslin I turned off my brain and my hands figured out how the pockets went together without a hitch. Isn't it nice how a lot of garment constructions is common sense? The rest of the sewing was standard coat/jacket stuff that I can do without any directions. Hooray! I also lucked out that the 40's fashion illustration was very detailed and showed where all the top-stitching should go. You'll probably have to look at the illustration yourself to be able to see any top-stitching details. My light gray on light gray stitching mostly gets lost in the photos. I do want you to know that I spent hours trying to get smooth top-stitching curves on my coat lapels. ;)
On to the review portion of the blog post..
Pattern
Hollywood 1214
Fabrics used
Stashed gray wool coating - originally from Gorgeous Fabrics
Stashed floral viscose as lining - originally from Emma one sock
Pattern changes/alterations
1. Standard 1/2 forward shoulder adjustment to the shoulder and sleeve head.
2. Added 1" extra ease to the hem line and hem.
3. Removed 3" of ease out of the sleeve cap. Some was removed by making the dart at the top of the sleeve wider. Some was pinched out.
4. Drafted my own lining for the coat.
Confessions/Advice
- This pattern seems to have been drafted with shoulders that are supposed to jut out past the natural line. Despite all the extra shoulder padding I added in that area it still looks like I didn't fit the coat right. If I had to do it over again I would take the shoulder line in to met my natural shoulder edge.
- I do like all the little details this pattern has. Lots of top-stitching, the little faux belt at the back, the lovely big pockets. It's really hard to keep your hands out of them!
- Compared with all my other coats, the lack of buttons below the waist feels a bit odd. I'm always thinking that I've forgotten to fasten a button or two. Thanks to the thickness of the coat there isn't too much problem with the bottom half blowing open unless it's a really stiff wind.
- Confession, the bugs got to this piece of wool too. One yard was badly compromised, but there were nips taken out here and there through out the yardage. The bugs seemed to favor the fuzzier side which probably was the right side of the fabric. I decided to use the "wrong side" and not worry about cutting around any nips in the fabric.
Husband + Son Comment
Steve - "Looks like there's a lot of room in that coat."
Desmond - "Room for 100 people the size of ants!"
Steve - "I was thinking along the line of thick sweaters or smuggling goods, but sure."
My Final Thoughts
Not gonna lie, my red McCall's 6800 is still my favorite coat. You know how a looooove red. However this project was an interesting sew and gave me a real ego boost. It's nice to find out that you can finish something without out any directions.
Can you guys believe this is the last of my stashed wool coating? I'm going to cry big crocodile tears next year when I have to fork money over for my seasonal coat.


