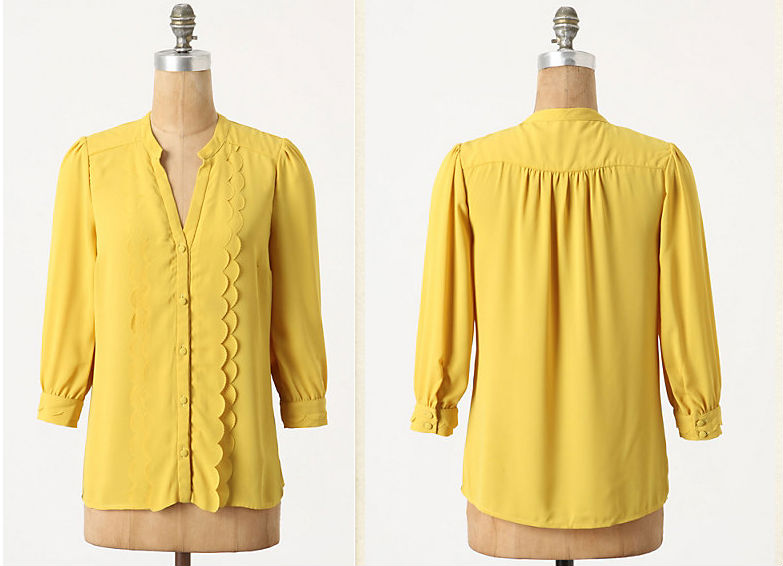
I recently had this experience when I ran across this lovely blouse from Anthropologie.
 |
| It's like butttta! Fancy fancy butter! |
 |
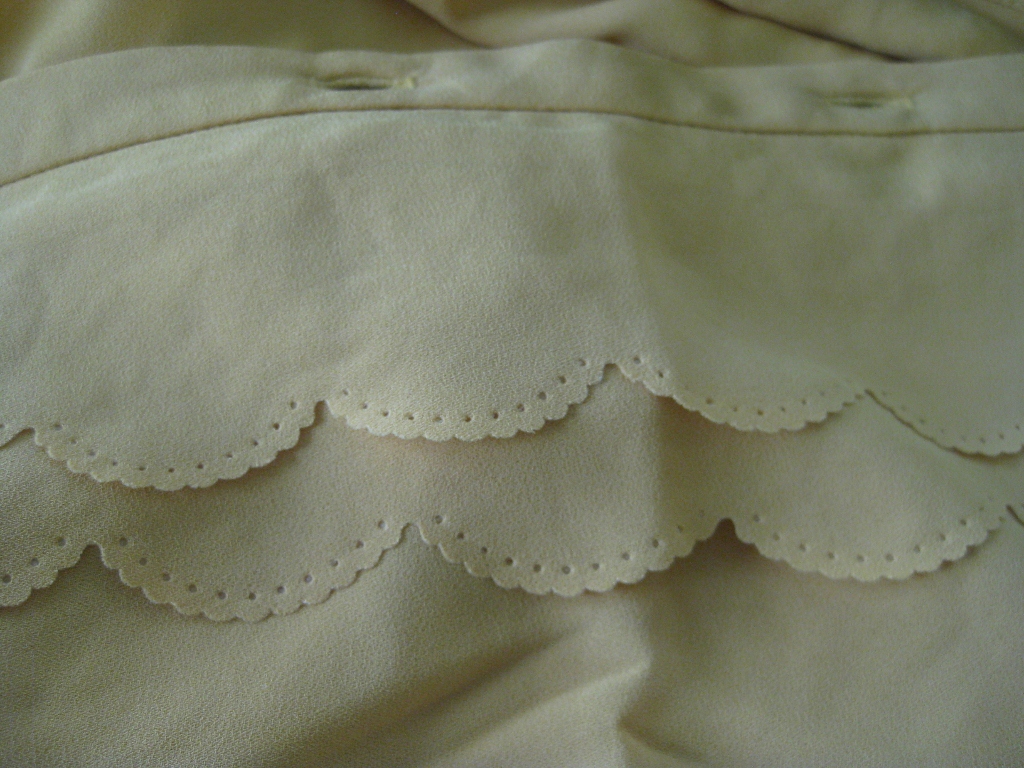
| Scallops on scallops. |
Looking through the pattern stash Simplicity 2246, View B seemed the best base pattern for this project. It has the same semi-fitted shape with a bust dart and 3/4 length sleeves. I traced off the size 16, decreased the length to around 26" and made up a muslin to check the basic fit. The pattern needed my standard fitting changes - A forward shoulder adjustment of 1/2", the hip ease bumped up to the next size and the Bust dart lowered and inch. (Note: I did not need to do a complete FBA because extra width was not needed across the bust. So I cut out the dart, lowered it an inch and then reblended the side seam.)
The style changes made to the pattern were far more excessive. Here is a quick overview of what I did, all measurements are made from the seam allowance in.
1. To approximate the slight v at the top of the button band I marked 1/2 inch in at the top of the button band and 7 inches down the length. Connected these two marks to make the angle and redrew the seam allowance. Also cut down the neck line curve by 1/2" at the CF blending it out to nothing at the shoulder seam.
2. Added yoke lines to both the front and back. Front yoke is parallel to the shoulder seam and is 2 5/8 inches deep from shoulder seam allowance. Back yoke is 3 inches down from the shoulder seam. Used a hip curve to draw a shaped yoke line similar to the original blouse.
3. Added additional ease to the lower back yoke line by slashing and spreading.
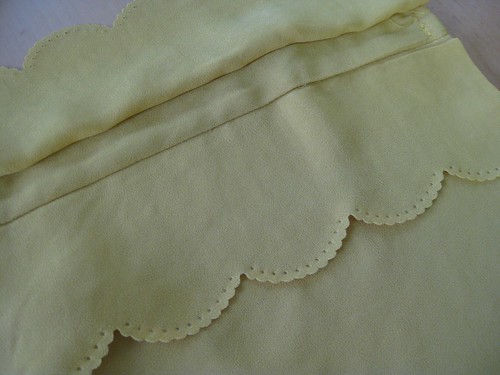
4. Added a vertical seam 3/4 inch away from the CF for insertion of second row of scallops. (See Photo)
 |
| The second row of scallops is sewn into it's own seam instead of the button band. |
5. Lengthen sleeve to 17 inches (+ seam allowance). Added a slit for a continuous sleeve placket and redrew the bottom of the sleeve with the classic curve of a sleeve with a placket. Then added fullness to the sleeve by slashing and spread along the entire length. A new cuff was drafted at 15" x 3.5" (+ seam allowance).
6. Drafted a new pattern for the collar, button band, and the scalloped trim detail at the center front.
All these changes took a lot of tinkering and several muslins, but I'm very pleased with the final result.
My scallops where created using a fancy stitch on the sewing machine. My process was to cut a block of silk big enough for the pattern piece. Then using a fabric marker trace the scalloped edge on the fabric. Next I top-stitched directly on the marked line using the fancy stitch. The scallops need a little something extra so I went back in and added a straight stitch about 1/4 inches away from the fancy stitch. All the stitching was complete so the scalloped edge was then cut out by hand very close to the stitching. It was a long process, especially when you only have 1 hour blocks of sewing!
A few shot of the details...
Another tutorial I found very helpful was Gertie's one on self covered buttons. The thin silk was looking lumpy on the edges when using the directions on the back of the Dritz package. Gertie's method of gathering the fabric circle first makes them come out looking great. If you are using 1/2" buttons like me you'll want to put the gathering stitch in by hand. I also found the little jig very helpful to put the buttons together at that size.
Finally for those of you who love the inside of a garment as much as the outside..... a little photo montage.
 |
| French seams on the vertical, self enclosed yoke, armhole seams overlocked. |


I love this- so many great details- thank you for sharing your lovely work!
ReplyDeleteThank you prttynpnk. I think all the great details were what got me hooked. :)
DeleteThis is beautiful! I love the gorgeous color and all of the attention you paid to the details (scallops!!!) have resulted in a truly fabulous blouse. Positively inspiring!
ReplyDeleteThanks Robin, the color of the fabric just tickles me pink. :)
DeleteWow, you did such a beautiful job. Love the colour. Very inspiring.
ReplyDeletelook at you and your awesome self! Love it. Everything is just perfect.
ReplyDelete