Showing posts with label Renfrew. Show all posts

A Tiny Hack - Boat Neck Renfrew

1.18.2014

Confession - I'm a instagramming junky when it come to my sewing. Unless it's a secret project, I'm taking a picture of my process every 10 minutes. Early this week I put up a pic of a black boat neck T-shirt that was altered from the Sewaholic Renfrew pattern. Silvia aka Jusipra said, "Hey can you do a tutorial on that?"  Heck yeah, tutorial request excepted.  I'll even make another T-shirt out of a fabric that doesn't photograph like crap.
Ta daaaa, one foxy boat neck out of some cheap ass fabric.  Oh little foxes I couldn't say no to you.

Fabric is from Girl Charlee "Fox family on Blue Cotton Blend Jersey." I feel the need to do some full disclosure on this particular yardage.
Pros
-The fox print is very cute and the colors are bright.
-The price is very reasonable at $6.50 per yard.

Cons
-The base fabric is cheap feeling and if I hold it up to the light it's semi transparent.
-On my piece the grain is skewed. The pattern does seem to be printed on the straight grain so maybe one could block this straight if they wished.
-It has very little stretch in any direction. Too be fair the fiber content is clearly stated and the fabric has no fibers like spandex woven in to increase it's stretch. That means the fabric only has "mechanical stretch," it  stretches cause knit construction is inherently stretchy.

I've ordered from Girl Charlee before and knew what to expect in terms of quality. I decided that the price point was low enough to make up for any inadequacies with the fabric. Those foxes where just too cute to pass up. Now on with the tutorial bit.

How to turn your Renfrew into a boat neck
Notes - All my Renfrew seam allowances have been trimmed down to 1/4 in this example. Use the seam allowances you are comfortable with. The coverstitch machine can be substituted for a twin needle or a zig-zag stitch on your regular machine.

Drafting Instructions
1. Trace the front of the Renfrew and extend the CF line up to the shoulder.
2. The width and depth of your boat neck is mostly personal preference, but it's always nice to have a guide line. For my shirt I marked the shoulder seam 2.5" from the outside and the neck 3" down from the shoulder point.
3. Then use a french curve to draw the new neckline in.
4. The front is pattern has now been adjusted. I considered the new neckline the cut edge and did not add any seam allowance to it.

5. Moving on to the back pattern. Here only the shoulder width needs to be adjusted to match the front.  Measure 2.5" from the outside of the shoulder and mark.  You can double check by putting your new front piece next to it.
6. Grab the french curve again and draw the new neckline.
7. Your back piece is now done.
8. One last step is to draft a facing for the front and back neckline.  I traced the new necklines and made the facings 1" wide. We'll be cutting them down later.  I cut notches at the CF/CB of both the shirt and facings to make them easier to line up later.

Sewing Instructions
1. Sew together the shoulder seams of the shirt.  Then sew together the shoulder seams of the facings.
2. Pin the facings and shirt right sides together lining up the seams and the notches on the CF/CB.
3. Sew these pieces together along the neckline.
4. Flip the facing to the inside of the shirt. Give it a nice press on a ham to keep the facing inside.
5. To secure the facing, run a line of coverstitching along the neck edge. I used the throat plate as my guide making the stitching 1/4" away from the edge. When you're done secure the coverstitch threads.
6. Finally we're gonna trim the facing down to the coverstitch.  Use a small pair of scissors and go as slow as you need to. When you're done the neckline will have a nice tidy binding.
Additional changes to this pattern were:
- Narrowed the lower half of the sleeve by 1/2" at the cuff, tapering the new seam up to the elbow area.
- Added 2" additional length to both the sleeves and body of the shirt. The shirt was then finished with 1" coverstitched hems.
Hopefully that was clear enough, but if you have any questions feel free to leave them in the comments. Happy Hacking!

Renfrew Cardigan How-To

2.24.2013

Ok, it's the moment some of you have been waiting for with baited breath.... the Renfrew cardigan How-To. Let's just get right to it.

For this modification you'll need to trace the following Renfrew pieces,
1. Scoop front and Scoop front neckband
2. Back
3. Long sleeves and long sleeve hem bands
4. Hem Band
 You'll also need a writing utensil, scissors, tape and extra paper.

(Note Renfrew comes with 5/8th seam allowances but I've reduced mine to 1/4.)

Front
1. Take the scoop front and shorten the length by 2".  Then add 1/4" extra width to the entire side seam.  Add another 1/4" to the CF since you'll be sewing a button band to it.

2. Next put your ruler on the shoulder seam of the front. Measure 1 3/4" down from stitching line (not edge of pattern) and draw a line parallel to the should seam. This is your front yoke line.

If you're going to do gathered yokes add some placement notches on this line before cutting it. Later you'll need them to know where to put your gathering stitches.  On my sweater I put a notch 5/8"away from the stitch line on each side. Cut the pattern apart on the yoke line and then add seam allowance to the yoke edge. Label the top part Front Yoke and then set it aside.  We will be using only the bottom half of the pattern next.

3. To add ease to make gathers you'll need to slash and spread the lower part of the front.  Draw a line between the placement notches and parallel to the grain line though the entire length of the pattern.  Now cut the line from the top almost all the way through to the bottom.  You want to leave a little "hinge" for the pattern to swing open from.  Take a scrap piece of paper and place it behind the cut.  Spread the pattern open til there is an 1" gap, then tape the pattern piece to the scrap paper.  Make sure you add some seam allowance to the now yoke seamline now. Trim off any extra paper and label this piece front.  It should look something like this...


Back
1. Take the back and shorten the length by 2".  Then add 1/4" extra width to the entire side seam.

2. From the CB line measure down 4" from seam line.  Draw a straight line perpendicular to the grainline across the pattern piece.  You'll only need to mark on placement notch since the pattern is on the half. Mine is 2.5" from the armhole stitch line. 
Cut the pattern apart on the yoke line and then add seam allowance to both cut edges. Label the top part Back Yoke make sure it says Fold on the CB edge and then set it aside.  Again we will be using only the bottom half of the pattern next.

3. Once again we will be adding more lines to slash and spread on.  Since I wanted to add 2" of ease to the half the back I drew in two lines parallel to the grain line.  Both lines are cut almost all the way through and each is spread open 1".  Fill in the gapes with scrap paper and tape down the cut edges.  You'll want to true the yoke seamline a little bit.  Just make sure it is smooth and it will probably have a tiny curve to it.
Add seam allowance to the yoke seamline edge, trim any excess paper off and label the pattern Back. It should look something like this...


Optional yoke alteration
You can keep the shoulder seam  or you can remove it and have a continuous yoke.  I decided to remove the seam since the front yoke piece is so small.  Simply tape the two pieces along the should seamline and you're done.


Sleeve
1. Add 1/4" to both side seams.  I also shortened the length of my sleeve by 1/2" which is optional.


Bands
1. Hem and Sleeve hands stay the same
2. Neck band gets 1/2" additional length added to each end.  (If your fabric has plenty of stretch you may not need the extra length)

Drafting a button band
1. Button band needs to be the length of the CF + half of the hem band + seam allowance doubled (Ahhh Maths!) and 2 1/4" wide plus your chosen seam allowance. You'll fold it in half and serge it on just like the other bands.


And now for a few sewing notes....
1. I used tricot interfacing on the button bands and neck band because I wanted to keep these areas stable.

2.While my overlocker does have a gathering setting it makes no sense to me, so I just used the regular sewing machine to put in some basting stitches.  Using a ball point needle stitch a basting stitch between your placement notches.  Then pull threads until the the main body piece fits the yoke piece.  Serge together and then remove basting.

3. I cut two yokes like you do in shirt making.  Sandwiched them around the back gathers and serged all 3 pieces together.  On the front I only serged the right side yoke and main piece together, then slip stitched the inside yoke to the seam.

4. Sewing order was back yoke, front yoke, neckband, sleeves, side seams, sleeve bands, hem band, button band.

Hopefully this is clear enough but it you have any questions, leave them in the comments.  Happy Sewing!

Pattern Hacking - Renfrew Cardiganized

2.22.2013

 What do you get when you have a semi-large stash of sweater knits and every cardigan pattern disappoints?  You get out your trusty Renfrew pattern and hack it up! (After tracing off a copy of course.)
Renfrew Cardigan Buttons
Renfrew is always there for you.

I really like those RTW sweater with gathered yokes so I did a little slashing and spreading as well.
Renfrew Cardigan Front gathers
Yoke Gathers!

I selected a nice firm knit from the sweater knit stash, an acrylic/polyester/wool blend purchased from Mood last year.  About 2 hours later we had what I like to call Librarian Chic. (Pants are Colette Clovers in stretch Corduroy BTW)
Renfrew Cardigan 4
I have just the book for you!

Also doubles as personal assistant chic.
Renfrew Cardigan 3
Yes, yes pick up your dry cleaning and then file the Peterman account.

And look the back is really pretty.
Renfrew Cardigan Back
More gathers cause they're awesome.
After giving this a really good pressing I'm super pleased with it.  The pattern changes aren't too hard to do and I'll explain them in my next post.

A Trio of Tees

2.15.2013

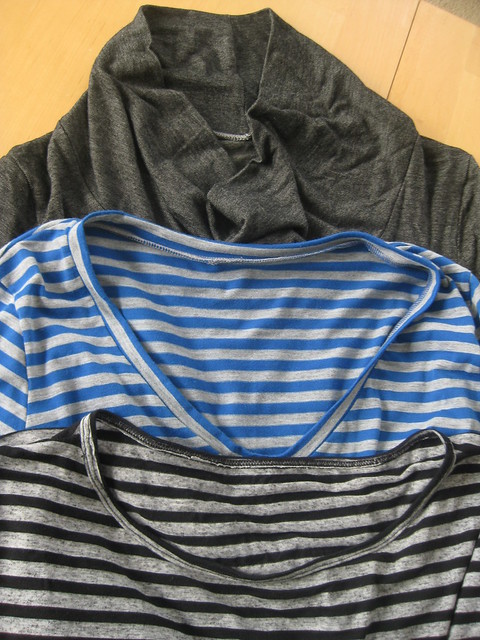
After such a labor intensive project as Butterick 5814, it's no surprise that I decided to return to the gigantic knit stash for a quick fix.  To make things really easy I pulled out my favorite TNT pattern, Sewaholic's Renfrew.  This is the V-neck long sleeve view, made up in a very nondrapy rayon knit. 
IMG_9791
Kind of nautical right, so the Lobster makes total sense. Just nod politely.


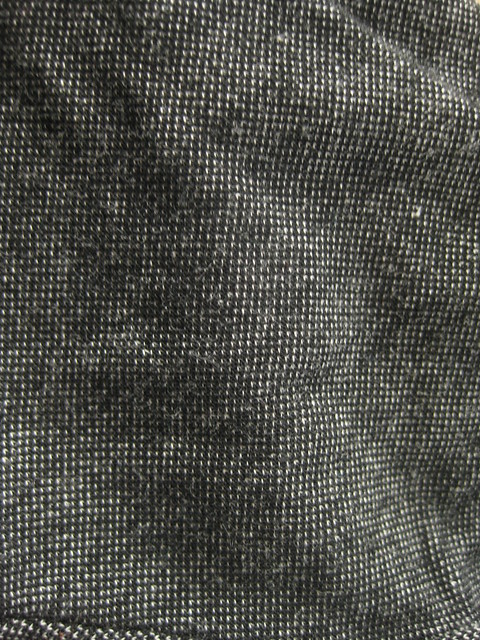
But Renfrews are like potato chips, you can't make just one so I dug deeper into the stash and found this awesome rayon tweedy knit. It just screamed cowl neck Renfrew. 
IMG_9871
Knit with white and black threads for gray tweedy goodness!
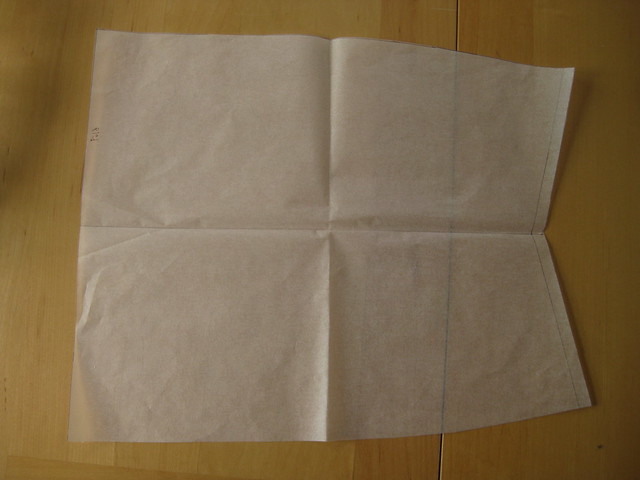
There wasn't quite enough fabric to do the cowl as drafted by Tasia so I drafted a smaller on hat folded over. The width is the same but it's about 12" high and folds over to 6".  Why that high, cause that's how much fabric I had.
IMG_9872
RTW told me to do this and it works just peachy.

Still looks super cute. This rayon had some drape to it which worked well with the cowl.
IMG_9772
I love gray, what does that say about me?
Lastly I decided to jump on the dolmen sleeve bandwagon and knock off a RTW shirt I'd bought, traced and returned.  The RTW shirt had very deep hems, about 3" or so but I found that a total sewing nightmare on the temperamental coverstitch machine.   Changed the hems to 1" and that made the hem and sleeves go much faster.  The neck is finished with a self binding, also attached with the coverstitch machine.  While I like that type of finish it's a pain in the ass to do.  In fact this last shirt reminded me why Renfrew is such a great pattern, you don't have to worry about coverstitching!!!!
IMG_9782
I'm a fashionable criminal.
Not totally sure that dolmen sleeves are a great look on me, but it's comfortable and layers with cardigans just fine.

I've worn all 3 shirts multiple times already and as a bonus they were all from stash.  Feels great to bust out 3 garments in a weekend. What a pretty set of triplets they make.
IMG_9870
You don't want to know how much more gray fabric is in my stash.
Proudly designed by Mlekoshi pixel perfect web designs