Since I'm the Stash busting theme host it seemed only fair to put my "money where my mouth is" and sew only stashed pattern this month. Luckily for me a really fun Frankenpattern idea popped into my head and got the ball rolling. Let me present a mash up of the Elisalex bodice and Burda 6834 flounce skirt. It's business time flamingo dancer.

Now you all know my fabric stash is large, but I have a pretty good memory about what's in there. Rarely do I stumble across something that I have no memory of purchasing. However during this fabric cull I found 2 yards of red wool crepe that was a complete surprise. As frog is my witness I did not buy this fabric. Most likely it came from my grandmother's insanely large stash and she sneakily stuffed in a box for me. Well played grandma, well played. Also you knew what I liked and I wish you were still around to give me side eye about what I pay for fabric. Grandma didn't pay retail, she bought auction lots. Lots of them.

1. The first version of Burda 6834 I made sits below my natural waist. It seemed prudent to add some additional length to the pattern if it was going sit higher. Two inches of length was added to all the skirt pieces at the lengthen/shorten line. (I could have gotten away with half that length.)
2. The Elisalex bodice was walked along the waist seam of the skirt to compare the princess lines seams. The skirt princess line seams were moved to match the bodice's. The front skirt matched without any changes and the back needed a slight tweak.
3. After the princess lines were adjusted, the side fronts/backs were walked along the waist seam. A sizable amount, around 3/4", needed to be removed from the skirt side seam.
4. The skirt has an angle in the princess line as a design feature. I decided to smooth this out into a curve by adding a bit to the side front seam line and removing a little from the center front seam line.


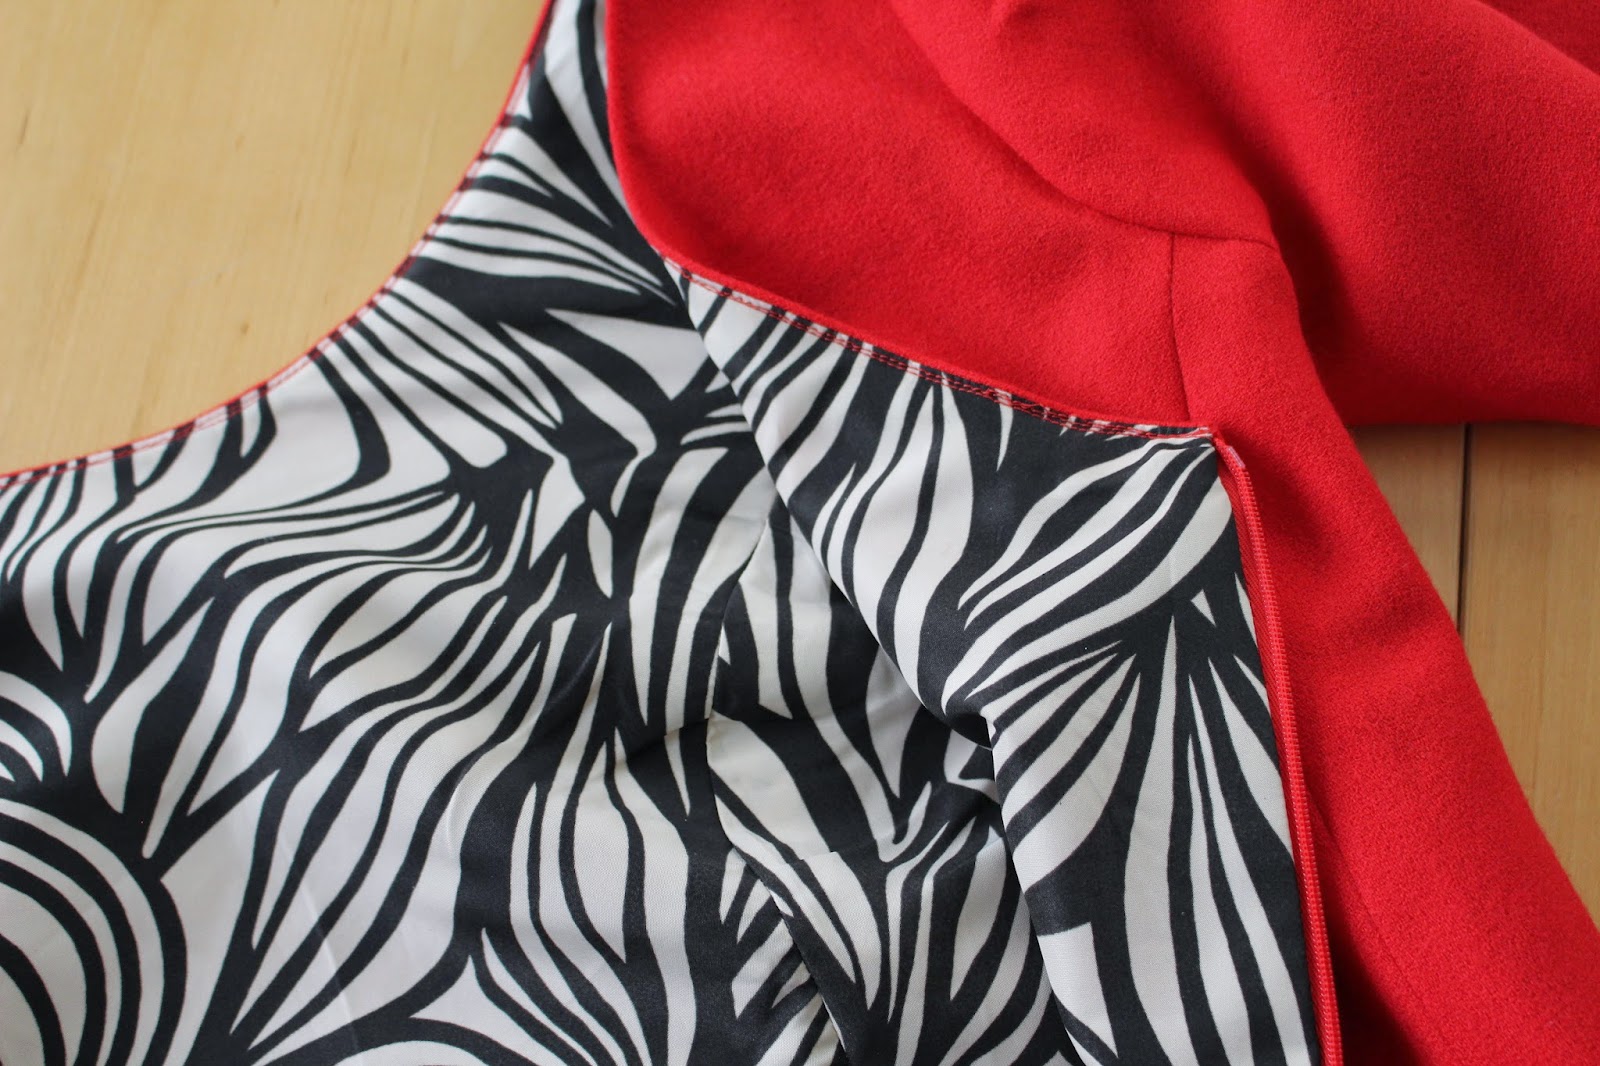
1. The lining shows through.
I didn't even think to check this since there were no issues with lining my Christmas dress. It's not too noticeable in the photographs, but in real life you can clearly see it. As fate would have it, the see through affect wasn't noticed until the entire dress was almost finished. At that point I decided it was a "design element," like a lace overlay or something. Yeeeeah, I know the lining should be switched out but I'm not gonna do it.
2. Not all fitting changes were transferred to the pattern.
OK here's the deal. The Elisalex bodice was made in a larger size for the red roses dress in October 2013. Some time last year I'd traced a smaller size and "thought" I'd sewn it up into some garment. Wrong, the smaller size never got sewn up till now and I certainly forgot to transfer over some armhole adjustments. The armhole is very tight and lining it didn't help the situation. Oops.
3. Stretch woven and non stretch woven do need different amounts of ease.
Another big oops on my part since this fact didn't cross my mind pre cutting. Both of these patterns had previously made with a stretch woven, but I'd forgotten that fact. When I put on the red dress there was a moment of, "Why is this tight across the back and the hips.....oh yeahhhhh no extra stretch." In hindsight I should have muslined this dress to double check the fit in a regular woven.
4. No amount of under stitching, clipping or pressing would keep the lining from rolling out of the neckline.
I finally had to top-stitch the edge of the neckline to stop the lining from peeking out. Growl. Having top-stitching in one location seemed odd. I decided to top-stitch the sleeve hems and skirt hem to balance out the garment.

Other than a bit of tightness in the arm holes, the fit isn't that far off. It's probably only something I'd be concerned with. "Oh no, it's 1/4" too tight, The Horror!" This dress is still going in the win column since it makes me want to do something like this all the time. Wheeeee dancing!

*Why doesn't mental sewing result in a real garment? Science get working on that. Not like you need to cure cancer or anything. Sewing is now your Top Priority.

Your dress is fabulous. And I love the lining. Amazing!
ReplyDeleteWhoa. Killer dress. KILLER.
ReplyDeleteThat looks gorgeous! Now I want a red work flamenco dress! With those thights of course...cause sexy!
ReplyDeleteAbsolutely stunning dress! I adore the flounce.
ReplyDelete"You make me feel like dancing" nananana... yeah, I don't know the rest of the lyrics of the top of my head.
ReplyDeleteGORGEOUS! Glad it will get worn even with the oopses. You're right. How can you not love a red dress?
Sewing time is elusive for me but I've got the Edith PDF taped together begging to be traced and sewn.
Stunner! I'm now wanting one!
ReplyDeleteThis looks fantastic on you!! Love the flounce. Great mashup!
ReplyDeleteLovely classic dress with flare (and flounce). If only mental sewing resulted in a garment, I've got so many in my head.
ReplyDeleteperfect with those heels and seamlined stockings (and luxulite ;o)
ReplyDeleteLove it. And the lining showing through just makes it look like super fancy fabric. If anyone asks just tell them it's a design feature!
ReplyDeleteThis dress looks fabulous! Great stash busting!! Seems like maybe Frog needs more chocolate and coffee LOL.
ReplyDeleteI totally missed your last post (I was on a business trip last week and had no time) but I think it's very interesting. I usually stash things I like, and patterns are no exception.
ReplyDeleteI have sewn very few garments but have lots of patterns, so I'll join you with a couple of them on march. I guess the hollyburn skirt, that's been at my (usually forgotten) "to do list" for a long time. Don't know why, because I know it will be an easy one.
But let's talk about this stunning sexy red dress. It's a great frankenpattern, like if the fabric, the bodice and the skirt meant to be together and be yours. Last pict is great. Yeah for dresses that makes people feel like dancing.
This is sharp and daring and nrrds a brooch!!
ReplyDeleteAwww thanks Shannon. That's the last of that amazing lining and it will be missed. (The only bad thing about busting the stash.)
ReplyDeleteOh no! Frog let me leave the house broochless. What will the world say about seeing me so exposed? ;)
ReplyDeleteFroggie says he's gonna come live with you if I don't up the chocolate/coffee ration. I'd better get on that cause his tiny paws do such delicate work.
ReplyDeleteThank you so much for saying that about the show through lining! It makes me feel better about lazily not switching it out.
ReplyDeleteI will instruct Froggie to start making you one on the double!
ReplyDeleteOh Sweet, I'd love to see you sew up the Edith pattern. Bet you have some fun stash fabric picked out.
ReplyDeleteThanks Roxanne. That fabric sure came up with a good idea for me. It was meant to be this dress. :)
ReplyDeleteI can commiserate on stashing many more patterns than you have time to sew. The Hollyburn skirts would be a great place to start. It seems like something that would be easy to wear what ever the weather.
ReplyDeleteI'd recommend doing a bodice/skirt combo like this to start out. You only have to worry about the one seam matching and maybe some darts. You know in all that sewing time you have. ;)
ReplyDeleteThank you Sarah. OMG, how did hem flounces escape my notice until recently? They really are fun.
ReplyDeleteThanks Lisa. It's so great when fabric tells you what it wants to be and it just works.
ReplyDeleteYour Frock is fabulous. I would love to see it IRL to get the lining effect, I think it would look very cool.
ReplyDeleteI'm in the process of sorting my pattern stash into proper storage boxes so have looked at EVERY ONE of my 270+ patterns (I stopped counting then) and I want to make so many! I haven't bought a pattern for about a decade (and should never need to buy a pattern again) as whenever I see something new I know that I already have something I can either use straight up or Frankenpattern. Sadly there is nothing really new in fashion..........
Love this! If mental sewing produced actual sewing, I'd have more quilts than one person has use for and a closet overflowing with gorgeous dresses, blouses, and skirts.
ReplyDeleteWhy, you sassy sonuvagun! What a great dress!!!!!
ReplyDeleteSounds like you have an enviable pattern collection. It's great that sorting through them sparked the desire to sew many. Can't wait to see what you sew up.
ReplyDeleteWe need mental sewing to be a reality and then we'll need tardis closets to store everything. :)
ReplyDeleteAwww thanks. Just need some ladies to drive up and give me a sound track. LOL!
ReplyDeleteHoly gorgeousness! I followed this beauty's making on IG and finally made it here to see. ( husband really needs to get better at sharing the laptop) I love this mash up Heather! No one would ever notice any flaws.
ReplyDeleteHaa haa!. You need to strong arm that computer away from Hubs more often. "I got dresses to look at!" A big Thank You too. :)
ReplyDelete