Showing posts with label Pattern-testing. Show all posts

Voom, Voom, Violet

11.20.2014

Hey folks, I'm standing out on this patio in my sheath dress wondering when the cocktails will arrive. What? This is a state park and open bottles are frowned upon.  Well I never! I'll have you know that Smoky the Bear invited me personally and he mixes a mean chocolate martini. Only you can prevent forest fires and sobriety.
While I'm waiting for Smoky to bail me out of the drunk tank, let's talk about the dress. I'm wearing the newest pattern from Bluegingerdoll, the Violet dress.  This was actually the first ponte dress that was sewn during the Fall. The one that got me thinking about adding a few ponte pieces to my cold weather wardrobe.

Like the Bonnie pattern, you get a few mix and match elements with Violet. Choice of short straight skirt, long straight skirt, or flared circle skirt and 3 sleeve lengths.  You can see them all over on the Bluegingerdoll blog if you've got the itch. I've sewn a straight View A, long straight skirt with 3/4 length sleeves out of some rayon ponte. Queue the technical sketch!
Boom! You know I have a torrid love affair with technical sketches. That way you can see the yoke detail without squinting.  The separate yoke gives you a color blocking option or added visual interest in a solid colored fabric.  A little extra pizazz if you will.
Fitting changes I made to the pattern were...
- Standard Forward shoulder adjustment of 1/2".
- Sway back adjustment of about a 1/2". I could go back and take a bit more out there.
On a second version I'd probably narrow the back waist a bit or put some darts in since some fabric is pooling over my sway back.
Quick side bar discussion about ponte - After making a few things out of ponte fabrics of various fiber contents, I'm going to stick to rayon based ponte.  For one they feel really nice next to the skin. I can't say that about the polyester ponte used in the Nettie hack here.  Rayon ponte also is more forgiving on the lower half of my body.  The skirt widths are exactly the same size between Violet and the Nettie hacks, but I consider the Nettie to be too tight.  I'm happy with the fit on the Violet skirt in a rayon ponte. It shows some curves, but not more than I'm comfortable with. Side bar discussion closed. 

Getting back to the pattern, I would recommend ponte or another stable knit for the straight skirt versions.  For the flared skirt version, there's no reason you can't pull out some regular jersey and make yourself a swishy skirt. The only other notion you need for this is some clear elastic to sew over the bust gather. All in all it's a 2 hour sewing project once the fitting is worked out.

Violet is now available over in the shop as a PDF, with the paper version to arrive soon. If you're interested the code "Violet" will give you 10% off until 11/26. Until then I'll be staring at the horizon for Smoky the Bear.

P.S. Somehow Abby and I shared a hive mind and made this view in almost the exactly same color blue. Quite a feat considering this ponte has been in my stash 2+ years.

A Pair of Bonnies

10.07.2014

If you've been sewing long enough I'm sure you've had the experience of thinking, "I'd really like a pattern for x garment" and then magically someone releases that very thing.  It's an Indiana Jones moment where it feels like a shaft of light might has fallen upon the pattern while heavenly voices sing. The holy grail!  Anyway I had one of those moments when Abby sent me the Bonnie pattern to test. Cropped sweater YEEEESSS!
Wait did you say sweater Heather?  Yes you heard right, Bonnie is the first knit pattern from Bluegingerdoll. I had no idea what Abby had up her "puffed" sleeves when she told me that the next pattern was going to be for knits. When the technical sketches arrived and I saw it was a mix and match sweater pattern, my little heart sang with joy.  Nothing like a quick knit project to make one feel productive. Because of that I might have whipped up more than one.

*Both of my Bonnies are the cropped length body, crew neckline and the full length sleeves.  I used a size 10/12 combo with a 1/2" forward shoulder adjustment. The crew neckline was lowered an 1" in the front, because anything higher makes feel feel a bit choked. Due to the neckline adjustment I added 1/2" more length to each end of the neckband for a total of 1"
.
Version 1 - Sewn in rayon ponte with stashed medium weight rayon ribbing. 
After doing my test muslin in T-shirt weight fabric, I wanted to try a more "sweatery" fabric.  Trying the pattern out in ponte seemed fun, especially after finding this wild rose pattern on Etsy.  Bonus - if using a contrast fabric/ribbing for the bands, then you can get a 10/12 combo out of one 60" wide yard. I'm happy with the ponte version other than a touch more fabric could be taken out of the back. 

Bonnie is paired with some Colette Clovers here. They aren't the best choice for the cropped length since the waistline on the pants is too low when actually moving around.  Some "at waist" cigarette pants would work, such as the Butterick 5895.  I also think the cropped length top would look sharp with some forties area full leg pants, such as Decades of Style Empire Waist Trousers.

Version 2 - Sewn in T-shirt weight organic cotton/spandex jersey with self bands.
Here the pattern is sewn in a plain jersey which let's you see the puffed sleeve detail.  I've used the self fabric for the bands on this version. Bonnie comes with different band lengths for ribbing and self fabrics so that you get a good fit with either. Nice not having to do that ribbing calculation in my head.

I've paired Bonnie with my latest version of the Betsy pencil skirt. (The yellow/white polka dot fabric is still available at Gorgeous Fabrics if you're interested) My growing collection of pencil skirts is one of the reasons I've had cropped sweaters on the brain. The length is perfect to show off a brightly patterned skirt.
Right now Bonnie is only available as a PDF, but a print version will be arriving later in the month and can be pre-ordered now. You can pick up the pattern at 10% off the pattern with the code BONNIE through 10-13-2014. Meanwhile I'll be whipping up a bunch of these since it's finally cold in Pa. Hot pink is up next!


New Bluegingerdoll Pattern - The Odette Dress

9.12.2014

Oh my it's been a busy week around these parts, everything happened at once! Sorry about clogging your blog readers, but I have one more thing to share with you. Something I've been sitting on for awhile and has been staring at me from the corner of the sewing room. That's right secret sewing!  Abby, of Bluegingerdoll, is always hard at work making new patterns and I had a good time with this last one. So without further ado let me show you the Odette dress.
The Odette dress comes with a contrast bodice inset feature, waistband and 6 panel gored skirt.  The contrast panel is "buttoned in" right along the neckline split. This gives you the option of making several insets with different buttons to change up the look. (Confession - I made up more than one because I couldn't decide if yellow or black buttons looked better.)
This pattern also has several sleeve options, sleeveless, cap sleeve, and 3/4" with cuff.  I've close the cap sleeve on my version. Like all Bluegingerdoll patterns the bodice is fully lined for a clean finish on the inside.
For this sample I pulled out some stash cotton originally purchased from Emmaonesock.com. It's from Ascher Studio, a favorite fabric designer of mine, but is a little heavier weight then the other Ascher cottons in the stash.  I figured that the Odette pattern would work well with this fabric. The thicker weight would help make the cut out neckline stand up crispy and also look good in the gored skirt.  My fabric pairing instincts proved to be right and I'm really happy with the fabric/pattern pairing here.  Though I will confess that I could have done some work figuring out pattern placement.  The majority of the yellow flowers ended up on the back of the dress. Oops.
I really love the skirt on this dress. Gored skirts are such a nice way to get fullness at the hem while keeping the waist area nice and trim. Oh and I almost forgot to mention that it has inseam pockets. What's in your pockets, precious?  Why the other inset I forgot to take pictures of..... Blogger Fail.

Finally a quick list of my fitting details since they come in handy every now and again.
- I went one size up from the recommended size because I like more ease.
- I did all my standard fitting alterations to the bodice. Dropping side seam dart and waist dart point 1 ", forward shoulder adjustment 1/2", Upper back widened 1/2" and back waist dart intake increased. In this case the intake was increased to a total of 2.5".
- After all my standard adjustment the bodice was still a little roomy in the waist band area. I nipped out about 1/2" at each side seam for a total of 1" removed.  Adjusted the top of the skirt to match and then everything fit nicely.
To celebrate your purchase of Odette will be 10% until 9/14/2014 when using the code Odette2014 at the checkout. So head over to the Bluegingerdoll store if you're in the mood from some pattern therapy.  I love the smell of new patterns in the morning.

Introducing Spearmint

12.13.2013

Remember back in October when I was doing a bunch of secret sewing?  Well my dears, I got my golden ticket to get on the pattern testing circuit and was knocking out this coat.  (I pattern tested this before the Brasilia dress so it's technically my first project, just not the one I blogged about first.) But enough about that, let's talk about new patterns...PATTERNS!

If you looking for a dramatic coat then look no further than Lolita Pattern's new Spearmint. With form fitting princess line seams and a large flouncy collar it's sure get noticed.

And if that's not enough you can make it fire engine red......and wear other red things with it. Let's just say I spiced up some neighbor's daily dog walk.
Did I mention the giant in seam pockets to keep your hands warm? I know you guys are in the pro pocket camp and this coat delivers.
Here's the back view. The coat has armhole princess line seams that whittle in at your waist and then flare out for a pretty full skirt.
Close up on the collar. It would be a crime not to show you one.

Pattern
Spearmint from Lolita patterns.  Amity is pre-saling the pattern at a 15% discount until Monday so if you love the pattern then you might want to jump on it right away.

Sizing Tip - Spearmint was drafted to be more of a fair weather topper. If you want to make it as a woolen winter coat, then go up a size from the suggested one.  If your size straddles the regular and plus size blocks,  like mine, then you might want get the plus sized block.
Format Suggestion - You have the option of buying Spearmint as hard paper copy or as a digital file. If you purchase the digital format I highly recommend using the copy shop file to print this coat.  You know that I LOVE putting together PDF files, but after hour one of gluing the tiled version I was no longer having fun.  It took me 2 toddler free hours to put the tiled version together and my back did not thank me.

Fabrics used
Felted wool blend boucle knit from Marcy Tilton.  She seems to have sold out of this lovely red color but still has gray and black in stock.  However I feel like this fabric was not the best choice for this pattern and will elaborate more on that the confessions section.

Rayon lining white with black polka dots is from Gorgeous fabrics and still is in stock.

Since my fabric was quite thick I did not put horsehair canvas in the collar. Instead I used pro weft fusible interfacing from Fashion Sewing Supply.

Pattern changes/alterations
Normal pattern adjustments
1. Forward shoulder adjustment on both the shoulder seam and the sleeve cap of 1/2". How to do that on a two piece sleeve here.
2. Wide upper back adjustment of 3/4" with shoulder seam dart added.
3. Sway back adjustment of 1".  This seemed to hike the hem up in the back so I added an extra 1" of length to the hem at center back and blended it out to the side seam.
4. Moved the bust apex of the princess line seam down 1 1/2". Alas god did not give me perky knockers.
5. Dropped the armholes 1/2".
6. Took in the upper back princess line seam about 3/4", blending that alteration out before reaching the armhole where I do need extra width.

Other Alterations.
1. I very aggressively FBA'ed the side front piece by 1 1/2". In retrospect I was a bit vein to think I'd fit into the size 14, no matter what the back of the envelope might indicate. This was my first time sewing a Lolita pattern so I had the whole "How does this block match my body" question.  But Colette patterns should have taught me never to use a size 14.  Like it or not I'm a size 16. However using a size 16 would mean I had to put together another PDF pattern, so I just made the size 14 work.

2. I raised the bottom of the neckline 1/2" for personal preferences, blending it out before getting to the shoulder seam. To make the collar match I took off 1/2 at the CB seam. This will keep the notches from matching, but I had no problem inserting the collar without them.

3. I raised the button hole placement 1/2" because of my neckline change. I also moved the button hole over from the edge about 3/8" because it seemed a little close to the SA with all the bound buttonhole bulk.  The finalized pattern also made this change, so no need to worry.

Confessions/Advice
Confessions
Now let's talk about the pros and cons of my fabric choice. I was very intrigued by the thought of a winter coat weight knit when I saw this fabric on the Marcy Tilton website. The fabric was described as being stable but with great drape. It also came in the perfect red color for me and I could not resist.

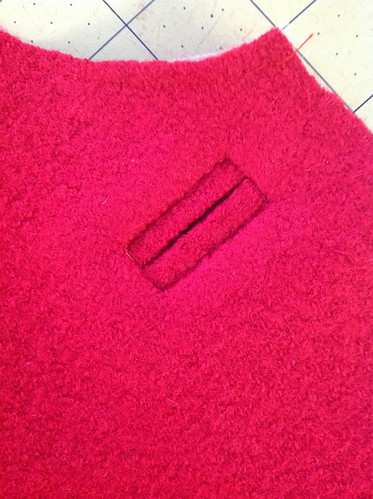
The fabric it's self is very thick with about 10-15% stretch in the cross grain and no raveling when you cut it.   On the pro side - the princess line seams sewed up beautifully, easing the sleeves was a snap and I got a perfect looking bound buttonhole on the first try.
image
On the con side - The knit construction created some problems that a woven wouldn't. The weight of the skirt pulls the back princess line seams out making the coat look less fitted than it is. I got drag lines from the pockets because the knit collapsing in on it's self.  Also the fabric thickness worked against me on the ruffled collar, making it want to stand upright rather than drape in nice folds. Some aggressive pressing helped but I'm not 100% happy with how it folds.
One last thing that should have been obvious to me but I overlooked at the time. Sewing a non stretch lining to a knit, even one that hardly stretches, is going to be a PITA.  Silly Heather should have brought a stretch woven lining. But hey, it looks great.

Advice 
1. I put twill tape in the shoulder seams since a lot of weight hangs from those seams.  I also put stay tape along the body neckline edge before sewing on the collar.

2. The pattern does not call for shoulder pads but I put some in because that's the look I prefer.  I used 1/2" pads and did not have to adjust the shoulder seams in anyway.

Husband Comment
"Hey you're red and white like a Canadian flag and the collar is ripply like a flag in the wind. That's nice. And you can pop the collar, cool."

My Final Thoughts
Despite my problems with the fabric not working with the pattern as much as I'd like, this counts as a successful garment. I especially like pulling the collar up like this and doing my best Cruella  De Vil impression.  "Bring me those puppies! For some reason I want a dog hair coat. Don't question my ethics or my inability to hire competent henchmen."
If you feel like giving yourself a little Christmas present then check out the holiday pattern bundle Lolita patterns has put together. You can get Sugar Plum, Gunmetal, and Spearmint for over 15% off the purchase price.  Happy sewing in the new year indeed!

The Brasilia Dress Part 3 - The Finished Dress

11.16.2013

It's the moment you've all been waiting for, the unveiling of my finished Brasilia dress! After the picture parade I'll go into some sewing tips for the inset and how I chose to finish the neckline and armholes.  Now with out any further ado, drum roll please, The Brasilia Dress!

Front view complete with disinterested model face
Brasilia Dress Front View
Back View, hey that did need a sway back adjustment. Don't fight it future Heather.
Brasilia Dress Back View
One full view pic that I squeezed out in the corner of my dining room. It was 45 degrees outside, not exactly sleeveless sheath weather. The red pumps don't care what temperature it is, they're always ready to play.
Brasilia Dress Full view
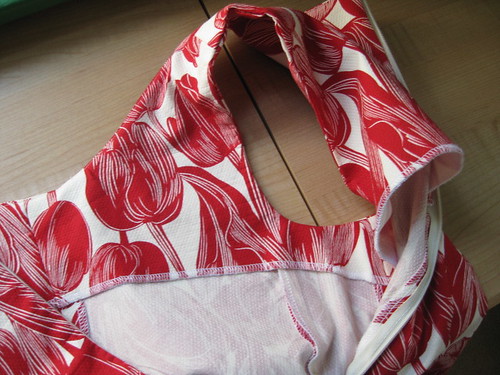
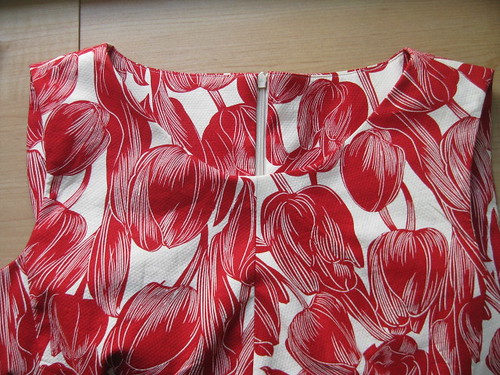
It was up to the individual sewcialist to decide how to finish the neck and arm edges.  I decided to draft an all in one facing by tracing the front and back pieces. Never mind the seam at the CF, that's due to a last minute alteration on the neckline.
Brasilia Dress all in one facing
All in one facings are a bit of a pain to sew, but having one piece keeps the armhole facings flipping out. I also like how it gives a nice look to the back of the dress when it's on a hanger.
Brasilia Dress Front Detail
You could also use a bias binding or contrast binding for the neckline/armhole finish.  It's all up to you!

The majority of the Brasilia dress is very easy sewing, darts and straight seams. Inserting the side inset is the one area that is a bit tricky, so here are my tips for getting a nice sharp point.
Brasilia Dress inset
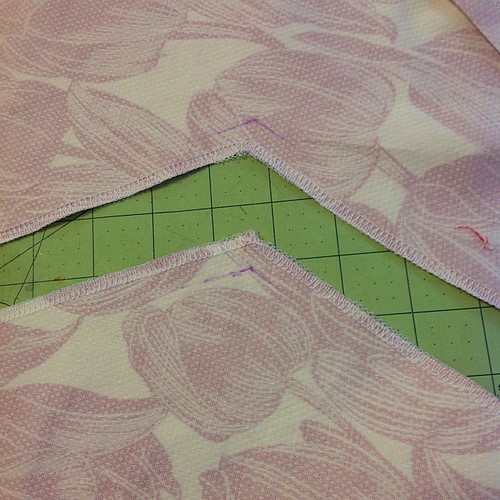
1. If you're fabric is delicate or prone to raveling then first reinforce the point area with a small square of interfacing on both pieces.  My cotton pique was pretty sturdy so I've this skipped this step in my photos.

2. Use a disappearing marker or chalk to pencil in the seam allowance at the point area.
Marking my points. #brasiliadress
3. Clip the fabric on both pieces a within an 1/8" of the seam line you just drew in.

4. Pin both pieces together right on the marked in point. Just pierce it with a pin.

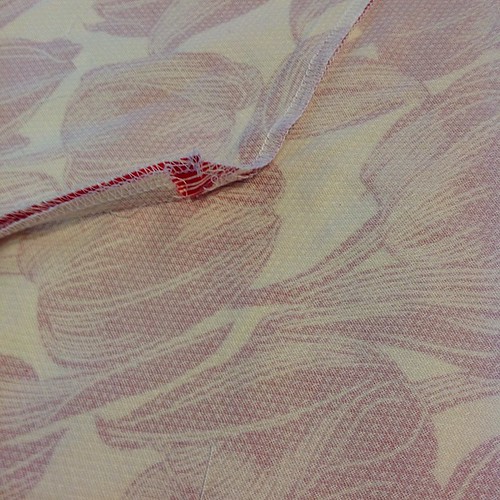
5. When you sew the pieces together pivot right on the marked in point. The clips you put in the seam allowance will allow you to turn the point without a big pucker. Here's a view of the back of the seam after sewing.  The clip the fabric also helps the SA to lay nice and flat after a pressing.
@charityshopchic I pulled up the edge to show my clip on the point back. #brasiliadress
6. Give it a good press and you should have a nice sharp point.

That my friends is my Brasilia dress.  I had a great time sewing this pattern and I know you will too come December.  Now back to the Christmas sewing Heather, chop chop!
Brasilia Dress Alt Front 2

The Brasilia Dress Part 2 - The Muslin

11.14.2013

Hello again my dears, it's time for part two of my Brasilia dress experience....almost sounds like a new age band. Cue the theremin.

After grading up the waist and the hips of the pattern I went ahead and put in some of my normal fitting alterations.
1. Forward shoulder adjustment of 1/2"
2. Wide upper back adjustment of 1/2" with dart to back shoulder added so that the seams match.
3. Changed the angle of the bust dart because my bust apex is much lower.
That seemed like enough fitting changes to start with, especially since I wasn't sure if my grading was a success yet.  Whipped up a quick muslin and had froggie pin me into it. Then we took a few pics to give you an idea of what it looked like.

Front view

Side view

Back view
First off my grading was a complete success!  Woooo Hoooo, I can follow directions if needed.  Secondly the fit is pretty darn good for a first muslin. That always makes me happy. However there were a few more things that needed to be tweaked.
1. There was some gaping at the front armhole so I pinched out 1/4" at the inset seam.
2. I'd skipped a sway back adjustment because I'm in denial about having to do one. I did need one, duh, but much smaller than usual, around 1/2".
3. The shoulder seam was at an odd angle so I redrew it forward to match the outside edge of my forward shoulder adjustment.
4. Decided that I didn't like the change I'd made to the bust dart. Instead of changing the angle to lower the apex, I would cut the dart out and drop it down to my apex.
5. Crew necklines are not that flattering on me so I drew in a more scooped neckline.
6. I liked that length of the dress unhemmed so decided to add 1 1/4 to the hemline.

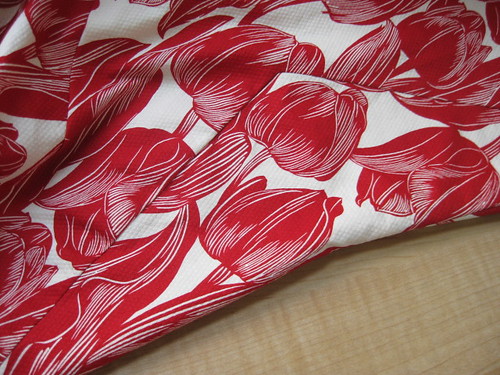
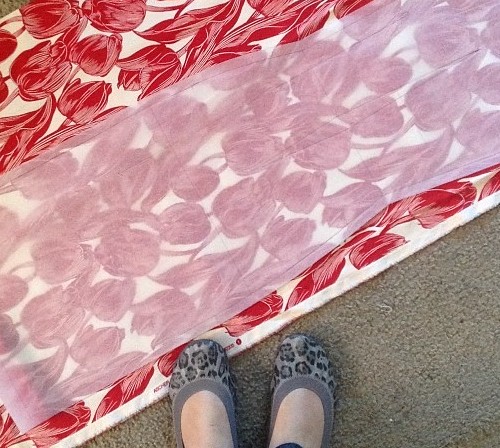
I figured that all these changes were minor enough that the next step could be sewing up the real fabric. Woot, time for a stash dive!  The stash come through as it usually does and yielded this lovely remnant left over from a Colette Macaroon. It's a stretch cotton pique with large scale tulips printed on top. Mmm yum.
Tulip fabric
In the next post I'll show you my finished Brasilia dress in all it's glory. Won't that be fun!

The Brasilia Dress Part 1 - Grading

11.12.2013

Hello All! Do you know about the Brasilia Dress over on the House of Pinheiro blog?  If you don't about it then here are the deets.  Rachel drafted herself a lovely sheath dress for "Fall for Cotton" sewing challenge and we were all impressed.  

Because she is a generous sewing blogger she decided to make it a free download to be released later this year. But first she needed to ask for a few volunteers to test that baby and put out the call on her blog.  I was like that annoying kid in class waving my hand and going Oooooo, Ooooo, Ooooooo Pick MEEE!!!  Well I did get on the "elite" pattern testing squad that gets first crack at it and I squeed with joy. Here's the technical drawing, which we all know I love so much.

Now since this gonna be a free download you have to do your own pattern grading if you are not a amazonian hour glass like Rachel. Yes I'm a wee bit jealous. ;)
Rachel's measurements are:
Bust - 37"
Waist - 29 7/8"
Hip - 40 1/8"

Pre baby Heather would have been near that size (not has busty) but post baby Heather is much more of a pear.

My measurements are:
Bust - 37"
Waist - 34"
Hip - 43 1/2"

I must admit that having to grade the pattern myself made me a bit nervous.  Back at Fashion Design school they taught us a lot of great stuff, but grading wasn't one of them.  Well that's a bit of a lie, they taught us how to digitize patterns and then click a button in some software that magically graded them. Wooo Hooo the power of software! So while I could still digitize a pattern in my sleep,  the principles of grading never made it into my gray matter.

Since Rachel is a professional she provided us with several web resources to learn about grading, she is so clever.  I took a look at all of them and the one that worked best for me was Casey at Elegant Musings blog series. After reading Casey's posts I realized that I was a nice even 4" grade in the waist and hip area and this was gonna be easy peasy.

I'm going to break down my personal grading steps in case other people find it helpful in the future.
1. Since Rachel and I are the same bust size the top half of the pattern need to be removed. I decided to cut the pattern in half along the length/shorten line that is below the dart.
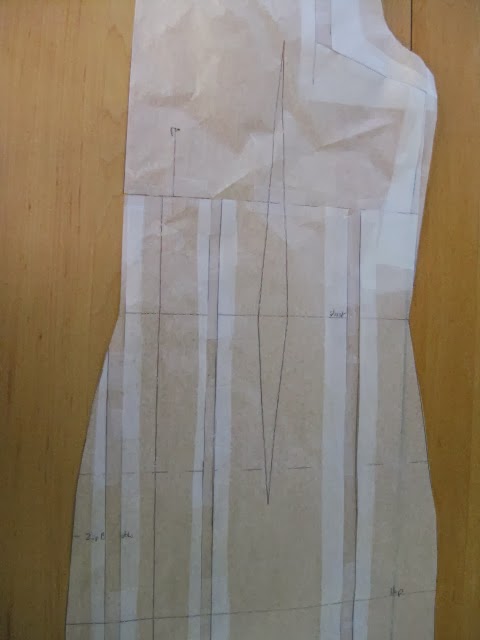
2. Next I marked the 3 vertical lines through the bottom half of the pattern that will be slashed and spread.  None of the information I read said these lines needed to be drawn in at an exact measurement.  You just want to spread them as evenly as you can without bisecting any darts. Again see Casey's post if this doesn't make a lick of sense. Here's a look at the bottom half of the front.
3. I put one grading line through the waist inset piece since there were already two lines through the waist on the main front piece. (Which you can see above.)
4. I slashed and spread my grading lines the same way Casey suggested, 3/8" on the two outside lines and 1/4" on the inside line. I did this to both the front and the back piece. Here's a look at the back.
 5. I reattached the top half of the front by lining up the CF's. Then added some paper to the inset seam side and drew a new line that blended into the underarm area.
6. Next I reattached the top half of the back by lining up the fish eye dart. On the armhole side I added some more paper and again drew a new line to the armhole.  On the center back side I drew a curve over the tush area and cut the extra paper off.  That did remove some of the grading from the center back waist, but since removing ease from that area is a common alteration for me I figured it would be fine.
7. On the side seam inset I just added paper in the gaps the grading created and trued the seam line. Then walked the seam line to make sure they still matched.  They didn't so I cut down the inset a tad at the underarm area and at the hip.
And that was all I had to do to grade the Brasilia dress to my size.  In my next post I'm gonna talk about what fitting alterations I needed to do and flash a few muslin pics.  So exciting?  Maybe I should have frog do some photo bombing.
Proudly designed by Mlekoshi pixel perfect web designs