It's the moment you've all been waiting for, the unveiling of my finished Brasilia dress! After the picture parade I'll go into some sewing tips for the inset and how I chose to finish the neckline and armholes. Now with out any further ado, drum roll please, The Brasilia Dress!
Front view complete with disinterested model face
Back View, hey that did need a sway back adjustment. Don't fight it future Heather.
One full view pic that I squeezed out in the corner of my dining room. It was 45 degrees outside, not exactly sleeveless sheath weather. The red pumps don't care what temperature it is, they're always ready to play.
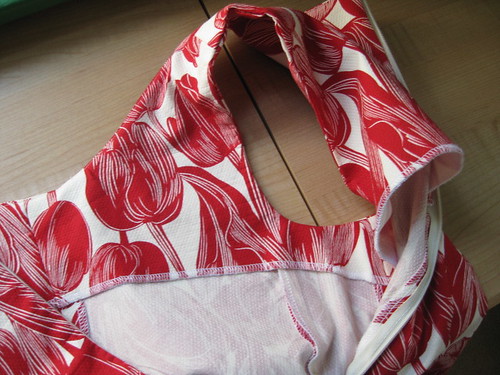
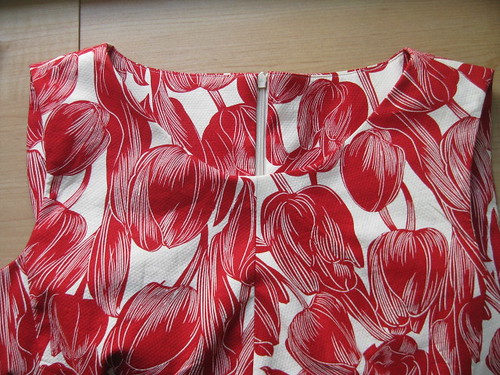
It was up to the individual sewcialist to decide how to finish the neck and arm edges. I decided to draft an all in one facing by tracing the front and back pieces. Never mind the seam at the CF, that's due to a last minute alteration on the neckline.
All in one facings are a bit of a pain to sew, but having one piece keeps the armhole facings flipping out. I also like how it gives a nice look to the back of the dress when it's on a hanger.
You could also use a bias binding or contrast binding for the neckline/armhole finish. It's all up to you!
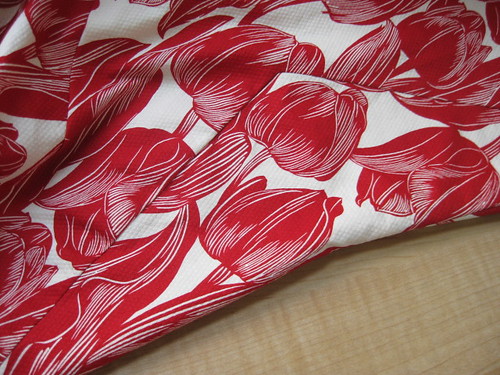
The majority of the Brasilia dress is very easy sewing, darts and straight seams. Inserting the side inset is the one area that is a bit tricky, so here are my tips for getting a nice sharp point.
1. If you're fabric is delicate or prone to raveling then first reinforce the point area with a small square of interfacing on both pieces. My cotton pique was pretty sturdy so I've this skipped this step in my photos.
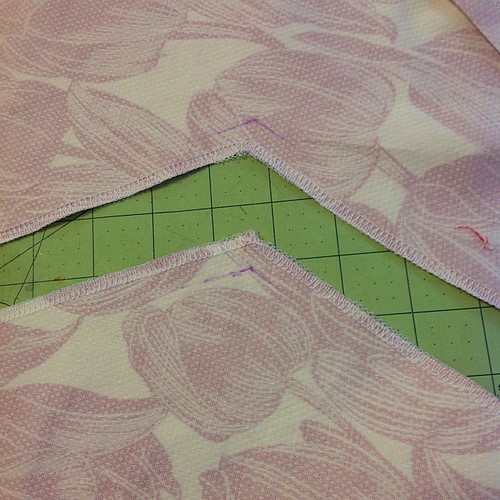
2. Use a disappearing marker or chalk to pencil in the seam allowance at the point area.
3. Clip the fabric on both pieces a within an 1/8" of the seam line you just drew in.
4. Pin both pieces together right on the marked in point. Just pierce it with a pin.
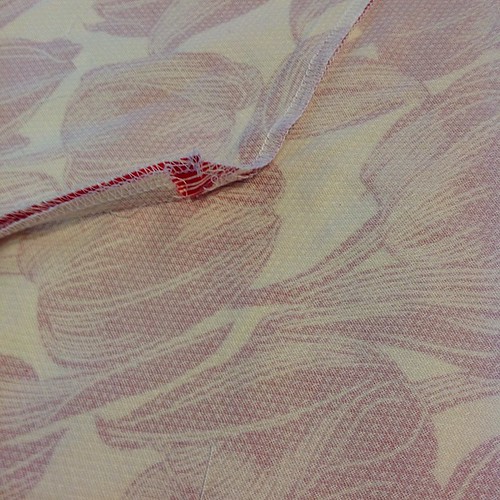
5. When you sew the pieces together pivot right on the marked in point. The clips you put in the seam allowance will allow you to turn the point without a big pucker. Here's a view of the back of the seam after sewing. The clip the fabric also helps the SA to lay nice and flat after a pressing.
6. Give it a good press and you should have a nice sharp point.
That my friends is my Brasilia dress. I had a great time sewing this pattern and I know you will too come December. Now back to the Christmas sewing Heather, chop chop!



Me and Chris De Burgh want to call you up and sing the lady in red to you all night. You're a vision Mrs Bee! Xx
ReplyDeleteYou are rockin' that red dress!! Great job!
ReplyDeleteLooking fine! You and the dress! ~Laurie
ReplyDeletePerfect dress for you! It fits very well and is SO flattering. More. You NEED to make more. Now. :-)
ReplyDeleteStunning! Great matching of fabric to this brilliant dress pattern ~ easily I can see you making more of these ... J
ReplyDeleteYou rock it. I love this on you and the fabric... Ohhh perfection
ReplyDeleteVery nice Heather!! I really need to get back to muslining. You always make it look so easy. :)
ReplyDeleteUtterly gorgeous! And thanks for the tip on sewing that side insert. I struggled with a similar inset on a different pattern recently before giving up and making it into a skirt instead - if only I'd waited a couple of weeks!
ReplyDeleteGorgeous!! Love how this turned out, and whooo for red pumps! All in one facings are my fav, too :)
ReplyDeleteGorgeous dress on a gorgeous model! Your hair look really good all straight like that.
ReplyDeleteI'm loving this dress on you, looks terrific! Excited for when Rachel releases the pattern.
ReplyDeleteYou look amazing in this dress! Please tell me your husband said he has to take you out somewhere fantastic when he saw you in this. Thanks for all the posts on this (I'm always bookmarking your notes). Love the hair too (and the shoes of course)!
ReplyDeleteVery nice. Beautiful job on the fit.
ReplyDeleteYour Brasilia looks fantastic.
ReplyDeleteThe dress is beautiful! Your hair really does look fabulous- I can see why it was time to take all the pictures.
ReplyDeleteLove it!
ReplyDeleteYup....you killed it again. Knew you would :)
ReplyDeleteYou are going to sing to me?! I'm waiting breathlessly for your call! Thax my dear.
ReplyDeleteThank you :) It's still Red October, right?
ReplyDeleteThanks Laurie, a sheath dress is always my best friend.
ReplyDeleteThank you Debbie. I am thinking about winterizing it with a sleeve. :)
ReplyDeleteThanks Judith, I was so happy there was enough fabric left to make this dress.
ReplyDeleteThanks Rachel! I'm happy to have been a part of the testing squad.
ReplyDeleteYou'll be able to crank this out in no time Leila. I know you. :)
ReplyDeleteThanks Rach. Bad prior pattern inset. You need to behave nice next time.
ReplyDeleteThank you poppykettle. All in one facings are the bomb!
ReplyDeleteThanks Sabine.Only the hairdresser can get my hair that straight. It just laughs at me when I try to flat iron it.
ReplyDeleteThank You Catja. You'll rock this dress, I can feel it.
ReplyDeleteThank you Shar. I will tell him that the dress deserves a fancy outing. If it doesn't get that outing it might do evil things to his shirts. :)
ReplyDeleteThank you Jean, I was lucky and this pattern did not take very much fitting.
ReplyDeleteThanks Sandra. I think I like your version better than mine. :)
ReplyDeleteThanks Laura, yes take all the pictures!!!! You'll get to see more soon.
ReplyDeleteThank you Jennifer. The fabric is doing all the work. :)
ReplyDeleteHaa haa Thanks Margo. I couldn't go wrong with more red prints.
ReplyDeleteWoohoo!!
ReplyDeletewooo! this turned out amazing! great fit, and that fabric... oh i love. i'm all about the facings; way less fiddly than bias facings, i don't care what other people say!
ReplyDeleteI love this-- it's seriously fantastic! You look super hot and this really suits you! Love the bright red lips, too!
ReplyDeleteOoh, gorgeous Brasilia - and the colour is soooo good on you!
ReplyDelete