Pattern
The Shirtwaist Dress from Gertie's New Book For Better Sewing. According to the Gertie size chart I an 8 on top and a 10 on the bottom. On my first muslin these two sizes were blended together, but the skirt was much bigger than I needed it to be. I ended up using the size 8 for the complete dress.
Fabrics used
Quilting cotton with LOBSTERS on it. I might have come up with the lobster shirtwaist idea during a pants fitting cycle of hate. "What's the craziest thing I can think of sewing right now? Lobster shirtwaist. UH HAA HAAA HAAA HAAA Ahhhhh."

After altering this pattern I'm pretty sure that Gertie and I have completely different upper bodies. The most contentious fitting problem was the armhole/sleeve area. I was getting horizontal drag lines from shoulder edge to bust and also felt like my range of movement was restricted when moving my arms. So buckle up cause I slashed the hell out of this pattern.
1. Did an 1 1/4" FBA but removed the added length that the FBA adds to the bodice. I'm short waisted so usually the extra length is not needed.
2. The FBA made the side seam bust dart rather large. Decided to rotate this extra dart intake into the waist bust dart instead. This is more of a personal preference change, I just don't like big darts under my arms.
3. Gertie's armholes are very shallow and I seem to need a Big 4 style scooped armhole. Took McCall's 4767 and drew those armholes onto Gertie's pattern. Tried to use the neckline to determine the position for tracing which seemed to work out OK. This also resulted in more paper being added to the side seam just at the top which was graded out to nothing at the waist. This change was made to both the front and the back armhole.
4. Made my standard 1/2 forward shoulder adjustment.
5. Took in the shoulders 1/2".
6. Despite the changes I'd made adding an FBA and scooping out the armholes I was still getting pulling above the bust and my neckline was tight. Decided to make shit up and added 1/2" down the entire center front. (I've never seen this recommended in any books but it seemed quasi-logical and actually worked for me.) The under bust dart then needed to be moved 1/2" toward the new CF so that it would fall in the correct location.

8. Because of the additional 1/2" on the CF and the fact that I was going to drop the first button placement the front facings had 1/2" added to their CF.
9. For a little more arm movement I added 1/4" to the sleeve side seams and the sleeve hem band side seams.
10. Because of the FBA adjustment the front skirt needed 3/4" added to the side seam which was graded out to nothing further down on the side seam.
11. I must have made some sort of tracing error but the front skirt also needed 1 1/8" of extra length added to the waist seam to get the side seams to match up.
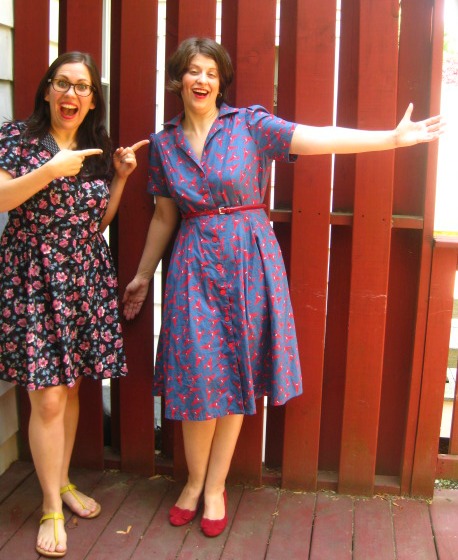
12. Made a 1 1/2" sway back adjustment on the back skirt. There was a lot of ease built into the back yoke seam line so instead of adding to the pattern to make the CB straight again, I just cut off a wedge of the upper back pattern. It was probably a 1" of ease taken out. I think you can see the difference between Leila's back ease and mine. (P.S. I was whispering to her big butt, flat butt while the camera took this picture.)

14. After getting the dress put together it seemed like the elastic ruching was a little too high. I took out the top 2 lines of elastic and sewed in two more below the existing lines.
Confessions/Advice
1. Despite all my alterations I still have the nagging feeling that the fit is a tad off in the bodice. I don't exactly know what is wrong though and my final dress does fit much better than all of my muslins.
2. I skipped most of the hand stitching by using good old contrast top-stitching. My hem is also machine stitched cause I'm a lazy, lazy sewcialist.

4. I may be completely addicted to elastic ruching now. Ruche all the things!

6. If you decide to make a lobster dress then you'd better go whole hog and get achor buttons.

Husband Comment
"Lobsters? Well if you ever go back to Maine you'll blend right in."
My Final Thoughts
I do feel a bit "costumey" in this dress because of my crazy lobster print obsession. Not sure this is going to be "hitting the grocery store" outfit, but sewing would be boring if everything you made was 100% practical. The dress design is comfortable and in a light weight lawn it would be nice and cool for summer. While making up one of my muslins it struck me that this pattern would also make a really cute sleeveless top. I may pursue that angle later. Muhaaaaa haaaaaa! Lobsters, MAINE!


You're so good about doing all the alterations you need. I got lazy at the end. From the pics, I don't think you can tell it's lobsters on it. Just saying...you might have to go grocery shopping in it after all. :)
ReplyDeleteMaybe if I have a day where I really couldn't give a shit what people think I'll wear it to the grocery store. ;) There are times where I can't finish the alterations and just abandon the pattern...pants cough, cough, cough.
Deletelove it. that was a serious labouir of love with all the fitting you did!
ReplyDeleteI did say screw it towards the end and just started cutting out the lobster fabric. Think I just lucked out.
DeleteWow, you were patient to hang in there with all those alterations...why not venture to the grocery store in that cool dress?
ReplyDeleteThanks, maybe I should decide that I'm awesome and where the dress out.
DeleteWow - I would have no idea how to make any of those alterations! I love those lobsters and their bug-eyes (and the anchor buttons were totally required). I think this is a great dress and you should wear it anywhere you want!
ReplyDeleteI didn't know anything about fit alterations until 2 years ago when I decided to learn from books. It's a gradual process which never seems to be completely done. "Fit for real people" is a nice starting point if you're interested.
DeleteThe lobsters wink at you with their googly eyes. :)
I'll look that up - thanks for the tip (I need all the help I can get)! Lobsters, I'm winking right back at ya ;)
DeleteWhoa - you are one seriously smart chick to go through all of those alterations. I applaud you. By alteration #3 I'm usually over it and on to the next project. I'm so glad you stuck it out though because this dress is AWESOME! Everyone needs a lobster dress! Love it!
ReplyDeleteThank you, Lobster dresses for everyone! As far as alterations go sometimes to becomes a stubbornness issue where I think, "You Won't Get The Best Of Me Pattern!" But there are times where I just throw the pattern aside and move on too.
DeleteLove this print!! I have Gertie's book and really want to give the shirtwaist dress a go. I've heard that a few people have had to make quite drastic alterations to the pattern so I'm a bit dubious at what may be ahead of me with this pattern. But I'm so glad you listed all of your alterations as I also seem to always need to make my armholes bigger!
ReplyDeleteThanks Jen, I was blissfully unaware of other people's major alterations, guess I should have checked PR. :) But yes, bigger armholes always seem to be needed!
DeleteLove it!! It very much suits you - and what better excuse to buy skinny belts in every colour under the sun? :)
ReplyDeleteThanks! I'm glad you're backing my new skinny belt obsession.
DeleteOh man, I've been obsessed with this dress since I got the book for Christmas and have been dying to make it. Seeing all of your notes has me gunning to make it now. Squee! I love the lobsters--genius choice is you ask me!
ReplyDeleteThis dress totally inspires obsession! Best of luck with yours, I'd say the fitting challenges were worth it.
DeleteOh my lordy . . . I HAVE THAT book and here I am spazzing about how I am going to find a shirtwaist dress to fit my butt, duh. Yes, the shirtwaist will be my "Make A Garment A Month" choice for January, 2014.
ReplyDeleteThank you for reminding me of this pattern. Who knew the shirtwaist " fever is sweeping the nation"; guess that's how I got the bug 'cause it surely came from seemingly nowhere.
Cheers,
Lyric
http://www.sewandcro.com
Yes! You should my sewist sister.
ReplyDeleteLyric
Hey there Lyric, I'm happy to have jogged your memory about this pattern. It did take a lot of fitting work to get the upper body right on me. But the final dress is very comfortable and cute. I'd say it's worth putting on your list of things to sew for 2014.
ReplyDelete