Showing posts with label Contest. Show all posts

More Stash Busting Contest Makes

6.26.2015

I promised/threatened to do another post of all my PR contest makes, so let me show you what else the frog powered sweatshop cranked out.  We had to close the sweatshop up a little early thanks to a freak storm that blew out our power for a few days.  Now that power is back on, we find ourselves only interested in laying in front of the air conditioning and surfing the internet. Oh internet, never leave again.

We still cranked out a lot of clothing during the middle of the month, including another Advance 9441 that will get it's own post. Mainly because I took so many pictures and can't whittle them down to one. So you have that pic heavy post to look forward to.  For now feast your eyes on a plethora of tops and a few bottoms that are no longer stashed fabrics.

1. Comino Cap
Finally decided I was keeping this yard of mermaid jersey for me. Sorry/Not sorry kids in my life. No changes to this baby, just hot pink mermaid goodness.

2. Maison Fleur 1301 Top View 2
This was supposed to be another version of View one, but the cotton sateen seemed a bit too thick for shoulder ties.  No worries, it's easy to convert the top to view 2 mid project.  All you need to do is cut off the ties on the back an put some buttonholes in the front ties.  A few self covered buttons were added to the front for a decorative element.


3. Nettie with cap sleeves and gathers.
Somehow I didn't make a short sleeve black Nettie last year. What! Well that oversight must be fixed immediately.  To spice the pattern up I added a few minor tweaks. First the normal Nettie short sleeve was swapped out with a cap sleeve that I'd drafted way, way back for the Fauxneta.  Second I gathered up the CF with a 1/4" x 1.5" piece of black elastic.  Easy, Peasy.


4. Edith and Self Drafted circle skirt
Yep, I really like the Edith pattern and keep adding them to my closet. More prints! More Colors!  And what could be better for summer than a sea themed vintage cotton version? Nothing! After that was finished, I decided to sew another self drafted circle skirt for a snazzy new outfit.
 

5. Several pairs of Barrie Briefs.
At long last a use for those Lillestoff remnants that are too big to throw away! I've been sewing the mid rise version because I'm turning onto an old lady who likes her underwear bigger and bigger.  They have excellent "check coverage" for those of us with plenty of junk in the trunk. I'll be sewing up a least a week's worth and while chackling with delight.

The stash busting contest was a fun challenge and did make me sew up more yardage than I normally do.  Nothing like a good dose of competition to get one cranking out all those things on the sewing list.  Still I'm looking forward to July, using new fabrics and not feeling guilty about picking up my knitting.

Stashbusting Power Boost

6.14.2015

It's been a little quiet on the blog this month because I've been cranking the sweatshop into high gear. Frog and I have been pumping out garments for the PR Fabric Stash contest. Since this contest is won based on yardage sewn, it seemed like we might have a shot at one of those sweet Mood gift certificates.
Fabric Stash Contest 2015
Froggie and I played the Rocky 4 soundtrack over and over again, and got our "Eye of the Tiger" on. However real life conspired against us and cut our sewing time in half.  Then I decided to sew a dress that needed plaid matching and bound buttonholes.  Oh yes Heather, planning a giant time suck project is greaaat strategy for this contest......not.  Froggie also might have binged on birthday cake and not held up his end of the hemming bargain.  Long story short, Team knitnbee is way behind in the numbers and won't be taking any prizes home

On the good side, the contest has been a great motivator to use up some of that dreaded orange stash layer. All those rementants and tricky fabrics that have been lurking in my stash for years. When the shiny new fabric is off limits, amazingly I come up with pattern ideas for the old stuff.  Or at least recycle patterns that seem to fit with the yardage available.

Most of the garments team knitnbee has made are ones you've already seen on the blog.  Instead of doing my normal review format, I thought a quick overview would make more sense. The pictures aren't going to be quite as good either. It's basically just me lurking on the sidewalk in front of my house, trying not to squint into the camera. So let me show you what I've been up to.
 
Outfit #1 - Maria Denmark Day to Night Drape Top and Colette Mabel
A couple of one yard knit remnants have been the bane of my stash for some time.  Too much to throw away, not enough for most pattern ideas....unless it's these two patterns. Score! The Day to Night Drape Top is new to me, but I'd seen numerous versions on other sewing blogs.  Figured it wouldn't be too hard to fit and whipped out a size medium with no changes.  On the whole I'm pleased with it other than the armhole depth. It's a little too close to flashing my bra band for comfort. I'd raise the armholes about a half inch for any future versions.
One sewing note - Instead of using either of the suggested bindings, I went a different route. The neckline was bound with self fabric the same say you'd use fold over elastic.  The armholes were finished with self strips of fabric and then coverstitch in the manner shown here.  Both of these methods worked out to my liking and I'd use them again. The Day to Night Drape top is a great way to use up rayon jersey scraps and it also got the husband seal of approval.  Not sure why I waited so long to make one.

Some of you may remember that I was less than enthused with the ponte Mabel made last summer. Surprisingly I actually found myself wearing that skirt around the house on a regular basis.  It's great for "fat" days and crawling around on the floor cutting fabric. When the deep stash yielded a yard of black rayon ponte it seemed like a good idea to modify the pattern and give it another try.
The pattern was lengthened 5" to make it a length similar to my woven pencil skirts.  I also put 1 1/4" elastic into the waistband to get rid of the feeling that the skirt was going to fall off. Both of these changes did improve the pattern for me, but I'm still not 100% comfortable with knit pencil skirts.  Stretch wovens just give you more lumps and bumps coverage.

Outfit #2 - Kitschy Coo Comino Cap/Lady Skater mash-up
Past Heather might have gone on a mesh buying kick two years ago under the assumption she was going to sew a bunch of underwear.  Guess what she never did....yep, sew underwear.  That's OK because present Heather needed some contrast fabric to squeeze out a dress in this swanky black jersey.  The swanky black jersey fiber content has been pushed out of my brain, but I did remember two things.  The fiber blend had milk fibers in it and the price per yard was on the high side.  That's why I hoared this fabric for years instead of sewing it right up.
Pattern details - The two Kitschy Coo patterns are drafted from the same block so you can sub in the lady skater skirt with no changes.  I did add 3" of additional length since I'm an old lady that like her knees covered.  The Comino Cap bodice is sewn as instructed other than reversing the direction all the seam allowances were stitched down. It seems smarter not to have the SA's peeking through the see through mesh.  I LOVE this dress and am happy to have put the swanky black jersey and feather mesh to good use.

That's all the sewing accomplished and photographed for now. I'll be back later in the month with another quicky post of TNT's. :)

Calling all Mad Scientists

8.30.2014

Hello sewing friends, I thought some of you might like to know that there's a new PR contest starting next month and I'm the appointed Evil League of Evil PR contest manager.  The contest theme is.....wait for it.... Franken Patterns. Muhaaa haaa!  The contest runs from September 16 - October 15, but the discussion thread is open right now.

Since this is an official joint there are rules and prizes.  You can read the whole kit and caboodle on the thread, but here are the main points so you can get an idea of what the sewing gurus are looking for.

1. Participants must use TWO or MORE commercially drafted patterns.

2. No self-drafted pattern pieces may be incorporated; however, typical alterations for size / fit are allowed. The pattern pieces may be altered to allow the patterns to be merged together. (i.e. if using sleeves from one pattern into a blouse pattern, the sleeve and / or armscye pattern pieces may be altered to fit together properly.

3. Resulting garment must clearly reflect the use of each and every pattern utilized. The design of the finished garment must reflect elements of each pattern. (i.e. simply changing the collar or adding a patch pocket from one pattern to another pattern would not be considered a FrankenPattern.) 

4. Each entry must include explanation of which pattern pieces from each pattern was used. 

5. Actual pattern pieces must be used. (i.e. may NOT just use the concept from one of the patterns.)

6. Elements from each pattern have to be combined into one garment. (i.e. Cannot use a top from one pattern & pants from another pattern and call it an franken-outfit.)

7. Adult garments only; women's or men's designs are allowed. 

The prizes are yet to be determined, but should be revealed before the actual contest gets underway.  So brush off your "How to make a monster" book and get your evil henchmen to collect the appropriate parts. It's time to make the best damn franken pattern garment you have in you.  Then teach it to tap dance. "PUTTING ON THE RITZ!"

ModCloth Knock Off - Part 2

10.31.2013

*In the last episode of "Handmade by Heather B," Heather and her trusty sidekick Frogore were engaging in the dark side of pattern mashing, hoping to clone a Modcloth jacket.  Were they successful or did their creation run amok? Stay tuned to find out*

After my second muslin, I was feeling pretty confident that the shape was pretty close to the inspiration garment.  Let's just take a look at that again.
I decided to redraw the back peplum seam a third time and mock up the body of the jacket in fashion fabric.  That way the question of a one or two piece sleeve could be put off as long as possible. I was also hoping that given enough time Frogore might convert that sleeve for me. I should have known better, he only makes candy disappear.

In the end I did convert the sleeve to a two piece in a way that was truly heinous and will not be spoken of again. (No tutorials on that people. I don't want to teach you bad habits that shouldn't work.) The only other tweak made was to take in the front edge by 3/4", for a more pleasing look.

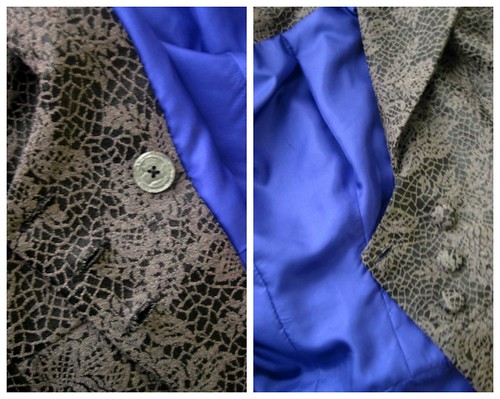
Since the search for jacket weight skull fabric came up dry, I did a bit of stash diving and decided on a lace print synthetic of some sort. At least that's what I think it is since it doesn't hold a crease that well. This mad scientist really should keep better notes on the stash since the "abby normal" brain can't remember jack.  But without further ado I give you.... My Creation! Frogore throw the switch! MUHAAAAHAAAHAA!

First up a front and back collage so you can do a little compare and contrast with the original garment.
Jacket collage
Close up on the buttons and collar.  I must be standing a bit funny because the collar doesn't look even on both sides.  I assure you that despite an "abby normal" brain I can balance a collar evenly.  Just take this fun sized candy bar and nod your head yes.
Jacket 4
Like the inspiration garment, the jacket is closed with self covered buttons.  On the other side is one silver button to keep the overlap from flopping around.
Details Collage
Trying to give you a decent photo of the sleeve head but failing. How about a process sleeve head shot instead?  The only thing I'm not entirely happy with is the support for the sleeve head.  I bought very nice shoulder pads from Gorgeous Fabrics, but the heads could really use more support than that.  What kind of support I'm not sure. Frogore should have done a little more research for me.
Sleeve Head Collage
Here I must be really excited to show you my lining, or maybe Frogore was making funny faces at me while we took pictures. He is quite the cut up.
Jacket 5
Finally cause I like you and Halloween's supposed to be about treats....a nice collage of my decorative seams. I'd offer you more chocolate but it seems to have gone missing.
Seams detail
So what did the towns people think?  We'll some of them weren't too sure of my 80's linebacker shoulder line. I managed to convinced them that it's what all the fashionable mad scientists are wearing this season.  The rest were immediately won over by the snazzy lace print and constructed a catwalk lit with their torches.  I'm currently demonstrating my "Blue Steel" while Frogore pockets their change for the next project.  Happy Halloween!
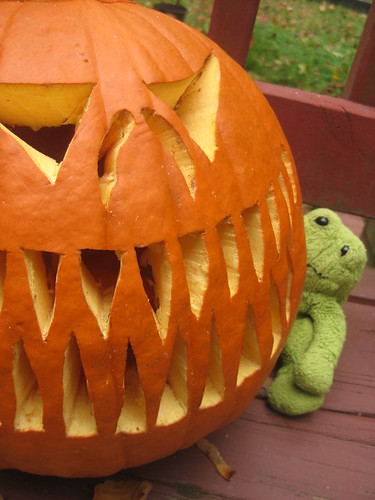
Happy Halloween

ModCloth Knock Off - Part 1

10.30.2013

Hello everyone, long time no post.  I've been sidelined by a series of minor head colds, social commitments and some secret pattern testing.  I'm not done with all those things yet, but I didn't want October to end without talking about my lined jacket project.

The Pattern Review Lined Jacket contest fell in the month of October this year and it's one that I always sign up for.  Probably because jackets/blazers have always been my favorite garment to complete. I might not wear them much, at least the blazers, but oh do I like sewing them.  Besides some day my child will take CEO mommy seriously because I'm wearing a kick ass blazer.  Shhhhh a girl can dream.

This year I decided use the PR contest as a kick in the pants to finally knock off this ModCloth jacket.
The sleeves, the peplumish back, the asymmetrical closure! I love it all.  I'd also give my eye teeth for that skull fabric but you can't have it all. Sniff, sniff.....psst modcloth suppliers, call me.

Now if I'd been a good "clean" pattern drafter, I would have finally made myself that blazer block and drafted this from scratch.  Inside I decided to change my name to Frankenstein, stitch a bunch of patterns together and then further hack them to shreds. I'm a monster I tell you, A Monster!!! I had my assistant "Frogore" collect these bodies....I mean patterns...for my crimes again science/fashion.
1. For the main body - Sewaholic Cordova.  Princess line seams, check!
2. For the sleeve - Style Arc Gabby jacket. These are the funky sleeve heads you're looking for.
3. For the collar/lapel area - Random Burda Jacket in one of my old mags. Sorry, Frogore was a little hazy on this one. He just threw a collar at me and said, "Make it work."

So I half haphazardly traced these three patterns together and then made a few changes.
1. Made the lapels bigger and similar to shape to the inspiration jacket. Also make the upper collar band thicker.
2. Turned the front shoulder princess line into a armhole princess line
3. Added a back peplum seam line and a front diagonal seam line.
4. Changed the CF to an asymmetrical overlap.
Then I threw it on a table and waited for some lighting while yelling "It's Alive!!"  Ummmm no really, I sewed it together while Frogore ate Reese's Peanut Butter Cups.

Here are pics of muslin number one.  I didn't put the sleeves or facings on it cause I knew it would need changes....and cause Frogore didn't get me more muslin.
The first version wasn't too bad considering I was just winging this whole drafting thing.  The front was close to the original other than looking a little long.  In the back the peplum seam line was too high.  I wanted it to lay on the small of my back, but it was a few inches above that.  I also felt it wasn't as curvy as the inspiration garment.

I went back to the drafting board and changed the location and shape of the back peplum seam. Then made muslin number two, this time with sleeves!  Frogore finally came through with the muslin once I hid his candy.
This time the peplum seam was in the right location as far as height, but the shape just made it look like a weird butt cut out.  I was also debating about turning the one piece sleeve into a two piece sleeve.

What did I do next?  Did I end up with a fashionable blazer or one that caused the towns people to chase me with lighted torches?  Tune in next blog post to find out!

My TNT fitted buttondown - McCalls 5138

3.30.2013

Hey All, it's time to round out Button Down March with a fitted button down. This one was inspired by the PR fitted blouse contest and the fact that I already had a properly domesticated pattern.

McCalls 5138 and I went 12 rounds last year but in the end I was able to beat it into submission. Then I lifted my arms in the air and yelled Adrian!!!!   Umm no wait, then I made a Joan Holloway inspired blouse. For all the gory details on that, check out this post

And now for the photos of me trying to look nonchalant in my front yard as neighbors walked by with their dogs. Laa laaa laaa, pay no mind to the self obsessed women next to the hedge....damn it's cold out here.
I call this one, Hey is that a plane....or maybe Superman!
While I have a strong preference for two piece collars, the combination of the one piece collar and no button band gives this pattern a vintage feel that I love.  Full flickr set here for more detail shots.
The linen was a Marcy Tilton purchase from last year.  She cleverly sent a book of linen swatches with another order and I was hooked. Why didn't I buy the metallic gray color too!

An now a final shot of this shirt properly styled for the current weather with past FO Burda leather jacket.
 Hey there ladies, just leaning up against a tree. Wanna come over and talk about sewing?

Pushing Daisies Coat - a project of 8 days

3.02.2013

I don't know about you but I always get great ideas for contests right before they end.  This seems to happen to all sewing on deadlines, it's like my brain needs weeks to ferment before it spits out the best idea.  In senior year of college we had to make a collection of clothes each semester, at least 3 complete outfits.  Both times I scrapped the whole idea/garments at midterm and started fresh.  It was insane.

So basically the same thing happened with my plans for the PR RTW contest.   I was going to knock off a lovely nightgown from Dollhouse Bettie, but just felt like sewing other projects first. Then on the 20th I thought, "You know what would be a great entry for the RTW contest, that Pushing Daises coat knock-off."   Back when that most awesome show was actually on the air, I'd bought all the materials needed to make a version of the coat Chuck wears in the episode "Corpsicle.  Then never did it, probably distracted by something new and shiny.  Here are some screen caps of that lovely coat.
Coat inspiration

Did a quick rummage through the pattern stash and Simplicity 2311 seemed like the perfect starting point.  I traced off the single breasted, short length version and began by redrafting the collar. McCall's 6519 was used as a guide to make the collar wrap around the neck.   For the wider lapel I just did a free form drawing while referencing the screen caps.
Pushing Daisies Coat Front
Since there are no good shots of the back of the original coat I decided to have a little fun and add a decorative yoke.  Simplicity 2311 comes with a yoke piece so that was traced, increased in length a tad and given a curvy edge.  I cut one yoke out of self fabric and another out of lining.  Sewed the two together, understitched the curvy edge and then overlaid the decorative yoke over the regular one before setting the sleeves.
Pushing Daisies Coat Back
Speaking of sleeves, simplicity only gives you a one piece sleeve in this pattern. Shame Shame!!  Lucky for me the sleeves from Colette's Anise fit right in the armholes, no drafting of my own required.  I did reduce the sleeve circumference by an inch to make them a bit sleeker looking.   Did this by cutting own the seam allowance on the forward most seam.

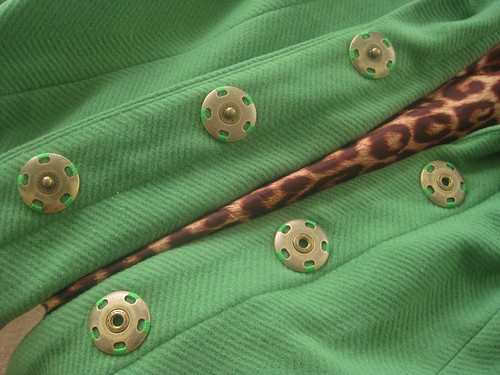
The pushing daisies coat has no visible closure other than the belt.  At first I thought about making a hidden button placket, but that didn't seem like a good idea with my rather thick wool.  Instead some beautiful large snaps were purchased from the wonderful Waechters.
PD Coat snaps

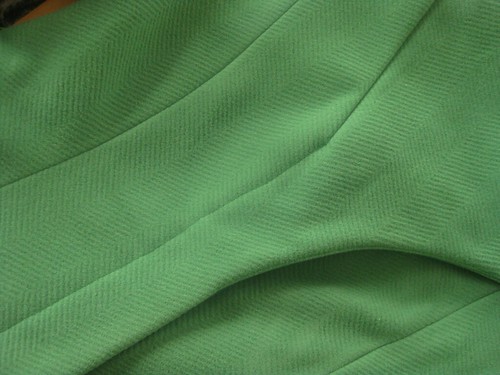
A little decorative topstitching was added to mimic a placket.  In this picture you can see I topstitched from the bottom up to the point of the dart in the undercollar.  This wasn't planned but it looks nice and tidy.
PD Coat front top stitching and lapel dart

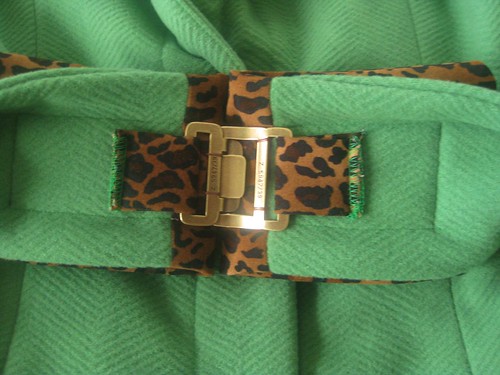
For the belt I just kind of flew by the seat of my pants.  The main part is simple, more self fabric the length of my waist measurement/4"wide, with some topstitching added.  The leopard print portion is some light weight suede cloth that needed some extra body.  To beef it up I took some hair canvas from the stash and sandwiched it between too layers while sewing the seam allowances.  This was attached to the ends of the green wool and given it's own topstitching. I really wanted a 4" belt buckle but lo and behold this is something that seems to be only made for RTW clothing. If I'd had this "bright idea" at the beginning of the month maybe I could have found a cheap one to cannibalize, but my local Target yielded nothing. With limited time to finish the coat for the PR contest I had to resort to Plan B - get creative with a 2" belt buckle. 
PD coat belt back

The belt buckle (also from Waechters) was attached behind the belt with loops of the suede cloth.  They were just sewed on with the machine since the stitches would be hidden.  I then folded the leopard belt ends back and secured them with another row of topstitching.  Finally the belt buckle pieces were secured by hand to the belt to keep the front from popping out away from the body.  It actually looks pretty good from the right side.
PD coat belt front

Here's my PR review if you're interested in what fitting changes were made.  Generally I had to take the coat in but that may have been because I started with with wrong size.  Big 4 ease sometimes confounds me.

Be sure to check out all the beautiful entries in the RTW contest and if you feel like casting a vote my way that would be great. Now excuse me, I must get my note to Oscar Vibenius.
Pushing Daisies Coat alt 2

Motorcycle Jacket Project - Part 3

8.31.2012

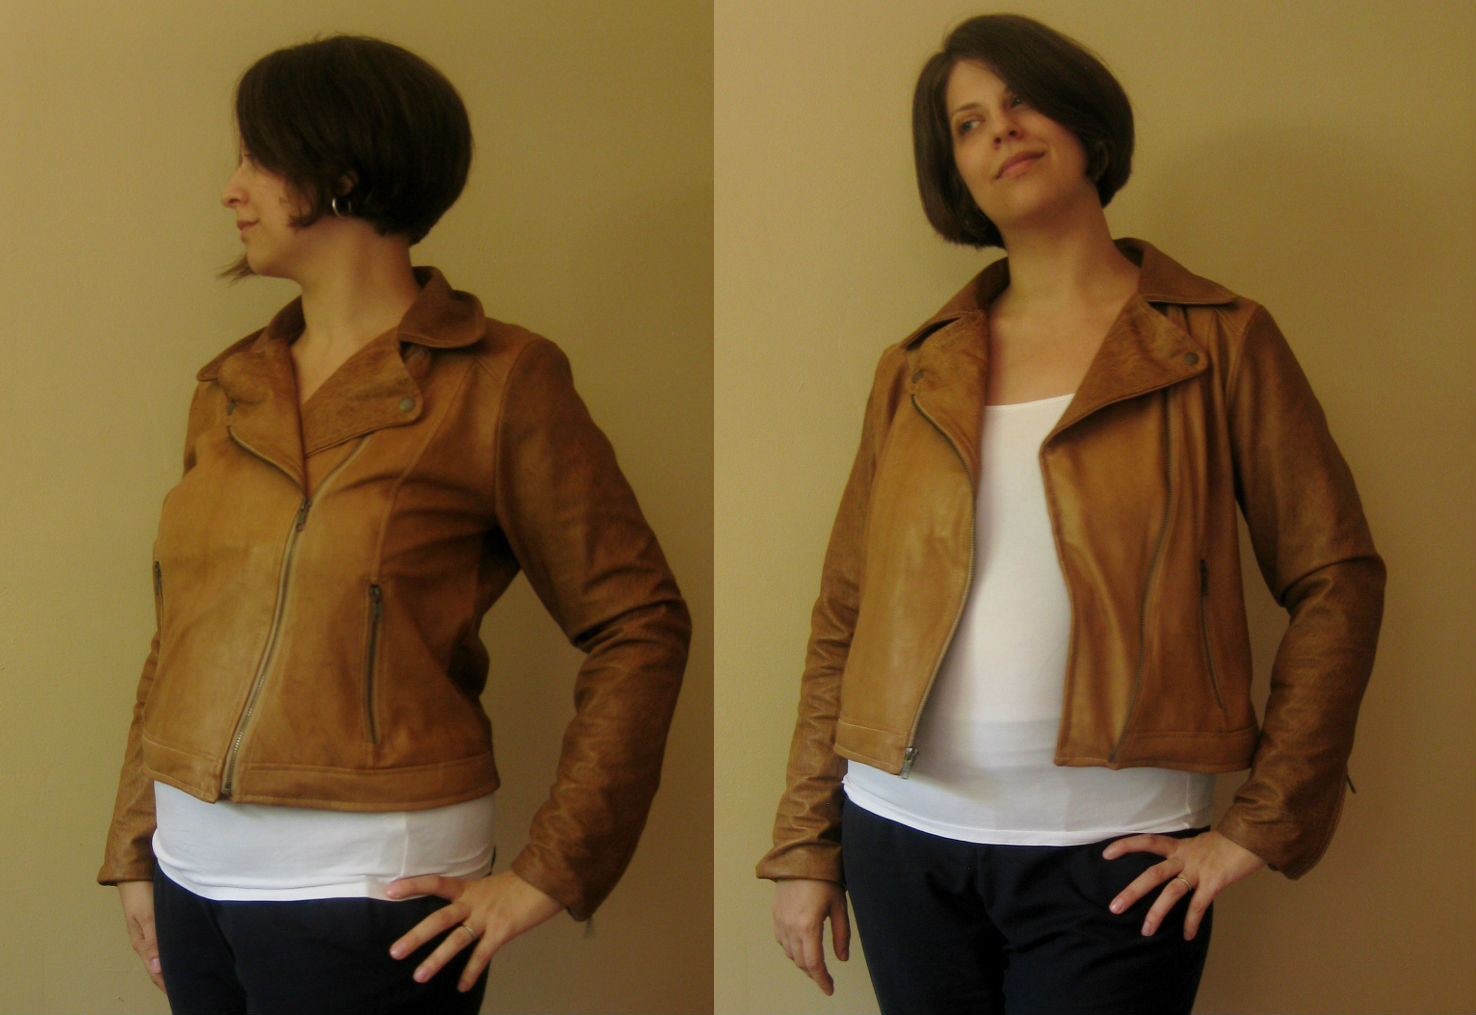
Stick a fork in it cause the motorcycle jacket is done.  Time for fun finished object pics.
 
Front view zipped and unzipped.
 
One of the things I really liked about the original fossil jacket is that it looked good zipped and unzipped.  The width of the left front facing and the snapped down lapels balances out the off center zip.
 
A close up of the snapped lapel.

Didn't have any luck finding the kind of metal snaps you see on RTW leather jackets so I bought size 24 Antiqued Brass snap heads from Snapsource.com.  The look of the snap head is nice and they work well for a decorative snap that won't be used much.   I don't think this leather would hold up to a lot of snap usage, its a bit delicate.
 
You've already seen the pocket zipper but here a little look inside the pocket.
 
 
Sleeve vent open
 
 
Back view
I did sacrifice a little upper back width for a slimmer looking silhouette.  The sway back adjustment could have been a little bigger.  That's OK, learning fitting is a work in progress. :)
 
The decorative back tabs, the other use of snaps in the jacket.
 
And finally a little shot of the lining.


More photos on the flickr set here and if you want to read my pattern review on this project go here.  There are many beautiful jackets entered in the lined jacket contest. Take a look if you have some time.  Some of those beautifully tailored jackets make me feel like a beginning sewer.  What great inspiration to do some more learning about making tailored jackets.

Motorcycle Jacket Project - Part 2

8.30.2012

August, where did you go?   I think it got sucked down a black hole of jacket sewing and 2nd birthday party planning.

I've been making great progress on the motorcycle jacket project, partly because I bought the original jacket and have been using it for construction details. After all my sewing is done I'll be returning the store bought jacket and wearing my own. :)

Speaking of construction details..... how about some photos of zippers sewn in leather?

First up, the inseam zipper pocket.  I'd never sewn a pocket like this before but "Threads" August/September article about sewing exposed zippers helped a bunch.

Inseam zippered pocket

My construction steps were as follows.

1. Sew seam together, leaving hole open for pocket area.  (Don't want unnecessary holes in the leather)
2. Cut miters on both ends of pocket area for the squared off top and bottom.
3. Topstitch wider line of stitching so that you have a slot in the leather to insert the zipper.
4.  Sew pocket bags to the zipper tape but do not join the bags.
5.  Place the zipper in the slot and topstitch again to attach it.  Don't get your pocket bags caught in the topstitching.  (This is where you might realize your machine doesn't like all this leather and zipper nonsense)
6. Sew pocket bags together and finish the edges.


Things I've learned the hard way,
1. Cutting down metal zippers is all well and good until you try to sew over the teeth and break your needle. Duh.
2. Double stick tape does not stick to zipper tape fabric.
3. My sewing machine doesn't do all the well with this sort of topstitching.

All this adds up to me having to handstitch that zipper in using the topstitching thread and the needle holes made by the sewing machine.  You can tell the thread tension is different, but it's better than ruining a bunch of leather.


The sleeve vents were a little easier since the zippers are inserted like a lapped zipper.  I only had to hand stitch the end because of the metal teeth.  There is a wedge shaped piece of leather behind the zipper, which increased the width of the sleeve hem.

Sleeve vent zipper
 Construction details on the sleeve vents.
1. Sew sleeve seam up to point where zipper will be inserted.
2. Fold back seam allowance on both sides and topstich close to edge.
3. Attach the piece of leather that goes behind the zipper to the zipper tape.  (I used pins here, GASP! In my defense it was the only time a pin was used.)
4. Place topstitched sleeve edges on top of zipper and topstitch a wider line of stitching to attach zipper.


The only thing left to do is finish attaching the lining to the leather shell.  I'm a big fan of bright linings so I used this silk crepe de chine roll end from emmaonesock.com.  Mmmmm petty!
Proudly designed by Mlekoshi pixel perfect web designs