Feed me all day long - Sew Fearless Pajama Eaters

11.26.2013

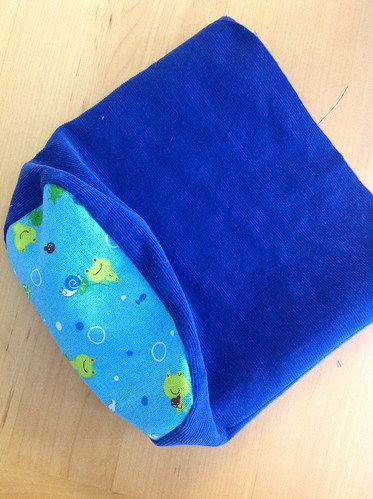
I've got a couple new mouths to feed. I don't mind because they're so darn cute.
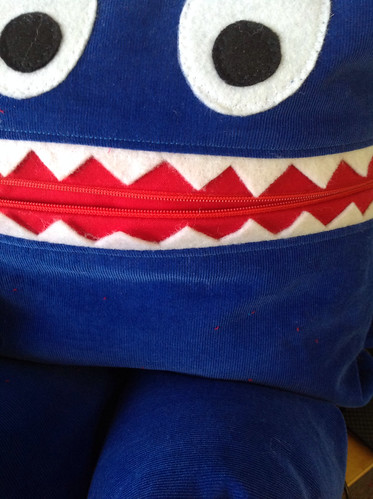
It is a bit of a feeding frenzy when they get their paws on some PJ's.  Good thing their teeth are felty.
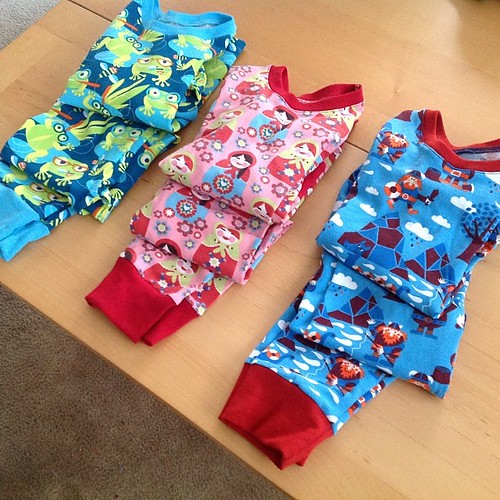
While PJ's are their favorite food they like eating other things too.
Thread
Candy
Froggie....don't worry I forbade this and gave froggie a tiny can of mace.
Actually the royal blue one is the only trouble maker, maybe he needs a felt muzzle.
"I'm just hungry....feeeeeeeeeeed meeee."

Pattern
Pajama Eaters from the Sewfearless blog.

Fabrics used
For the main body - Robert Kaufman 21 wale corduroy from Fabric.com
For the mouth/inside lining - Kona cotton solids also from Fabric.com.
Eyes/teeth - Felt from JoAnn Fabrics
All soles were scrap cottons I had in the stash.

Pattern changes/alterations
I only made one alteration, the addition of a thread tack at the corners of the body for an ear flap.  I made mine 1" away from the edge and hid the thread in the seam for the body.  If you'd like to do this too then make them right before stuffing the body.

Confessions/Advice
The majority of this pattern is easy peasy sewing, but attaching the soles to the legs can be bit tricky. Mostly because you're sewing a straight edge to something with curved edges.  Here's my method for doing them.
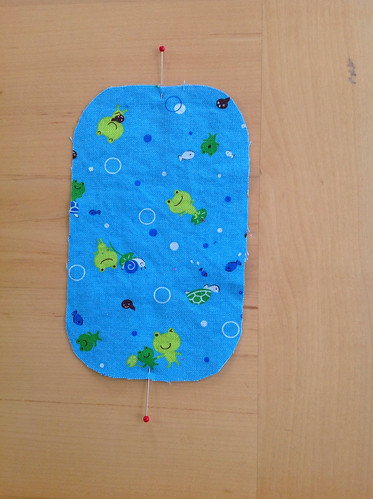
1. Mark the center of the soles on the short ends with a pin.
image
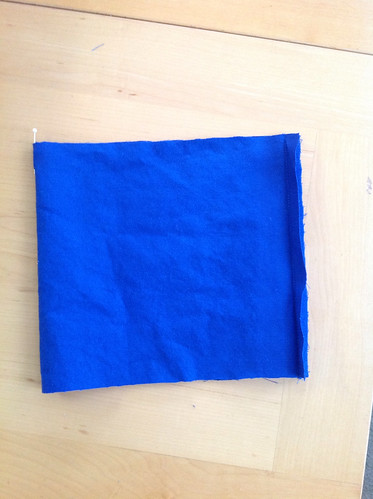
2. Sew the leg together and then mark the center of the tube with a pin.
image
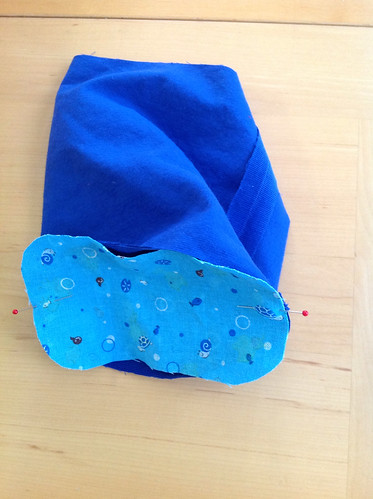
3. Line up the pins on the soles with the pin/seam on the leg tube.
image
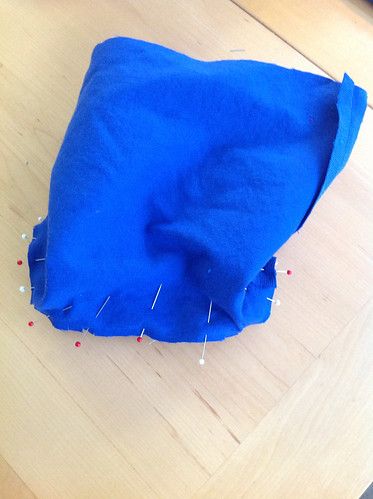
4. Clip the leg tube in the areas it will be curving around the sole's curved edges.  Pin in place.
image
5. Attach as many more pins and you'd like and start sewing. I usually started at the leg seam.
image
6. Even with the clipping on the leg tube you will get a bit of a pleat right in the center of the curve. You should be able to massage it out with your finger when the presser foot is raised.
image
7. When you're done you should have a nice pleat free leg.
image
Husband Comment
"Did you sew this?   This is the best thing you've ever made."

My Final Thoughts
I had a lot of fun making this pattern and not just because I was posing monsters and taking amusing pictures. (See my instagram feed if you missed them)  The construction steps were very well documented and are also formatted like a comic. Squee!
image
The finished PJ eater is not only cute as a button, but excellently constructed too. Plus the added bonus of working with fun bright colors and maybe using up some scraps.  Or be like me and buy up a bunch of corduroy colors only to have you kid tell you he wants a green one.  What? You've never expressed a color preference before child.  OK fine, the red one was supposed to be mine....but then I've gotten a little attached to this feisty royal blue one.
image
"Nom, Nom, Nom. Pants patterns are delicious."

Progess

11.24.2013

I'm "almost" done with the Christmas sewing...
That's one Christmas project done!
image
image
image
One more Lady Skater to sew and some boxers for the husband. Go Go Gadget sewing machine!

Briar and Espresso - A match made in heaven

11.20.2013

Sometimes a fabric tells you what it wants to be. Sometimes it also yells and screams "Just sew me already!!!" Here's the mouthy fabric in question, a 2 layer knit from Waechter's. The color is a tad off here as the top layer is a true black. Everything else is just as awesome in person.
I really shouldn't have been surprise that it wouldn't sit mutely in the corner.  It's all "Let's party with the young folks." It also told me to ignore my misgivings about giant butts in high/low hems and download that Megan Nielsen Briar pattern.  You want be to buy a new pattern? Well you don't have to twist my arm casue I got to keep my rep as "All the patterns Heather" to keep.
Upon completion of the Briar I released that it's the kind of shirt that allows one to commit the "sin" of wearing leggings as pants. But I had no leggings.....so I bought the Sewing Cake Espresso pattern. MOAR PATTERNS! The serger and coverstitch were both threaded to black anyway. One must take advantage of that and sew more black clothing. I can feel Katie nodding her head in agreement.
This time I could have the superior feeling of using stash neoprene fabric bought from Gorgeous Fabrics last year.  Confession time.....I like buying new types of fabric just to see what they're like. When GF started stocking neoprene some HAD to be purchased even though I wasn't sure it would result in a wearable garment. This stuff is about the weight of a ponte but has a lot more recovery both in the horizontal and vertical stretch.  One side is matte rib and the other has a shiny satin look.  The greatest amount of stretch was in the vertical direction and I was lucky the fabric was 58" wide, my drafted leggings pattern just barely fit. The plan was to go with the conservative matte side but I said, "Screw it, let's make shiny leggings."


I sewed the neoprene with my serger and used the coverstitch for the hems/casting just as I would any other knit. The satiny side was a little slippery but since the fabric is so stable I had little trouble sewing it together.

Patterns
Megan Nielson Briar and Sewing Cake Espresso Leggings.  I bought PDF versions of both these patterns and found them easy to assemble.
That was easy!
Fabrics used
For Briar a Polyster/lycra knit, still available.
For Espresso a thin neoprene knit, sold out.

Pattern changes/alterations
I made zero alterations to either of these patterns.  For the Briar I combined the med and large sizes as is my habit. Since it's a loose fitting style it needed no other tweaks.

The espresso is drafted to your measurements so they fit well right out of the gate.  I did add extra to the back rise and then found that it wasn't needed. Better to be safe than sorry!  I might add some extra length to the leg, just for personal preference, on any future versions.

Confessions/Advice
No advice per say, just a note that I used a plain black jersey for the neckband of my briar.  That worked a whole lot better than trying to serge a thin strip of the self fabric to the neckline.
Husband Comment
"Do you make those shiny pants! Cool!"  He made no comment about the shirt which probably means he doesn't care for it.  Or maybe it's awesomeness rendered him speechless.

My Final Thoughts
Briar - I still think the high/low hem looks best on women with regular/small sized backsides where is drapes in a pleasing manner. My backside just fills the available space but I like the complete coverage that the style provides. There are plans to make more, the first in some stashed sweater knit.  Hey I'm still "Stashbusting."

Espresso - Never thought I'd like leggings but my fellow sewcialists seemed to have changed my mind about them. This pattern is excellent for us ladies with more junk in the trunk, since the self drafting means you don't have to worry about short back rises and bending over. *Shudder* We've all had that problem with RTW, am I right? Never again I say!  Now let's rock out in our leggings as pants. WOOO HOOO!

The Brasilia Dress Part 3 - The Finished Dress

11.16.2013

It's the moment you've all been waiting for, the unveiling of my finished Brasilia dress! After the picture parade I'll go into some sewing tips for the inset and how I chose to finish the neckline and armholes.  Now with out any further ado, drum roll please, The Brasilia Dress!

Front view complete with disinterested model face
Brasilia Dress Front View
Back View, hey that did need a sway back adjustment. Don't fight it future Heather.
Brasilia Dress Back View
One full view pic that I squeezed out in the corner of my dining room. It was 45 degrees outside, not exactly sleeveless sheath weather. The red pumps don't care what temperature it is, they're always ready to play.
Brasilia Dress Full view
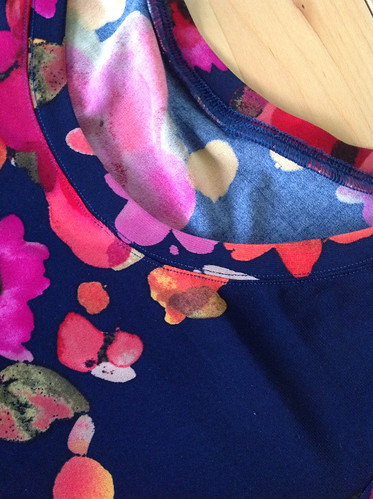
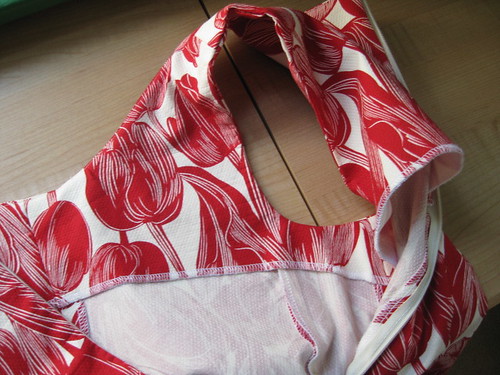
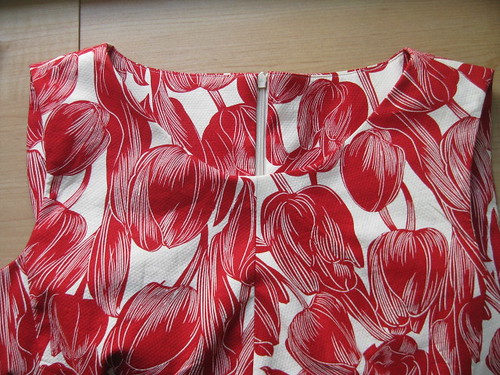
It was up to the individual sewcialist to decide how to finish the neck and arm edges.  I decided to draft an all in one facing by tracing the front and back pieces. Never mind the seam at the CF, that's due to a last minute alteration on the neckline.
Brasilia Dress all in one facing
All in one facings are a bit of a pain to sew, but having one piece keeps the armhole facings flipping out. I also like how it gives a nice look to the back of the dress when it's on a hanger.
Brasilia Dress Front Detail
You could also use a bias binding or contrast binding for the neckline/armhole finish.  It's all up to you!

The majority of the Brasilia dress is very easy sewing, darts and straight seams. Inserting the side inset is the one area that is a bit tricky, so here are my tips for getting a nice sharp point.
Brasilia Dress inset
1. If you're fabric is delicate or prone to raveling then first reinforce the point area with a small square of interfacing on both pieces.  My cotton pique was pretty sturdy so I've this skipped this step in my photos.

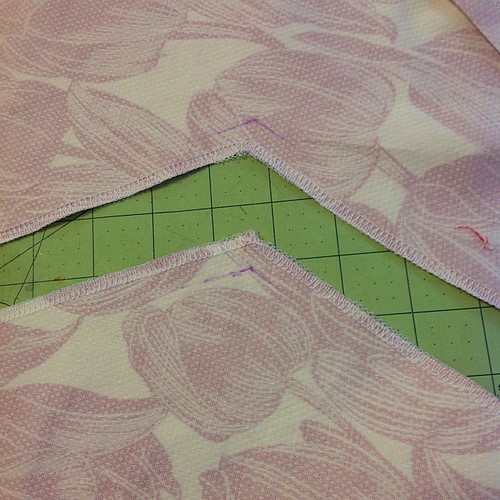
2. Use a disappearing marker or chalk to pencil in the seam allowance at the point area.
Marking my points. #brasiliadress
3. Clip the fabric on both pieces a within an 1/8" of the seam line you just drew in.

4. Pin both pieces together right on the marked in point. Just pierce it with a pin.

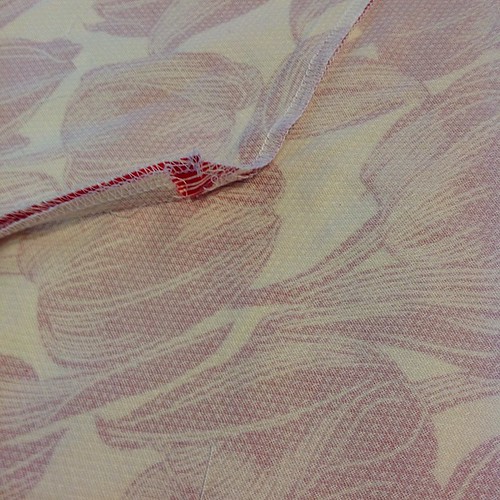
5. When you sew the pieces together pivot right on the marked in point. The clips you put in the seam allowance will allow you to turn the point without a big pucker. Here's a view of the back of the seam after sewing.  The clip the fabric also helps the SA to lay nice and flat after a pressing.
@charityshopchic I pulled up the edge to show my clip on the point back. #brasiliadress
6. Give it a good press and you should have a nice sharp point.

That my friends is my Brasilia dress.  I had a great time sewing this pattern and I know you will too come December.  Now back to the Christmas sewing Heather, chop chop!
Brasilia Dress Alt Front 2

The Brasilia Dress Part 2 - The Muslin

11.14.2013

Hello again my dears, it's time for part two of my Brasilia dress experience....almost sounds like a new age band. Cue the theremin.

After grading up the waist and the hips of the pattern I went ahead and put in some of my normal fitting alterations.
1. Forward shoulder adjustment of 1/2"
2. Wide upper back adjustment of 1/2" with dart to back shoulder added so that the seams match.
3. Changed the angle of the bust dart because my bust apex is much lower.
That seemed like enough fitting changes to start with, especially since I wasn't sure if my grading was a success yet.  Whipped up a quick muslin and had froggie pin me into it. Then we took a few pics to give you an idea of what it looked like.

Front view

Side view

Back view
First off my grading was a complete success!  Woooo Hoooo, I can follow directions if needed.  Secondly the fit is pretty darn good for a first muslin. That always makes me happy. However there were a few more things that needed to be tweaked.
1. There was some gaping at the front armhole so I pinched out 1/4" at the inset seam.
2. I'd skipped a sway back adjustment because I'm in denial about having to do one. I did need one, duh, but much smaller than usual, around 1/2".
3. The shoulder seam was at an odd angle so I redrew it forward to match the outside edge of my forward shoulder adjustment.
4. Decided that I didn't like the change I'd made to the bust dart. Instead of changing the angle to lower the apex, I would cut the dart out and drop it down to my apex.
5. Crew necklines are not that flattering on me so I drew in a more scooped neckline.
6. I liked that length of the dress unhemmed so decided to add 1 1/4 to the hemline.

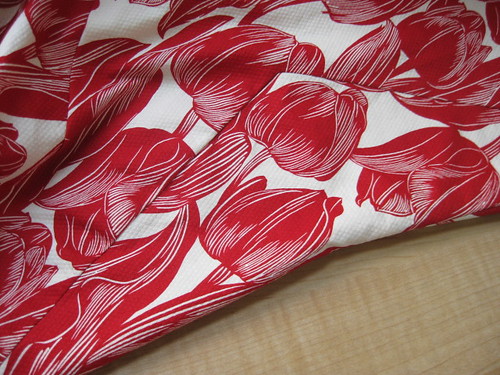
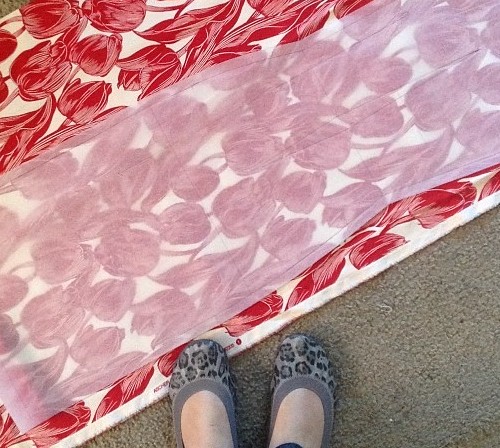
I figured that all these changes were minor enough that the next step could be sewing up the real fabric. Woot, time for a stash dive!  The stash come through as it usually does and yielded this lovely remnant left over from a Colette Macaroon. It's a stretch cotton pique with large scale tulips printed on top. Mmm yum.
Tulip fabric
In the next post I'll show you my finished Brasilia dress in all it's glory. Won't that be fun!

The Brasilia Dress Part 1 - Grading

11.12.2013

Hello All! Do you know about the Brasilia Dress over on the House of Pinheiro blog?  If you don't about it then here are the deets.  Rachel drafted herself a lovely sheath dress for "Fall for Cotton" sewing challenge and we were all impressed.  

Because she is a generous sewing blogger she decided to make it a free download to be released later this year. But first she needed to ask for a few volunteers to test that baby and put out the call on her blog.  I was like that annoying kid in class waving my hand and going Oooooo, Ooooo, Ooooooo Pick MEEE!!!  Well I did get on the "elite" pattern testing squad that gets first crack at it and I squeed with joy. Here's the technical drawing, which we all know I love so much.

Now since this gonna be a free download you have to do your own pattern grading if you are not a amazonian hour glass like Rachel. Yes I'm a wee bit jealous. ;)
Rachel's measurements are:
Bust - 37"
Waist - 29 7/8"
Hip - 40 1/8"

Pre baby Heather would have been near that size (not has busty) but post baby Heather is much more of a pear.

My measurements are:
Bust - 37"
Waist - 34"
Hip - 43 1/2"

I must admit that having to grade the pattern myself made me a bit nervous.  Back at Fashion Design school they taught us a lot of great stuff, but grading wasn't one of them.  Well that's a bit of a lie, they taught us how to digitize patterns and then click a button in some software that magically graded them. Wooo Hooo the power of software! So while I could still digitize a pattern in my sleep,  the principles of grading never made it into my gray matter.

Since Rachel is a professional she provided us with several web resources to learn about grading, she is so clever.  I took a look at all of them and the one that worked best for me was Casey at Elegant Musings blog series. After reading Casey's posts I realized that I was a nice even 4" grade in the waist and hip area and this was gonna be easy peasy.

I'm going to break down my personal grading steps in case other people find it helpful in the future.
1. Since Rachel and I are the same bust size the top half of the pattern need to be removed. I decided to cut the pattern in half along the length/shorten line that is below the dart.
2. Next I marked the 3 vertical lines through the bottom half of the pattern that will be slashed and spread.  None of the information I read said these lines needed to be drawn in at an exact measurement.  You just want to spread them as evenly as you can without bisecting any darts. Again see Casey's post if this doesn't make a lick of sense. Here's a look at the bottom half of the front.
3. I put one grading line through the waist inset piece since there were already two lines through the waist on the main front piece. (Which you can see above.)
4. I slashed and spread my grading lines the same way Casey suggested, 3/8" on the two outside lines and 1/4" on the inside line. I did this to both the front and the back piece. Here's a look at the back.
 5. I reattached the top half of the front by lining up the CF's. Then added some paper to the inset seam side and drew a new line that blended into the underarm area.
6. Next I reattached the top half of the back by lining up the fish eye dart. On the armhole side I added some more paper and again drew a new line to the armhole.  On the center back side I drew a curve over the tush area and cut the extra paper off.  That did remove some of the grading from the center back waist, but since removing ease from that area is a common alteration for me I figured it would be fine.
7. On the side seam inset I just added paper in the gaps the grading created and trued the seam line. Then walked the seam line to make sure they still matched.  They didn't so I cut down the inset a tad at the underarm area and at the hip.
And that was all I had to do to grade the Brasilia dress to my size.  In my next post I'm gonna talk about what fitting alterations I needed to do and flash a few muslin pics.  So exciting?  Maybe I should have frog do some photo bombing.
Proudly designed by Mlekoshi pixel perfect web designs