I have been doing a bit of sewing at about a quarter of my usual pace. You might say that Butterick 6167 is a perfect encapsulation of this. A perfectly fine project that was then complicated by second guessing, procrastination and general laziness. In total it took more than 3 months from start of muslining to finished dress. This is honestly terrifying since it's a cute summer dress and I've made lined coats in less time than that. I'm sorry Butterick 6167, you deserved better!


Now back to actual sewing talk....having completed the musling process all I had to do was pick a fabric and get sewing. Usually this is not a hard decision for me because A. I have a lot of fabric and B. I have no problems buying more fabric. There should have been at least 7 different applicable fabrics in the stash, but for whatever reason I just wasn't excited about using them for this particular pattern. One sewing lesson I have learned is not to shoehorn fabric into a project if it doesn't feel right. You are never going to be happy about sewing that fabric up. Better just to put the project on the back burner until the right fabric comes along. So poor Butterick 6167 got put on the back burner a looooong time. I did try to find it some new fabric but my usual

It's all smooth sailing from here right? Wrong. Turns out that if I make a muslin in April and then pick it up in August my little brain decides maybe the whole thing needs to be tinkered with. Maybe it needs to be more like the Bernie Dexter Paris dress I'd been wearing all summer. The general look between the two was very similar, but I liked some of the details on the Paris dress more. Why not get the pattern out and just change one or two things?
The great thing about sewing is that you can make a garment just how you want it. It's also the worst thing because you can get caught up in a series of fiddly changes that had nothing to do with the fit of the garment. You end up wondering if you're really just trying to drive yourself crazy and/or find an excuse to abandon the sewing project for you knitting project. "I can't possibly think of pattern edits right now. Guess I have NO CHOICE but to knit this sock and watch The Americans. Yeah baby, Wigs!" Seriously though, the wigs in that show are great. This blonde one....uhhh I want to marry it.

- Changed the ratio of bust shelf to lower bodice. The height of the bust shelf was reduced and added to the lower bodice instead.
- Added a bust band under the ruched area. I thought the band gave a nice transition between the two areas. I've put my drafting and construction details for this in the Confessions/Advice area.

- Added a lot more width to the skirt for more gathered volume. Since this made the pieces very large the skirt was cut on the cross grain even though my fabric wasn't a border print. I think the skirt as drafted is nice, just wanted to turn it up to 11.
- Added side seam pockets because why doesn't this dress have some in the first place?

Pattern
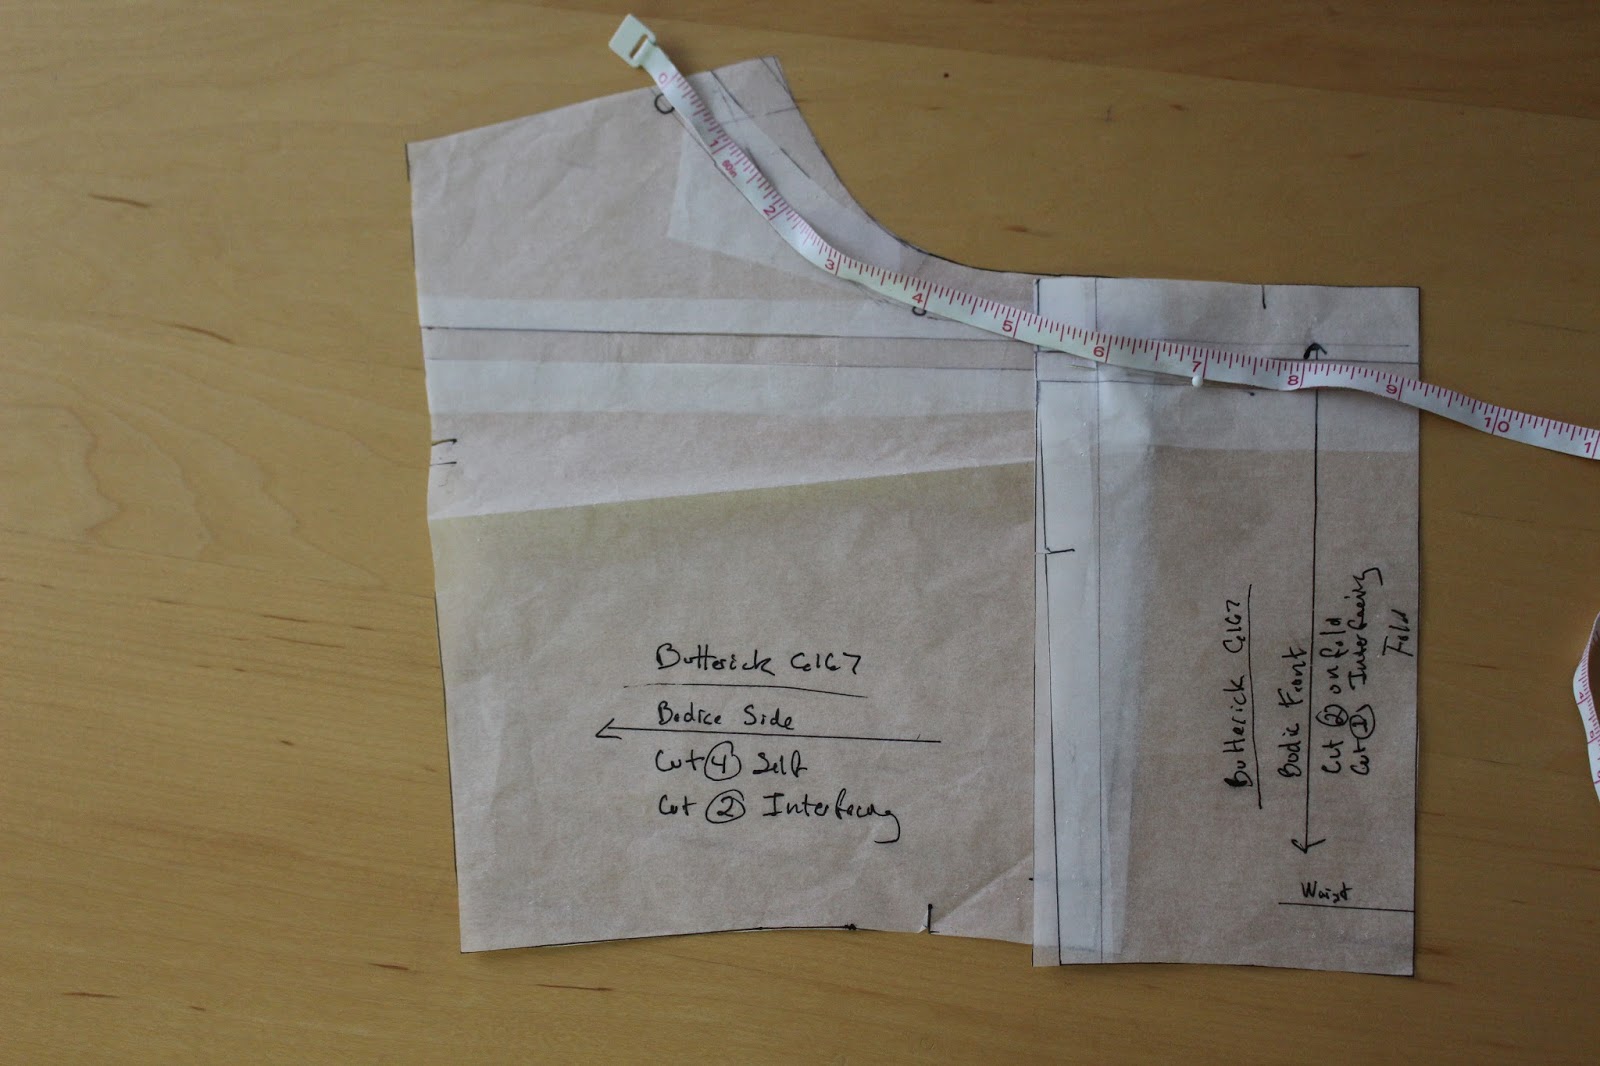
Butterick 6167. Started with a straight size 14 with a C cup.
Fabrics used
Stretch cotton shirting from the most excellent Margo. Thank You Margo!!!

Pattern changes/alterations
1. Added 1/4" at the waist to each side of the front princess line seam.
2. Changed the proportion of the front bodice of the dress. The overall height was nice but I wanted the ruched area to be a bit smaller. Removed 5/16" from the bust pieces, added the same to the lower bodice pieces. (Back needs no alteration since the overall height remains the same.)
3. Changed the angle of the bust shelf. On the bodice side added 1/2" at the very top of the curve and graded it out to nothing. Removed the 3/4" from the bust stay and bust inset because that area needed to be taken in.
4. Additionally reduced the length of the bust inset 2" for a total of 2 3/4" of width removed.
5. Added 8" long elastic to the top of the bust shelf to get rid of the rest of the gapping.
6. Added a bias band to the bottom of the bust shelf. Finished width is 5/8".
7. Reduced shoulder strap width to a finished width of 8/16".
8. Added 11" to both the front and back skirt pattern pieces to increase the skirt fullness by 44".
9. Added pockets to the side seams. I used the pockets from the Odette dress.
10. Made the hem slightly smaller at 1.25" when pattern calls for 1.75" hem.
11. Omitted the boning called for in the back of the bodice.
12. Went back into the finished garment and took the side seams in a 1/2". Think I didn't make my muslin small enough to account for the lycra in the real fabric.
Confessions/Advice
- Just a note that my fabric choice was a lighter weight than the cotton sateen the pattern sample is sewn in. I probably wouldn't have added as much volume to the skirt if using a sateen weight.
- I'm not opposed to boning in dresses, but don't think one piece makes sense for the design. I could see adding additional boning into the side seams/front princess lines seams if you wanted to make the garment really sturdy. I also think this design works fine with no boning at all. (Bonus, you don't have to worry about dry cleaning the dress because of spiral steel boning.)

- Also skipped the lapped zipper and put in an invisible one. Screw you lapped zipper.
- Looking at these pictures I should have done a bit more seam allowance grading at the waist.
- If you like the underbust band, here's how to add one to the dress. First measure the curved seam of the lower bodice to get an idea of the length needed. Double that and add an extra 1" of wiggle room. This will be the length of your underbust strap pattern piece.


Husband Comment
"It's bunchy...and all the cleavage is hidden under the bunches." *Insert sad face emoji here* (I even showed him my Marilyn Monroe impression photo and he was not impressed.)

My Final Thoughts
The husband and I are going to have to agree to disagree on this one because I felt pretty darn good taking pictures out on the sidewalk today. I even got an unsolicited "Beautiful dress," comment from someone's husband. (His wife chose not to comment, but I'm going to pretend he spoke for both of them.) I also like being able to bend over in a dress and not worry about my girls falling out. Flashing cleavage all over town has never been my MO anyway. Flashing collarbones, now that's another story.


No comments:
Post a Comment