Showing posts with label Gertie. Show all posts

We get it, you like lemons - Butterick 6556

7.22.2018

Honestly, is there a lemon print I've ever said no to?  Are lemons the new bird?  Just put a lemon on it?  Putting a lemon on it would actually work for me. "Look Steve! I bought a new power drill because it has lemons on it! I know we had a black one already but that's just boring." But enough about my weakness for good marketing, let's talk about lemon print dresses instead.

This is the third lemon print dress I've blogged about here hence the amusing, maybe only to me, post title. I imagine you all murmuring it when opening your blog readers. Listen guys, all the lemon dresses have different colored backgrounds, which is what a girl needs in her closet.  I don't have a problem, I can stop whenever I want.......*Looks up lemon prints in Spoonflower*
This time I used a pattern currently in print, instead of a hard to trace vintage one. You're welcome? May I present to  you my version of Butterick 6556, aka one of Gertie's new designs in the Spring catalog. This design caught my eye right away, especially the neckline. You guys know I like flashing my collar bones all over town.  Even though my sewing is mostly 40's era garments now, I just couldn't resist. As soon as Butterick had one of their regular sales this pattern joined my collection.
I'd bought this stretch cotton sateen home from work last summer and didn't get around to sewing it.  A fabric has to mature to reach its full potential....or something like that.  In truth the sateen weight was a little heavier than I usually buy and didn't fit any of the projects I wanted to work on at the time. However it was the perfect match for the structured bodice and pleated skirt of B6556.

The dress is drafted to have a full bodice lining, but I decided to leave that out due to the thickness of the self fabric.  Instead I used the neckline interfacing pieces as facings and hand stitched them down so that they don't flap out.  The added facings do make the top of the lapped zipper insertion look messy on the inside.  You have to kind of fold one side under so there isn't a raw zipper tape sticking up out of the neckline.  If I'd switched out the lapped zipper for an invisible one then the inside guts would have been a lot cleaner.  For some reason that day I'd decided that we had to do a lapped zipper, even though I hate them. Who knows what that's all about.
Construction wise I found this one extremely easy. Sew some darts, pleat the skirt, do some hems. Heck I didn't even have to hand hem the skirt on this one. Simple rolled hem on the machine and you're done.  I did have to do an "on the fly" waist alteration thanks to the spandex in the sateen making that area too roomy. The side seams were taken in an additional 1/2" and I made the side seam pleats deeper to match the bodice.  Going down a size in the waist probably would have been smart to do in the first place knowing I was using a stretch woven. That's OK though, it worked out in the end.

Pattern
Butterick 6556

Fabrics used
Stretch cotton sateen from Emma One Sock. (We happen to have this in stock still.)

Pattern changes/alterations
1. Blended sizes 14-16.
2. 1/2" Forward shoulder adjustment to shoulder seam and sleeve cap.
3. Dropped bust dart 1" and shorted waist dart the same amount.
4. Sway back adjustment of 1/2"
5. Removed 1/2" from the neckline. - See below for more info on that.
6. Removed 1" of ease at waist due to stretch woven. (1/2" at each side seam)
7. Added 1" of length to the hem.

Confessions/Advice
Confessions - Hmmmm, I've already confessed about my messy zipper insides and that's about the only naughty sewing issue that happened when making this dress.

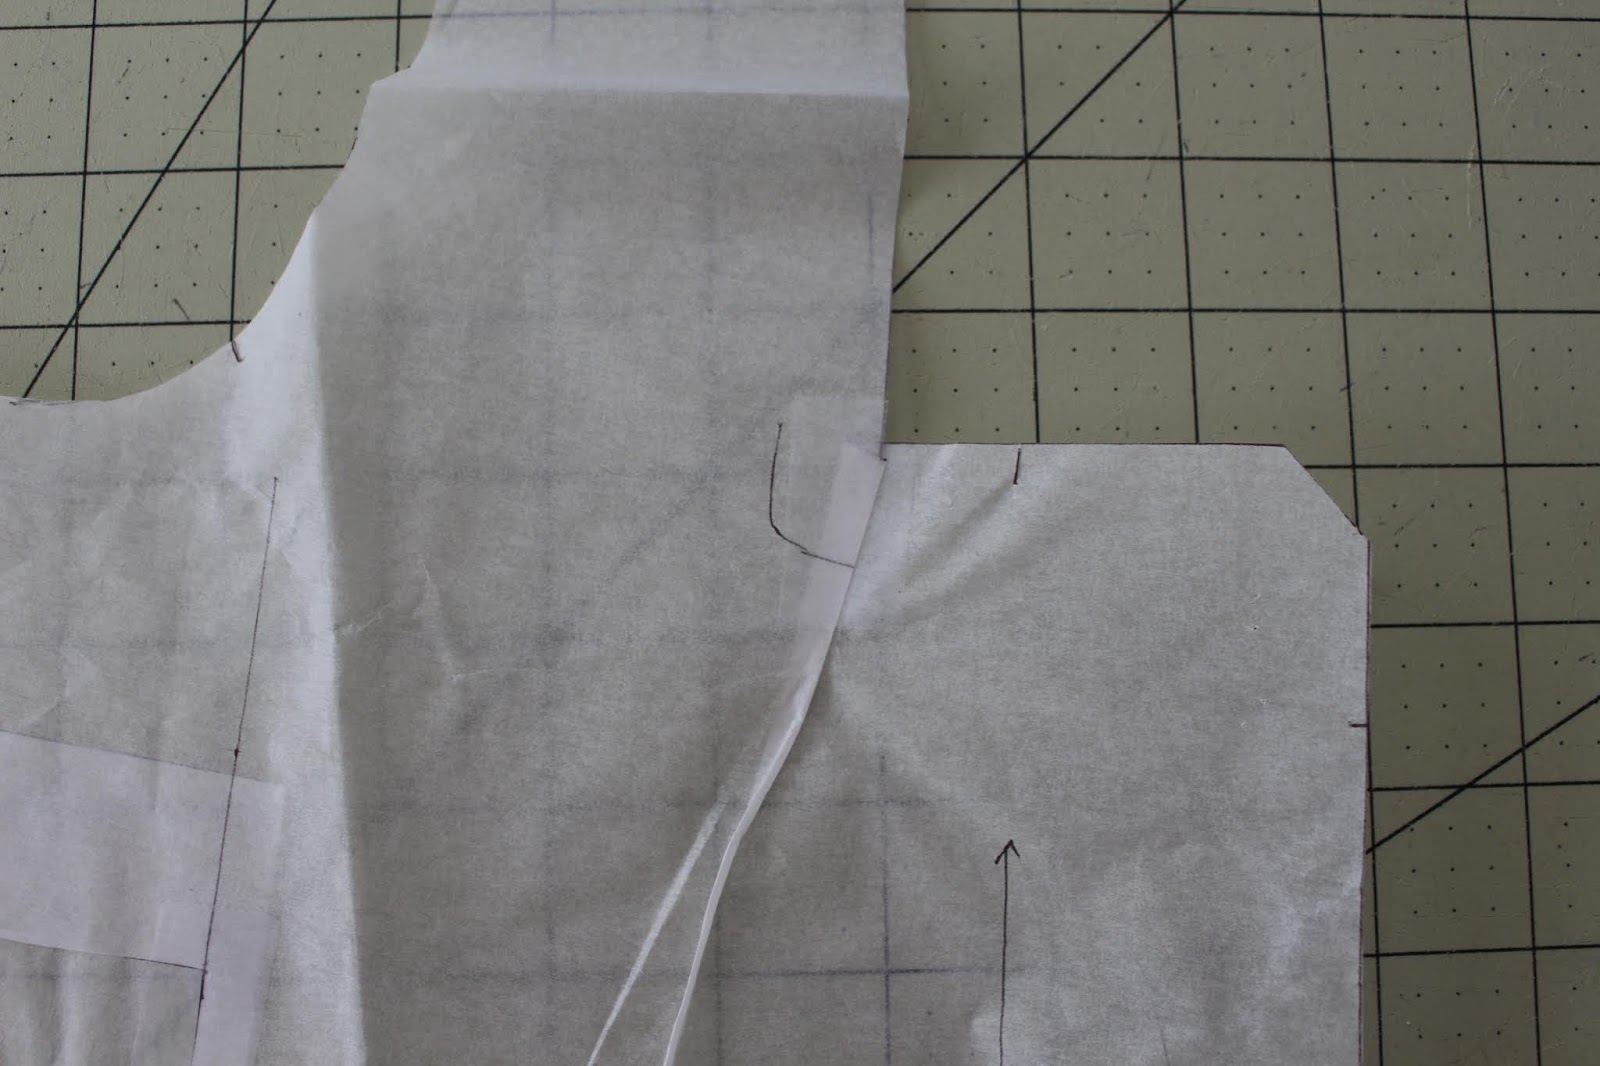
Advice - I nailed the square neckline fit on this dress by some "just winging it" pattern fitting. To remove the extra width I didn't need a small fold was made in the corner of the neckline and I taped it closed. Figured it wasn't much different than doing a sway back adjustment. 
A poster in one of the Gertie FB groups told me that I should have slashed into the neckline and rotated that width into the bust dart.  That does make sense, but also this worked and was less work? I probably should try the other method on a similar style if only to compare.

Husband Comment
*Started singing U2's song "Lemon."  Declined to comment further as he was sure he already talked about this dress. *

Bonus Son comment - "I think it's cute. I love it and I love lemons." - The brainwashing has been successful!!!

My Final Thoughts
This was a fun, easy project for the start of spring. It fits nicely and gives me plenty of room for moving around. The only reason I'm not wearing it more right now is because it's been crazy hot. This weight of sateen will be nicer when we transition into Fall and have some cooler temps. And last but not least, when people say, "Nice Dress" you can say, "Thanks it has pockets."

Hollywood 1413 - The Easter Outfit That Wasn't

6.03.2018

Hello everyone, happy summer 2018 to you heat loving people out there. You all are currently flooding my instagram feed with giant smiles on your faces as you gleefully break out your sandals. "Finally it's warm and I can ditch this sweater" you exclaim! I'm glad you are enjoying yourself, heck I can semi empathise having grown up with a beach loving father and sister and a weather neutral mother.  They never thought the summer sun was a hateful orb sucking up all their life essence while simultaneously stabbing them in the eyes. Only I would be huddled under an umbrella hissing with distaste while successfully trying to read in the eye searing glare.  Yes my friends, in my immediate family I'm the sole possessor of the nordic and/or vampire genes of my ancestors.

If you're a long time reader of the blog this is no surprise. I've been bitching about summer for probably as long as I've been blogging and will continue to do so. However I will admit to liking two things about summer. One - fancy summer shoes and Two - wearing rayon dresses. My closet is full of rayon dresses, but there's always room for more. Which brings us to some sewing actually done in 2018......gasp! So let's talk about Hollywood 1413, aka the Easter outfit that never was.
Here in southern Pa you have a 50/50 chance that Easter Sunday is going to be either 55 degrees or 85 degrees. There is no inbetween. In 2017 it was 85 degrees and my version of Hollywood 1025 was not heat appropriate.  I wore it anyway because by god my sewing plans were not going to be ruined by a freak heat wave. However the memory of unwanted sweating did trigger me to choose a flirty short sleeve dress pattern for Easter 2018.  It would look lovely paired with some stashed rayon from Gertie's JoAnn's line from the year before.  See, a match made in heaven.
Hollywood 1413 is full of 40's design detail goodness.  The bodice features a ruched center that is created by putting a seam along the neckline that extends down toward the bust.  This makes it possible for center of the bodice pattern to be extended/more ease added. This extra ease is then gathered back into the seam area and sewn in place.  A jaunty little self fabric bow completes the neckline area.

The skirt features 3 tucks that radiate out of the left hip and a sewn in cascade. The front skirt is pieced at the left hip to give you a seam for the cascade. Finally a bow belt balances out the bow on the opposite side of the bodice.
The back is pretty plain Jane with standard darts and no design details. Not that I'm complaining..... there were plenty of new techniques and hand sewing in this design already.


The sewing goddess has been very generous with larger sized 40's styles this year and this pattern happened to be my bust size of 36 inches.  Would I have purchased this in a 32" bust and graded it up?  Probably not.  That ruched bodice detail might have discouraged me from trying. As it was the pattern only needed minimal grading through the waist and hip to fit.  Used my cheater method of slapping .5" on the side seams and called it good. 

I did reference the instructions a few times since the drafting for the bodice ruching was totally new to me. All the neckline edges are faced which means there is a set order of sewing that needs to happen or you'll bungle the whole thing up.  Good news is that the original pattern drafter did do an excellent job giving you reference/placement points. There are various sized circles in the neckline area to help you line everything up.  After reading the sewing steps twice I was able to see what needed to be done and use these marks to assemble the neckline properly. 

The skirt was a bit easier since sewing tucks is pretty much the same on any part of a garment. The cascade was a no brainer, just hand hem and insert into the seam.  I only wish my nails looked as good as the illustrations while doing a rolled hem.
Hollywood 1413 was finished in plenty of time for Easter 2018, a whole month ahead of schedule! It didn't matter though because Easter wasn't 85 degrees this year.  Instead we came down on the 55 degree side of the coin. Obviously Mother Nature is trying to neg me by looking at my sewing plans and making the weather the opposite of whatever's coming out of the sewing machine.  Oh well, as you all may remember I put on Hollywood 989 and saved this dress for hot weather.  Now we'll be best buddies until the blessed Fall breezes arrive.

Pattern
Hollywood 1413 (pictures above)

Fabrics used
Rayon from Gertie's JoAnn's line in 2016.

Pattern changes/alterations
1. 1/2" forward shoulder adjustment to both shoulder and sleeve cap.
2. 1/2" extra ease added to waist and hip.
3. Dropped the bust dart 1.5" and waist dart point the same amount.
4. Added a .5" of length to the bodice.
5. Made .25" sway back adjustment.

Confessions/Advice
Not too much to add here for this pattern.  Will note that I spray starched the rayon fabric before cutting to make it less slippery. Then all the pattern pieces were carefully cut out on a single layer, keeping the selvedges parallel with my cutting board. This method worked with with this rayon which was on the less slippery side of the spectrum.

Husband Comment
"The swirly pattern on the fabric works well with the loose fit." - I think loose fit actually means the design elements. If that's the case he might be learning something about sewing after hearing me natter on about it for 13 years.


My Final Thoughts
This pattern perfectly scratched my intermediate sewing skills itch of wanting a bit of a challenge.  It was neither too easy or too hard, but jusssst right. 

Thanksgiving Outfit - Butterick 6285

11.29.2015

This year the sewing fairy must have had a slow night, because she paid me a little visit to specifically dictate a Thanksgiving outfit. Usually my dressing concerns for America's favorite eating holiday are, A. Does it have an expandable waist and B. Will the sleeves accidentally fall into the gravy boat? Bonus points if fabric that doesn't readily show grease stains. Using these rules I usually put together an outfit without much fuss or pre-planning. The sewing fairy was having none of that and whispered in my ear that I "needed" to have a leaf print skirt for Thanksgiving.  It's Fall and leaves are festive....or something like that.  She probably knew I'd outright laugh at her if she suggested festooning myself with turkeys.
I did laugh at the thought of Thanksgiving specfic sewing anyway.  My desk already has a Christmas sewing list a mile long, like hell another item is going on there. The sewing fairy just looked at me and smiled slyly. "Of course my dear, do whatever you want.  You should probably stay away from that Etsy website after all. You know how you like to spend money on there." Say what now?! Wild horses could not keep me away from the Etsy site now.  I'll show you sewing fairy!!! And that's how I ended up purchasing 4 yards of vintage cotton with red/black leaves.
Once that yardage entered my house I felt contractually obligated to sew it up. Man that sewing fairy is a wily one! It's like she knows all my sewing weakness....or paid someone for information.  I'm looking at you froggie!  Well at least I could put that impulse buy of Butterick 6285 to good use.
Having been burnt by Big 4 ease in circle skirts before, I measured the waist area before tracing. Hooray for sometimes learning lessons from past projects. My ruler told me that Butterick had drafted this pattern with more ease than I'd like.  Two inches of ease has been added to the waist measurement for each size, so the size 16 with a 30" waist will have a 32" finished waistband.  My waist is exactly 30" so I dropped down to the size 14 and muslined up the skirt as is. That muslin did "zip up," but felt like it might grow uncomfortable as the day wore on.  Figuring it was a smart thing to do, I added 1" of ease around the side seam area......which made my final garment about 1" too big in the waist.  HAA HAAA HAAA, sob.   The waistband was left that way for Thanksgiving for obvious reasons.....specifically pie.  However I will HAVE to go back and take in the waistband because the skirt kept falling forward off my waist all day. It drove me crazy having to constantly adjust it.

One other thing to note about this pattern is that the CB seam and side seams are drafted with a 1" seam allowance and I'm not sure why. The directions do show you how to recess the pocket bags, sewing them at a 3/4" seam allowance so they disappear into the seam a bit better.  I do think this is a nice feature, but you don't need a whole 1" of seam allowance to do so. Dare I say that a standard home sewing 5/8" seam allowance is more than enough to accomplish the same thing. OK, my college prejudices of 5/8" SA being way too big might be showing. Let's just say that if you need to save some fabric you can always cut those areas down. Forewarned is forearmed or something like that.

 Pattern
Butterick 6285 - Skirt portion only.

Fabrics used
Vintage cotton, closer to dress weight than quilting weight.

Pattern changes/alterations
1. I went down one size and added an 1" of ease to the waistband.

2. Added 3" of length for a finished length of 27".

Confessions/Advice
- You will want to stay stitch the skirt waist on this pattern immediately. I found it grew with even the lightest amount of handling.

- I'd meant to give you some photos of the skirt with a petticoat underneath and forgot to pack it for our trip to the in-laws. Anyway it's a nice look for the design if you want more fullness.

- The top in these pictures is a Nettie hack that is in no way ready for prime time. There's not enough ease for a faux wrap style and it's trying to gape open at every opportunity. In fact I'm going to rip it apart and turn it into a regular V-neck.

Husband Comment
"Oh did you make that too?  What's happening here with the extra fabric? Oh pleats? That's cool."

My Final Thoughts
I bought Butterick 6285 more for the kimono top than for the skirt, but really enjoyed sewing up the bottom portion.  I like the double pleats and the fact that the pattern comes with pockets.  Since only the waist area needs to be fitted, it's a quick pattern to bang out.  It took merely a week to sew both the muslin and the real garment. Guess the fabric fairy was right about me needing a new skirt after all. So if you'd like to add another cute circle skirt/kimono top to your pattern collection, then pick this one up during the next Butterick sale.

A wiggle dress years in the making

10.29.2015

Have you ever had a garment on your mental "to sew" list so long that the very thought of sewing it becomes a chore? Shouldn't that dress already be hanging in the closet?  I've thought about sewing it so many times that it should have a corporeal form at this point. "Ta Da, I magiced this dress into to my wardrobe with my mind. It's amazing!!!!" - is what I'd like to be able to say. Instead I have to mutter, "Where did my scissors disappear to for the 40th time?  Oh they're under my butt...once again. Guess I have to make this dress now." *Heavy Sigh*
This might only be a problem for those of us who suffer/embrace the "Ooooo something shiny!" form of sewing planning. Once a pattern loses its shiny new patina it turns into work instead of fun. Those of you who are serious planners will have to let me know if you get tired of old plans eventually. Maybe you have a stronger work ethic towards the sewing list than I. If my sewing list isn't an open ended one like FESA then I'm more likely to sew something completely unplanned. I don't play by anyone's rules, not even my own. ;)

Enough about plans, let's get to the point of this post, the Gertie Wiggle dress from her first book. When I saw her green sample of this pattern it was love at first sight and I immediately preordered the book. Sometimes you know a pattern is going to look good on you just by looking at a photograph. When my copy arrived excitement was running so high that I did a very stupid thing when starting this project. I failed to consult the size chart for the patterns. Who knows what I was thinking at the time. More likely no thinking was actually involved in the decision, "I'm usually a 14 in patterns so I'll trace that one."
Spoiler, my measurements correspond with the size 8 in the Gertie book ,so my size 14 muslin was wrong in every possible way. Not only was it too big in the circumference, the torso and height seemed to be for a much taller/longer torsoed person than me.  The last thing I felt like doing was starting from scratch and tracing a new size.  Instead I moved on to the Shirtwaist dress pattern which turned into a nightmare of fitting alterations. That was enough to make me gun shy and the book went back to the bookshelf not to be opened again for quite a while.
Clearly those sewing traumas weren't enough to put me completely off the wiggle dress pattern. After letting it marinate for 2 years I finally traced the correct size 8 and muslined it up. To my surprise the dress fit almost perfectly straight from the "envelope." Who would have thunk it? In the end this was a super easy pattern to sew up with great results.

I did find two drafting errors on the size 8
- The front torso is 3/4" longer than the back.  I double checked the trace lines 3 times to make sure that the problem wasn't me blending different sizes. Nope, that sucker does not match up if you walk the seam line. My solution was to remove this extra length in the front so that the seam lines did match. I was lucky that this torso length also matched my body.

- The slash lines for the gussets are not the same length on the front and back. The slash lines on the back are longer and seem to fit the gusset size better. I made the front slash lines the same length and this worked fine for me.

So yeah, I'm still a little iffy about the drafting of patterns in the book. On this dress it was just some easy to fix errors that didn't impact my sewing enjoyment. Still that doesn't make me feel super confident about trying a different pattern. Will it be an easy to adjust project or will it end with me futilely trying to adjust the pattern for a completely different body type than what it was drafted for?  Who knows! To be honest I might just stick with Gertie's Butterick line, since they seem to have the standard Big 4 issues that I know how to handle. (Feel free to laugh at me when I sew another pattern from this book.)

Pattern
The Wiggle Dress from "Gertie's New Book for Better Sewing."

Fabrics used
Black cotton/linen? with a silver metallic lace design screen printed on top.

Pattern changes/alterations
- The height of the neckline is very choke inducing. I lowered mine about 5/8".

- Like on my Joan dress I put on the muslin and liked the length of the unhemmed sleeves and skirt.  1 1/4" of additional length was added to both the sleeves and the skirt.

- As previously mentioned I pinched out 3/4" on the front bodice only as it was drafted longer.

- Front gusset slash line was lengthened by a 1/4"

Confessions/Advice
- The only thing tricky about sewing the pattern is putting in the sleeve gussets. Since I had two Advance 9441's under my belt I figured it wouldn't be all that tricky this time. Wrong. The gusset seam lines are drawn differently on the two patterns.  On the Gertie wiggle dress the seam lines are much straighter and closer together. I found this a lot harder to sew than the large and curved lines of the Advance pattern. (Photo comparison -Wiggle dress on the left, Advance 9441 on the right.)
Obviously I persevered and managed to sew all 4 gussets without giant puckers or leaving holes near the points. There was just a little more cursing at the sewing machine than usual.

- Just wanted to note that with the gussets the kimono sleeves are very close fitting. My upper arms just fit in there so you "may" need a width adjustment if that's an area where you carry weight.

- Confession, I did not reinforce these particular gussets.  My fabric felt sturdy enough to get along without extra organza added.

Husband Comment
"It looks nice on you and I like the baseball sleeve.  Hey is that fabric cracking?"

My Final Thoughts
Despite my continued reservations about the patterns in "Gertie's New Book for Better Sewing," I'm glad that this pattern got sewn up. After all it was my fault the first time for not consulting the size chart and muslining a wildly inappropriate size. If you have a similar figure to mine, you'll find it an easy pattern to fit and not much harder to sew. Just get those gussets under your belt and the rest is smooth sailing.  This pattern is certainly a sexy number but it's also surprisingly comfortable to wear.  I feel like it has just the right amount of ease to show off your curves while still letting you move around like a normal person.  So if you like to gamble a bit with your sewing then this pattern might be for you. Just don't gamble with good fabric, muslin, muslin, muslin.  I SEE YOU IGNORING ME! :P Oh well, you can lead a horse to water but you can't make them drink.  See you guys next month with hopefully the last of my FESA list finished. I might have to stay up late to get that beret knit. Do you think Froggie would knit it for extra cookies?

Sewing Notes - Butterick 6167 Low bust adjustments

8.31.2015

Do your boobs hang low, do they wobble to and fro? Do they hang out near your waist instead of being up by your face? Are they pointing toward the ground while you're walking around town. Do your boobs hang low? Oh yeah, that just happened and you're welcome. Now that we've gotten the juvenile humor out of the way, let's talk about how having a low bust complicates a dress with a bust shelf element.

One could make the argument that those of us with low busts should just pass on this trend. When your bust just rolls off the shelf into the "floor" is there really any reason to put a shelf there in the first place?  The answer for me would have easily been "No!" if I hadn't purchased a Bernie Dexter Paris dress. (Here's a photo of that particular RTW dress.)
Wearing that dress convinced me that girls with low busts can enjoy a bust shelf as long as you mentally relabel it as a rufflely bust dickie. It's there to cover your bust root and fill some your large upper chest area with fluffy goodness. To that I say, "Thumbs up to fluffy goodness. Let's sew some more bust dickies."

To do so we are going to have to brace ourselves for some pattern alterations.  Even on a pattern that offers different cup sizes*, the bust ease is not going to be in the correct place for those of us with "low hanging fruit." To see what I mean, let's take a look at the bust stay piece.
The bust apex is clearly marked more than half way up of the bust shelf with not much shelf height above it. (1.5" to be exact)  From this I can infer that the drafter is expecting there to a lot of breast fullness at the top of the dress.
To give you a colorful mental image of what I'm talking about let's think of the breast as a cupcake. The bust shelf is the ruffled cupcake liner with the top half of the breast, the icing, sitting above it. This is all well and good if your apex matches this point and you have plenty of "icing" to fill out the top of the bodice.  But what does this bodice look like if you have a low bust point?  Or to further our metaphor, your breasts are more like creme filled donuts than cupcakes? (Just as delicious but with less fluff on top) What you are going to get is a bodice with MAJOR gapituts along the top edge of the inset.
Sorry about the poor quality photo but I was a bad girl and threw this muslin alway some time in the last 3 months. You can still see that I have literally inches of extra fabric along the top edge since all my bust fullness in in the lower part of the bodice. What you can't see is that the front part of the lower bodice feels tight because that's where my apex actually is. My face also says, "Crap, I need to do some major fitting work on this pattern."

That muslin might make the pattern look like a lost cause, but never fear because the bust ruching is going to allow us to make an easy fix.  All we really need is elastic!  That's right ladies, we're gonna sew elastic into the upper edge of the bust shelf and make all our problems go away.  Woot, Woot, fitting short cuts!  But first let's make few minor adjustments to the front bodice.

First you can remove a bit of that extra ease at the upper edge by changing the curve of the bust stay. This will keep the lower part of the seam the same width, which is good because your boobs are in that area. On my dress I was also changing the location of the seam, so some of the width removed here was added onto the bodice piece.  (Note - I changed the height of the bust stay for aesthetic reasons, not fitting ones.)
On the lower bodice you'll want to add some extra ease to the princess line seam for your low bust point. I added 1/4" to each side of the seam. (You can also see that I added a bit to the outside curve and changed the length of the bodice. The lengthening was more for portional reasons than bust fitting reasons since my bust won't actually hit the shelf area.)
Then you may want to reduce the width of the bust inset. On this pattern the ruching ration is fairly high on the bust inset. Adding elastic to that area is only going to increase it and it may get poofier than you'd like. Of course this is more of a personal taste than fitting issue, so use your own discretion. On my dress I reduced the inset by making the same curve change to it as was made on the bust stay. Then made the pattern smaller by moving the CF fold line in and cutting off some of the ease. In total I removed 2 3/4" on the half.

To assemble this area follow the pattern instructions for gathering the bust inset, sewing it to the lower bodice and the top edge to the bust stay. Before you do any edge stitching on the top edge, open the bodice like so.
We are going to sew in some 1/4" elastic onto the seam allowance to tighten up the area.  On my dress the inset area was 13" wide without elastic.  I wanted to gather it down to around 10" to get a nice snug fit against my chest.  After much trial and error, meaning sewing and seam ripping, I ended up inserting an 8" long piece of elastic.  Long story short, I recommend basting in the elastic and checking the fit before "really" sewing it in.

The elastic is going to be basted into the seam allowance of the bust inset area. First fold the seam allowances the same way you would for stay stitching. Pin the edges of the elastic near the edge of the bust seam.  I found it's a good idea to baste both ends of the elastic first before attaching all of it.

Stretch the elastic to that it sits flat against the inset and baste it to the seam allowance. At this point try on the dress to see if the upper edge fit is to your liking. If not you can rip out the elastic and try a different length.

Once the you're happy with the elastic length, it can be secured with some edge stitching.  On my dress I edge stitched the entire upper edge of the bodice at once, but you could just do the inset area.
Go back and remove any basting left over. Then press the edge so that the lining rolls toward the inside of the garment

Ta Da! A perfect fitting bodice. See that actually wasn't all that hard to do. Thanks elastic!

* Note about cup sizes on this pattern - The shelf pieces vary 1/4" in height between each cup size but are the same width. I did go with the recommended cup size for my bust, but don't think it's as important for women with low busts.  You could just choose the height of the shelf you prefer the look of the most. 

A sundress just under the wire - Butterick 6167

8.30.2015

Oh hi there, where did those almost 3 weeks go? All I remember doing was laying in bed coughing and then decorating for Mr. D's 5th birthday party.  Maybe I happened upon "The Doctor" and some weird timey whimey crap happened and suddenly it's the end of August and I have strange dreams of giant bugs. AHHHHH, AHHHH, get away bee!  In truth I've been suffering from a rather long case of lost sewing mojo this summer. Usually warm weather puts me all in a froth to sew as many dresses as possible before being forced once again to layer in wool. However this summer's mostly been spent knitting said wool and binge watching TV series most people saw years ago. Maybe I just have too many giant stashes of supplies that make me slightly nervous. Gosh darn hoarding gene.

I have been doing a bit of sewing at about a quarter of my usual pace. You might say that Butterick 6167 is a perfect encapsulation of this. A perfectly fine project that was then complicated by second guessing, procrastination and general laziness. In total it took more than 3 months from start of muslining to finished dress. This is honestly terrifying since it's a cute summer dress and I've made lined coats in less time than that. I'm sorry Butterick 6167, you deserved better!
Originally this pattern was going to be one of my first summer projects.  The design caught my fancy when Butterick released their Spring line and I thought the version Amy sewed up was very pretty. Coincidentally after Amy's FO post JoAnn's had a Butterick sale, so you know I "had" to buy a copy. Pattern in hand I excitedly muslined up the bodice to find that there were going to be major fit issues due to my low bust. You'd think that would have been my stopping point, but no. Sometimes I need to show my dominance by pounding fitting issues into the ground with a steely gaze much like Robert Patrick as the T-1000.
Ooooh yeah....I will kill you fitting issues/John Conner with merely a gaze.  Side note - Anyone else find the T-1000 weirdly hot. He's trying to kill us all, but he looks so good doing it. I'm all a flutter just thinking about his intense running. Stupid sexy evil robot. Anyway, let's just say I put this face on and the fitting problems magically melted away...with the liberal use of elastic. If that sounds vague it's because I'll be going into detail about my low bust alterations in a "Sewing Notes" post tomorrow. I compare boobs to baked goods.......so you've got that look forward to.

Now back to actual sewing talk....having completed the musling process all I had to do was pick a fabric and get sewing.  Usually this is not a hard decision for me because A. I have a lot of fabric and B. I have no problems buying more fabric.  There should have been at least 7 different applicable fabrics in the stash, but for whatever reason I just wasn't excited about using them for this particular pattern.  One sewing lesson I have learned is not to shoehorn fabric into a project if it doesn't feel right. You are never going to be happy about sewing that fabric up. Better just to put the project on the back burner until the right fabric comes along.  So poor Butterick 6167 got put on the back burner a looooong time.  I did try to find it some new fabric but my usual crack fabric dealers just didn't come through for me this time.
I'd just about written this pattern off for this summer when my pal Margo mailed me a surprise package of fabric. Margo has impeccable taste, so I basically squeed all over myself when I found she'd send me a tropical print on a black background. The fabric said, "I'm here for the Butterick dress! Aren't you glad you waited for me?"  YES fabric, YES! You are so worth it. We hugged and I put it in the washer for a prewash.

It's all smooth sailing from here right?  Wrong.  Turns out that if I make a muslin in April and then pick it up in August my little brain decides maybe the whole thing needs to be tinkered with. Maybe it needs to be more like the Bernie Dexter Paris dress I'd been wearing all summer.  The general look between the two was very similar, but I liked some of the details on the Paris dress more.  Why not get the pattern out and just change one or two things?

The great thing about sewing is that you can make a garment just how you want it. It's also the worst thing because you can get caught up in a series of fiddly changes that had nothing to do with the fit of the garment. You end up wondering if you're really just trying to drive yourself crazy and/or find an excuse to abandon the sewing project for you knitting project. "I can't possibly think of pattern edits right now. Guess I have NO CHOICE but to knit this sock and watch The Americans. Yeah baby, Wigs!" Seriously though, the wigs in that show are great. This blonde one....uhhh I want to marry it.
Eventually I burned through all cold war era spy craft available to me and finally buckled down to make those pattern edits. Based on the look of the Bernie Dexter dress I decided to make the following changes:

- Changed the ratio of bust shelf to lower bodice.  The height of the bust shelf was reduced and added to the lower bodice instead.

- Added a bust band under the ruched area.  I thought the band gave a nice transition between the two areas.  I've put my drafting and construction details for this in the Confessions/Advice area.
- Thinned the shoulder straps to about the same width as the Bernie Dexter dress.

- Added a lot more width to the skirt for more gathered volume. Since this made the pieces very large the skirt was cut on the cross grain even though my fabric wasn't a border print. I think the skirt as drafted is nice, just wanted to turn it up to 11.

- Added side seam pockets because why doesn't this dress have some in the first place?
I kept some of the nicer elements of the Butterick pattern that the Bernie Dexter dress doesn't have, like a full lining and a deep hem. If you're cherry picking you might as well have it all, don't you think? Just nod your head and we'll move on.


Pattern
Butterick 6167. Started with a straight size 14 with a C cup.

Fabrics used
Stretch cotton shirting from the most excellent Margo. Thank You Margo!!!

Pattern changes/alterations
1. Added 1/4" at the waist to each side of the front princess line seam.

2. Changed the proportion of the front bodice of the dress.  The overall height was nice but I wanted the ruched area to be a bit smaller.  Removed 5/16" from the bust pieces, added the same to the lower bodice pieces. (Back needs no alteration since the overall height remains the same.)

3. Changed the angle of the bust shelf. On the bodice side added 1/2" at the very top of the curve and graded it out to nothing. Removed the  3/4" from the bust stay and bust inset because that area needed to be taken in.

4. Additionally reduced the length of the bust inset 2" for a total of 2 3/4" of width removed.

5. Added 8" long elastic to the top of the bust shelf to get rid of the rest of the gapping.

6. Added a bias band to the bottom of the bust shelf.  Finished width is 5/8".

7. Reduced shoulder strap width to a finished width of 8/16".

8. Added 11" to both the front and back skirt pattern pieces to increase the skirt fullness by 44".

9. Added pockets to the side seams. I used the pockets from the Odette dress.

10. Made the hem slightly smaller at 1.25" when pattern calls for 1.75" hem.

11. Omitted the boning called for in the back of the bodice.

12. Went back into the finished garment and took the side seams in a 1/2". Think I didn't make my muslin small enough to account for the lycra in the real fabric.


Confessions/Advice
- Just a note that my fabric choice was a lighter weight than the cotton sateen the pattern sample is sewn in. I probably wouldn't have added as much volume to the skirt if using a sateen weight.

- I'm not opposed to boning in dresses, but don't think one piece makes sense for the design. I could see adding additional boning into the side seams/front princess lines seams if you wanted to make the garment really sturdy. I also think this design works fine with no boning at all. (Bonus, you don't have to worry about dry cleaning the dress because of spiral steel boning.)
- The hem was machine sewn because I wasn't feeling it in the hand hemming department.

- Also skipped the lapped zipper and put in an invisible one. Screw you lapped zipper.

- Looking at these pictures I should have done a bit more seam allowance grading at the waist.

- If you like the underbust band, here's how to add one to the dress.  First measure the curved seam of the lower bodice to get an idea of the length needed.  Double that and add an extra 1" of wiggle room. This will be the length of your underbust strap pattern piece.
Decide how wide you want the finished band to be. The fabric piece will be folded in half when it is attached, so double that measurement and then add seam allowance.  For example my finished band is 5/8" so the finished pattern width is 2.5"  After drafting the pattern add a bias grain line to it.  You'll want the band cut on the bias so that it bends around the curved part of the bust seam.
The band is added before sewing in the bust inset. To attach the piece, fold it in half and then baste it to the lower bodice edge.  Change to a regular stitch width and then edge stitch the folded edge to the bodice.  Try to make the curved area as flat as possible. You may need to manipulate the curved area of the bias with your fingers as you stitch.   Once the folded edge is secured you can remove the basting, or leave it in until the bust inset is attached.


Husband Comment
"It's bunchy...and all the cleavage is hidden under the bunches." *Insert sad face emoji here* (I even showed him my Marilyn Monroe impression photo and he was not impressed.)

My Final Thoughts
The husband and I are going to have to agree to disagree on this one because I felt pretty darn good taking pictures out on the sidewalk today.  I even got an unsolicited "Beautiful dress," comment from someone's husband.  (His wife chose not to comment, but I'm going to pretend he spoke for both of them.)  I also like being able to bend over in a dress and not worry about my girls falling out. Flashing cleavage all over town has never been my MO anyway.  Flashing collarbones, now that's another story.
Don't let my long list of alterations scare you off. Remember that half of them didn't really need to be made to get a pretty end result.  The only thing really had to be tinkered with was the front of the bodice/inset area. If your bust apex is in a "normal" location or if you are smaller busted this area would not be as tricky to fit. For those of you with low bust apexes like me, check out tomorrow's fitting post.  A little elastic in the inset area hides a lot of sins. :)
Proudly designed by Mlekoshi pixel perfect web designs