Showing posts with label SewOverIt. Show all posts

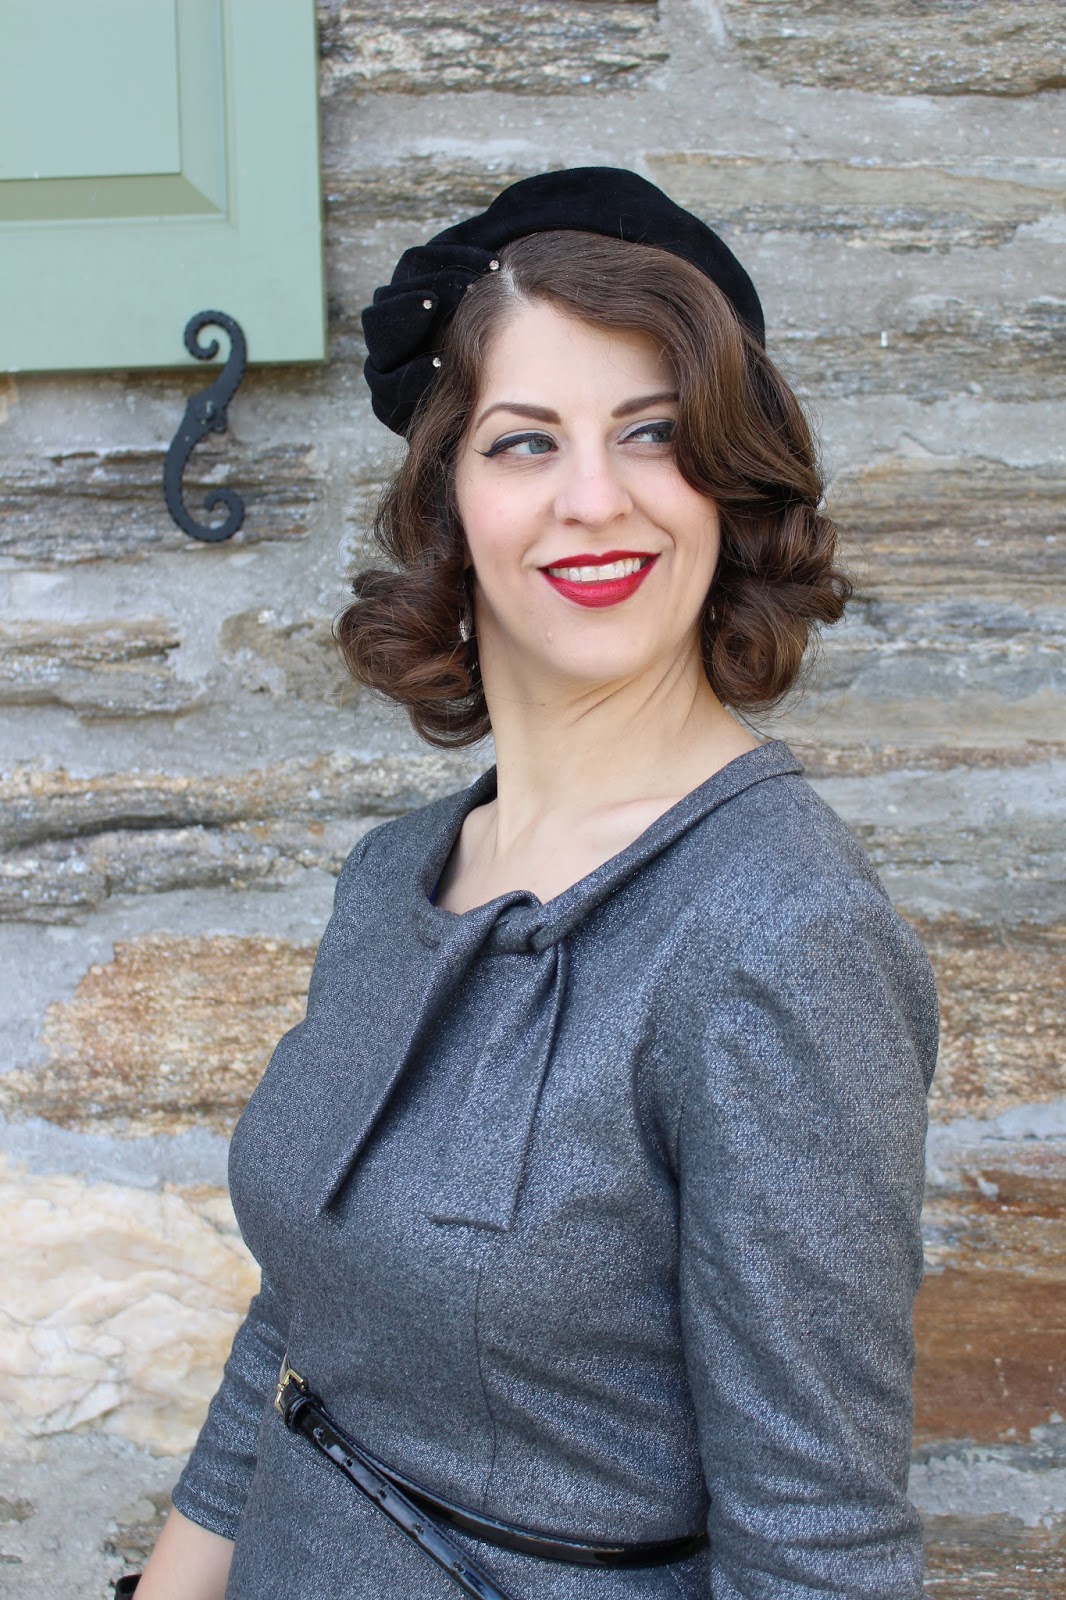
Just going for a stroll - The Joan Dress

10.12.2015

Hello all my sewing friends. Fall weather has finally found us in PA and I alternate between sighing with happiness and freaking out that I don't have enough warm clothing. Why haven't I been sewing wool clothing since August?  Didn't Past me know that Future me wanted some new wool dresses to shimmy around in before old man winter arrived? I hear her whining about sewing wool in 90 degree heat and all I can do is frown sternly at her lack of commitment to Sparkle Motion  Fall wardrobes.
In truth I can't blame Past Heather too much because planning has never been a strong point for any Heather, no matter what time continuum she's currently in. All we can do it put our forehead to the side of the sewing machine, sew like the wind and hope the weather holds. Which is pretty much all I did last week with the exception of getting some teeth filled, making my kid do homework and cooking meals for the family.  There's currently ironing strewn across the floor in the main part of the house and the bathroom hasn't seen the back of a sponge in two weeks.  Listen, some things need to be sacified for fashion.
On the flip side, procrastination does pay off when it comes to the release of new Fall patterns. If I'd been sewing in August who knows what this shiny piece of wool might have become.  Instead it was still sleeping in the wool box at the time Sew Over It released their newest pattern The Joan Dress. When it popped up on their instagram feed it was an immediate "Add to the mental buy list." I probably would have bought it right away if it wasn't for the surprise dental bill my teeth earned me this month.  I'm sure my cake consumption has nothing to do with those new cavities, nothing! The tooth fairy gave me a special dietary clearance and everything.

I was going to be a good girl and wait till next month to buy this pattern when an email from Pattern Review popped into my inbox. Would I like a copy of the Joan Dress pattern to blog about?  Are you guys reading my mind because I've currently staring at it with longing in my web browser. Yes, yes, please hook me up.  So Deepika emailed me a digital copy and I banged the dress out in a week.  What can I say, this baby was easy to put together, including that sassy collar.
Unlike my last Sew Over It project I didn't make any major changes to the pattern. This garment only has fitting adjustments and the sleeves/hem were lengthened a tad.  Am I the only one that puts unhemmed muslins on and suddenly decides the final garment needs to be the same length? It's like once my brain has seen the garment at that length there's no going back to the drafted hem allowance.  On this dress that meant adding 5/8" of length to the sleeves and 2" of length to the skirt. Oh and I did make one more change, I reduced the kick pleat high by about 5".  It literally started right under my backside and while I do like extra walking room, no one needs to see the much of the back of my legs.

Fitting notes - This pattern has a lot of darts in it which usually makes fitting easier for me. For example my wide upper back adjustment creates a shoulder dart. In this case the pattern already has a dart there, so I only need to make the dart bigger when adding the extra width. For the most part I plugged in all my standard fitting adjustments and the dress fit great. There were two areas where I had to make extra adjustments, the bodice length and the sleeve width.  The bodice length must be on the short side because I actually have a short torso and usually have to reduce the length of bodices. On this dress I lengthened it a 1/4" and probably should have gone for a full 1/2".  Something I only really noticed when trying to keep a belt on that seam while taking pictures.  As for the arms, those of you which sender ones will probably be fine with the sleeve width.  But if you carry a bit of fluff on your upper arms like I do you might need to split the sleeve open to add extra width for bending your arms.  On my dress I added a 1/2" along the whole sleeve width. I have this problem with some designers and not others, so it's more of a "second tier" adjustment for me.  You'll see all the alterations listed in the regular place in the review if you're interested.

Warning non-sewing tangent ahead:
Gillian's better pictures project has given me a bit of a kick in the butt when it comes to my photo routine. This year it's felt like I've been going to the same 3 places and doing all my standard poses. Not that there's anything wrong with that, especially if you have to knock some blog photos out in a limited amount of time. Still I was in the mood to do something different this week and had a bit of fun choosing a new location in my favorite park. (The one that houses the white door patio and the rock wall. )  Over on this side of the park there is another lovely historic building which would be a great backdrop if it wasn't in full sun all morning. Drat.  But this Sunday I noticed the walking path next to it had a fair amount of tree cover.  Only problem, all that sunlight in the background messes with the camera's foreground brightness setting and I was coming out all dark.  Nooo what's a girl who doesn't really know anything about photography to do?  Answer - Mess around with random camera settings and accidentally stumble on a solution.  I shoot with a Canon Rebel T5i and here's the settings that were used. After setting the camera to Creative Audio mode I hit the camera button so I can see the "backdrop" in my view finder. Then I hit the Q button to get the additional option menus.
I change Flash firing to "Off", Background to "Max blurred", Ambience based shots to "Brighter" and finally Effect to "Medium." All other settings were left at their default locations. This brightened up the foreground so that you could actually see me against the backlit background. Now if you're someone who does know someone who does know something about photography and has a better way to do this then fill me in. I would love to know.

(P.S. I thought some of you might like a photo of the dress without the hat and gloves to get an idea of how it would look in a more modern wardrobe.)

Pattern
The Joan Dress from Sew Over It.  PR offers all the Sew Over it Patterns as digital downloads and if you're a PR member, which I am, you can get a nice little 10% discount.  I often go that route when it comes to UK based patterns so that the "Paying for shipping money" can become "buying fabric money."

I sewed a 12/14 combo but easily could have sewn a straight 12. I found the lower half to be plenty roomy.

Fabrics used
All fabrics were rather old purchases that have been lurking in my stash.
Gray/metallic silver/lycra wool suiting, originally from Emmaonesock.com
Poly acetate lining, origially from GorgeousFabrics.com


Pattern changes/alterations
1. Lengthened bodice 1/4".

2. Dropped front dart 1" and increased back dart intake by 1".

3. Added standard 1/2" wide upper back adjustment.

4. Dropped armholes 1/2".

5. Made 1/2" forward shoulder adjustment to the bodice shoulder and the sleeve cap

6. Split the sleeve down the middle and widened it by 1/2"

7.  Lengthened skirt by 2".

8. Increased back skirt dart by 1" to match the bodice.

9. Cut down kick pleat length by 5".


Confessions/Advice
- The lycra and metallic content of the fabric made pressing a bit of a challenge especially in the collar area.
I got around this by spritzing the collar with water, then folding it over and holding it with small binder clips. The collar was left to dry overnight and then removed the clips. Essentially I wet set that sucker.
- Instead of hemming the skirt and lining as one I kept them separate. This was more of a personal preference in construction issue. Doing it the way described in the directions will give you a prettier finish on the kick pleat.

- The metallic fibers in the wool really seem to show A Lot of drag lines.  Other than the bodice length I do think the fit of this garment is correct and most of the lines are just from posing. I did put a non-stretch lining in a stretch woven shell which could be a source of some of the problems. Need to add some stretch linings to the stash in the future.


Husband Comment
"You look like you should be in a black and white movie. Swinging your curves around the pool hall...or maybe courthouse."

My Final Thoughts
I'm grandfather clausing this pattern into my FESA list since it wasn't released when the list was drafted. Otherwise I would have put this on the top of the Fall sewing list. Something about Fall weather just makes me want to sew sexy wiggle dresses. Meow!
Pattern Review provided me this pattern free of charge for a blog post. Which means you got to see it this month instead of in November because I was making this baby no matter what. 

In which I pretend to be a 40/50's era Gillian Anderson

9.15.2015

Last year my husband and I decided to watch season 1 of "The Fall" together.  It was an enjoyable if super creepy time until the end. At that point I might have shouted, "You Bastards!" at the cliffhanger ending. (I come from a long line of TV yellers.)  My take away from the the series was, A. My brain will always be semi scared of poor Jamie Dornan, who I'm sure is actually a lovely person. And B. Who ever was dressing Gillian Anderson needs to take me shopping.  If you've never watched "The Fall", it's about a serial killer with Gillian Anderson playing the detective trying to find him. Her wardrobe is full of tailored suits paired with silk blouses of various colors. She comes off as professional but coldly sensious, which seems to drive some of her male co-workers a little crazy.
Obviously I wasn't the only one taken with her collection of silk blouses since Lisa Comfort decided to design a pattern inspired by the show.  When it was posted on the Sew Over It instagram feed last year I was sobbing lightly after reading it was only available in a class. But I wants the precious and I don't live in the UK. *Sniff, sniff* Thankfully all I had to do was wait and now the pattern is available as a PDF for those of us who reside across the pond.
I'd classify this pattern as beginner level blouse pattern since there's no darts, collars/collar stands, button bands to deal with. The cuffs do call for button holes, but having to sew two is a lot easier than making a standard button down shirt. So here's the thing about me and beginner level patterns.....I can't leave well enough alone.  At first I'm all like, "Oh and easy project that I can zone out on." But I never really do that. Instead I start redrafting the pattern because I'm not a beginner and I'm dangerously equipped with "textbook" pattern drafting knowledge. That said, there wasn't any major redrafting done on the Anderson blouse. I think this pattern has a solid base, but there were one or two details of the drafting that weren't to my liking. Then add to that my usual personal preference changes that have nothing to do with the draft of the pattern. The things you change because it's your garment and you can. So here's a breakdown of what I liked and didn't like, and what was changed just for my tastes.

Things I liked about the pattern as drafted
- The back neckline is finished with bias binding that is slip stitched down.  This gives you a pretty clean edge that won't flip out like a facing would.
- The fronts are finished with fold over facings. I found these to be drafted wide enough that they weren't prone to flapping out the neckline.

- The sleeve caps have just the right amount of ease. Just a little for movement, but not so much that you have problems setting the sleeves pucker free.  I'm also like the width of the sleeve itself. Feel like it would have been easy to stray into 80's puffy sleeve land, but these perfect.

Things I didn't like as drafted
- If you make this blouse as instructed then the sleeve slit is part of the underarm seam. When scanning the directions I saw this and said NOPE.  On the good side it will take you all of 10 minutes to move the pleat, add a slit and draft a piece of continuous binding. (Steps for this are under the Confessions/Advice section.)
- The bottom of the blouse is cut straight across and finished by sewing a casting and inserting some ribbon to gather it up. As someone who has always had a "large for her frame" butt, anything that gathers around that area sends me into a fit of hives.  I did some brainstorming for alternate finishes and didn't come up with anything that would look all that great if the blouse was worn untucked. So I procrastinated another day and then decided that I didn't really want to wear the blouse untucked and finished it with a rolled hem.

Things I changed just because I'm picky about clothing in a way that drove my mother crazy when it was her job to clothe me.
-  Instead of gathering the shoulders I turned that area into pleats.  It's more of a 40's look which appeals to me, but might not appeal to everyone.
- The pattern comes with a narrow cuff. After making a muslin I didn't care for the narrow cuff and widened it to the same width as some button down patterns in the stash.
With my mods I'm pretty pleased with this blouse. It's got a bit of a vintage-ish vibe when paired with a pencil skirt that is gonna work great with my wardrobe. Now on to all the review details!

Pattern
Sew Over It's Anderson Blouse

Fabrics used
Double silk georgette (This was purchased from Tessuti fabrics years and years ago. Sorry because I know a lot of you like it.)

Pattern changes/alterations
1. Standard 1/2" forward shoulder adjustment to the sleeve and shoulder.

2. Took the shoulder width in 1/4".

3. Changed the side seam from a straight line to a curved one to remove a bit of the ease at the waist. Removed around 1/2" on the quarter for 2" of ease removed at the waist through the entire garment

4. Changed the gathers to pleats.

5. Redrafted the sleeve to be a standard shirtmakers sleeve with a continuous bias binding.

6. Increased width of the cuff to a finished width of 2 1/4".

7. Sleeve length was reduced 1" since I'd increased the size of the cuff.


Confessions/Advice
- The sleeve redraft is super simple because the only thing missing is the cut line to make the slit. I converted one side of the pleat to the cut line and moved the pleat.

1. The left side of the pleat will be converted to the slash line so first we will move the pleat to the right.  Measure out the 1 1/4" from the right pleat mark.

2. Cross out the old pleat fold marking and draw in an arrow over the new pleat location.

3. Go back to the leftmost mark and extent to up to the length you want the sleeve slit to be.  Mine is 2 1/2" finished. (So 2 1/2" plus the 5/8" seam allowance for the cuff, 3 1/4 total.)

4. Last step is to draft a rectangle to be the bias binding for the slit.  The rectangle should be twice as long as your slit length plus seam allowance.  Mine is 6 1/2" line.  The width depends on what seam allowance you will use to attach the piece and how wide you want the finished binding to look.  I sew sleeve bindings on with a 1/4" SA and like them to be around 1/4" finished. My binding piece is drafted to be 1 1/2" wide.

- I was a dum dum and transferred one of my slit markings incorrectly to the cutting paper. Didn't notice it until I'd cut the slit in the fabric and tried to sew the binding on.  So on this blouse the sleeve slits are 3 1/2" instead of the drafted 2 1/2".

- In my humble opinion this is not a blouse to wear untucked. Here's my photographic evidence. Having it tucked into a fitted bottom makes all that ease look good. Hanging on it own....not so much. Tucked in though, it's sooo good.

- Want to convert the gathered area on the shoulder to pleats like I did? Here's a look at my pattern.
The 3 pleats are around 1 3/8". There's a bit of fudging here to make everything fit in the marked out gather area. Between the pleats is 1" so that they don't stack right on top of each other.  All the pleats were folded towards the neck.

- I used the old stiffen it with gelatin trick on this double georgette and had a very pleasant sewing experience. Here's a link to the Threads article which explained it to me.

Husband Comment
"Ooooh, blousey. That's a cool fabric."

My Final Thoughts
Even with my anal retentive tweaking this project sewed up really fast. It took me only a week even with the time suck of cutting silk between paper. Speaking of silk, this is the perfect pattern for using some of those long stashed lengths in the stash. I'm thrilled how great this almost 5 year old georgette looks sewn up and how the blouse pairs with my collection of pencil skirts.  I'm pretty sure another Anderson blouse is in my future.
So that was a good start to my FESA sewing. Froggie thinks that the Smooth Sailing trousers might also pair well with an Anderson blouse. He's probably right, but I started another pencil skirt instead.  Trouser fitting will wait for another day or until someone prods me into doing it. Please someone prod me a little. Or come sew some pant for me. I have cookies! Please?

Heather Hacks Again - The 1940's Dress

9.08.2014

Until this summer my instagram feed was almost 100% sewing content. It's my comfort zone and so I never strayed far from my sewing friends.  However those friends have other hobbies they like to post about. Things that piqued my interest and made me want to know more. If I had to put my finger on the starting point then it would have to be Luxulite brooches.  Both Sarah and Ange posted pics of cherry brooches within a week of each other. That made me purchase my own brooch and start following the maker of those brooches, Katy. Suddenly I found myself going down instagram rabbit holes about pinup style, companies that make reproduction clothing, pin-up models, etc. I started following several people who aren't sewists, but have a fun style and post regular pics of their outfits.

This is all a long way of saying that I found a bunch more people and websites that are inspiring. The first thing that I fell in love with and just had to have was the Ashley dress from Trashy Diva.  My cursor hovered over the buy button numerous times. The fabric print alone is gorgeous and and the style is vintage inspired without being too costumey. Perfect! I was about to pull out my credit card until remembering  A. I can't afford it and B. My bust point is so low that any RTW empire seam always goes across the middle of my bust. Not a great look to have the bottom half your girls hanging out in the waist area.

Ashley Dress from Trashy Diva
OK then, expensive dress purchase averted, but I still had 1940's dress lust in my heart. What to do now? Froggie then pipped up, "Sew Over It has a 1940's dress pattern. Remember?" That's right my furry friend, let's bring up their page and stare at the technical flat for a minute.
Yes, this is excellent. You can see that the two designs have a lot in common.  Both have the inset waist pieces with gathering at the bust, v type neckline, and the skirts appear to be identical. To hack the Sew Over It pattern to be more like the Ashley dress I would need to:
* Continue the waist inset around the back.
* Turn the neckline into a slight wrap bodice and add some shoulder tucks.
* Remove the seam lines from the waist inset and take the center point out of it.
* Shorten/puff the sleeve.
The only thing I didn't know how to do off the top of my head were the shoulder tucks. Luckily I knew this info was in the Helen Armstrong, "Pattern Making for Fashion Design" text. Thank you college education!

Any one who follows me on instagram knows this baby took a couple of muslins.  I probably should have worked out the fit alterations first, before diving into the style alterations. What can I say, sometimes I like to jump in with both feet no matter the consequences.  So let me present to you my tweaked version of the 1940's Tea Dress pattern. Taa Daaa!
I love this rayon challis print, but the pattern does obscure most of the seam lines. Oops. Let me just assure you that the bust seam is now in the right place after dropping it a good 1 1/2". Yikes!!! Good thing I didn't buy that Trashy Diva dress.
Ahh a close up, maybe now you can see the tucks at the shoulder and the pretty piping along the bottom of the sleeve. I did have to slip stitch the bodice over lap together because I was getting too much cleavage.
I'm pretty sure that the Ashley dress has darts instead of princess line seams in the back.  This difference didn't seem worth redrafting most of the back. Instead I added the waist inset and left the rest of the back as is.  The decorative top stitching on the waist inset was also left off because mine needed to be so much smaller. Thanks low boobs.

Pattern
1940's Tea Dress from Sew Over it. They now offer PDF's versions of all their patterns for instant gratification.

Fabrics used
Rayon Challis purchased from Gertie's Etsy store last year.

Pattern changes/alterations
Fitting changes
1. Lowered bust seam line 1 1/2".
2. Moved the bust gathers further towards the center of the dress.
3. Standard 1/2" forward shoulder adjustment.
4. Decreased the back width by taking in the princess line 3/4" on the bodice and increasing the back skirt dart intake to 1 3/4".
5. 1/2" Sway back adjustment.
6. Added 2" of length to the skirt.

Design changes
1. Filled in neckline 5/8".
2. Added pleat cluster at the shoulder.
3. Changed bodice to have a slight wrap.
4. Removed seam lines from waist inset and changed the shape.
5. Continued waist inset around to the back.
6. Shortened sleeve and added extra ease to the cap to make it a puff.

Confessions/Advice
- I didn't put enough length at the center front seams and had a bit of an unevenness in the hem there. Went back and made the seams smaller on the bust line and waist to fix the problem.

- I like the look of the bias bound sleeves on the outside, but I'm not thrilled with them on the inside. It doesn't seem as neat as the rest of the dress. This is the same technique as I used in the "Gingham is for the Birds" dress. I liked the piping on that dress, but maybe because it's store bought.

Husband Comment
"This is terrible! Just kidding, I like your sleeves.  I also like those out of focus flowers shining in the dark. Are you waiting for your man to come back from the war? He's probably taking to long so maybe you should hang out with me."

My Final Thoughts
This isn't the best review for the "Sew Over It" pattern since I went and chopped the top half up. Sorry folks.  I can say that the unmodified portion went together like a dream. Big props to this company for making a 1940's pattern with lots of the details I was looking for. I do prefer to start with a solid base when hacking, rather than having to invent the whole thing.  The original design is also pretty and would be nice for Fall with it's 3/4 length sleeves. Hmmmm do I need to add to the Fall Sewing Plan?
Since this post is already a mile long, I will be splitting out my hacking details into separate posts. Don't worry, I won't leave you hanging if you want your own extra awesome 1940's dress.  So sharpen your paper scissors and get ready for some pattern cutting madness very soon.
Proudly designed by Mlekoshi pixel perfect web designs