Showing posts with label cotton. Show all posts

Leopard Party Bellatrix Blazer

1.27.2014

It seems fitting to round out Jungle January with a party....a leopard print party to be exact.
Leopard 1
My outer leopard shell is muted and business like, but my inner leopard skin is all "Hello and MEOW!"
Leopard 5
But let's back up and talk about the Bellatrix pattern for a moment.  When Papercut Patterns released their Constellation collection I practically foamed at the mouth upon seeing this blazer.  I've got a fever for blazers and the only prescription is more blazers!!! At least that's what Dr. Frog tells me.

I swear on Dr. Frog's fake medical degree that I was going to sew this pattern up immediately. But that pesky Christmas/germ tsunami totally took the wind out of my sales.  My forlorn Bellatrix muslin stared at me sadly from the corner for weeks. "Why won't you sew me? I thought we were in luv."  Poor blazer, I couldn't let it go on pining for another month. Instead I got my shit together and decided to pull out ALL the leopard print.  Bellatrix Blazer, you will be a magnificent beast! *Cue "Bungle in the Jungle*
Outside pocket detail
The main fabric is a stretch cotton twill picked up from Marcy Tilton last year. Most of the pattern pieces need to be fused, so the stretch factor is moot in the finished garment. Speaking of fuse, I used my favorite "Pro Weft" for the majority of the jacket.   For the extra collar fuse, sleeve facings and welts, I swapped in a different product from Pam, "Pro woven crisp".  I found that pro woven crisp takes a lot more work to fuse completely. You really have to wet it down, put a press cloth on top and just lay the iron on it for a minute. Worth the effort cause I like the way it looks in the blazer.

For the finishing touch I did pull out more of my leopard lining stash. Pretty sure it goes with everything.
Lining shot
Pattern
Papercut Pattern's Bellatrix Blazer

Fabrics used
Self - Stashed Stretch leopard cotton twill
Lining - Stashed Leopard lining
Interfacing - Stashed Fashion Sewing Supply Pro weft, with some Pro woven crisp in the collar/sleeve facings and welts.
Button - a freebie from some past Waecter's order
All Stash Project - collect your bonus internet points! Cha-ching.button

Pattern changes/alterations
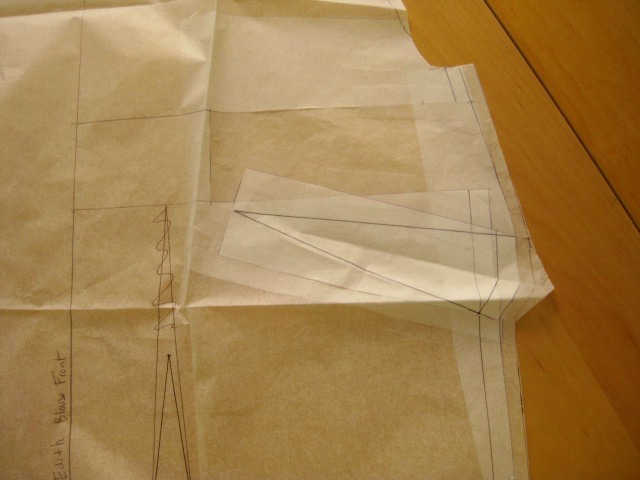
1. I had to do a giant forward shoulder adjustment on this pattern 1 1/4". The corresponding change to the sleeve cap makes for one funky looking pattern.
2. Normal 1/2" upper back width increase with added shoulder dart.
3. Sway back adjustment of 3/4".
Leopard 4
4. Added 3/8" to the side seams to increase the hem sweep.

Confessions/Advice
- I think this pattern is drafted very slim through the hips or maybe just with flat butts in mind.  My muslin was made back in December using a blend of sizes M and L, which should have fit my hips.  I found the waist and hip area both way too small and put the muslin away for awhile.  This month I'm 10 lbs down and have lost several inches from both of these areas.  I still found the hip area too small and added more ease the hem area. I would advise anyone that carries their weight in the hips/butt area to size up on the lower half, especially if you want to wear this blazer over pants.

- I decided to bag the lining instead of following the directions.  Then discovered that it's impossible to under-stitch the bottom of the blazer from a gap in the armhole lining.  Solution - open up the lining side seam as instructed, under-stitch, then turn the jacket inside out again and stitch up the side seam.  Then you can turn the blazer right side out through the armhole gap and machine sew that closed.  No hand sewing makes Heather a happy girl.

Husband Comment
"That looks nice and it has real pockets that work." *Shoves his hands in the pockets to check that his eyes aren't deceiving him.*
Leopard 3
My Final Thoughts 
The construction of this blazer was different from most that I've previously sewed.  I did find that enjoyable and think it would be a good pattern for those not experienced with sewing blazers. The fusing does take a fair bit of work at the beginning. However this step gives the finished blazer a crisp professional look, so don't skip it.  The inseam welt pockets are super easy to sew. Can all my welt pockets be inseam from now on?
More pockets
Beep Beep Beep!  Oh no, it's the stash-o-meter! It seems my leopard print stash levels are now dangerously low. Frog take a note - Schedule trip to Katie's house to steal more leopard print before next Jungle January. We have to be prepared for more Jungle parties.

- I'm going to do the scarf drawing next post, so you'll have to bite your fingernails for now.

Red Roses Dress - Elisalex/Simplicity 2444 Mash-Up

10.17.2013

I have a wedding to attend this month and instead of wearing one of the dozen dresses made this summer I made a new one.  One might point the finger at Red October, the little #sewcialist idea to make something red in October and post it to the flickr group.  But I don't have to explain myself to you guys. I'm pretty sure you're all shaking your heads saying, "Of course you made a new dress, there was fabric and free time. You had to sew it!"
Pic 3
Taaa Daaaa! A pattern mash up of the Elisalex bodice and Simplicity 2444 skirt.  It's pretty and has pockets! I want to keep you pocket lovers coming back, I'm afraid you're still shaking your heads about the pocket-less Burda jacket.

Soooo anyway, it took me a long time to buy the internet sensation that is the Elisalex dress pattern for a couple of reasons. Let's just dive into them, shall we.

- The company's design aesthetic does not really match mine.
The same can be said of several other companies, so no demerits there. Everyone's taste is different and there are plenty of people out there designing with different aesthetics.  My personal style is kind of amorphous anyway, so I don't expect anyone to design specifically for it.
It's just that sometimes there's an element on a pattern that you dislike to the point that it distracts you from other features you might like. Such is the case with the Elisalex "lantern" skirt...... it's not my bag baby. Probably cause its similar to my natural shape and I have no desire emphasize my larger bottom half when I'm trying to balance it with the top.
So when I first saw this pattern I just though, "this one's for the skinny girls," and closed the tab. It took Dolly Clackett's various mash-ups of the pattern to make me give it a second look. Then I realized that the bodice portion of this design was beautiful and might be interested in purchasing it myself.

- Photos of the garments tend to be "arty" with washed out details or very busy prints.
Pattern companies have to the right to present themselves the way they want and By Hand London's photos aren't even as crazy as some of the shit Vogue puts out. Crouching in windows anyone?  In fact my opinion has always been be as crazy as you want in photos, as long as you give me a technical sketch.  Which leads us to my main problem.....

- No technical sketch for the garments before you buy.
Let be me clear that the pattern comes with a technical sketch on the inside of the sleeve. If you happen to be one of those lucky people with a brick and mortar store stocking these, then you could see it before buying.  However those of us in internet land are up shit creek, because a photo shown of this sketch is never shown.
See perfectly nice technical sketch. I could do with a back view, but this is enough information to make my brain happy.  By Hand London did tweet me a couple of months ago saying that they were going to add it to their website. This hasn't happened yet, but small companies have limited resources so I'm sure it's on a "to do" list that's a mile long. I do appreciate them taking my feedback and responding to it.

However this gives me the perfect opportunity to get up on a soap box and talk about a topic near and dear to my heart... the lowly technical sketch. I've noticed a trend across the internet concerning it lately that troubles me.  More and more it's not included as picture in the on-line buying process or omitted entirely from the pattern. Yes, a technical sketch is not sexy like photos or fancy packaging, but it is essential information that should be included in EVERY design.

I will admit that this is BIG pet peeve of mine because the technical sketch how my brain processes a design.  It allows me to see all the construction details in a format were I am not distracted by fabrication, accessories or even the model. I would also argue that no photograph can clearly show you all of the seams lines on a garment unless it is very simple one. (In this case some stylist has probably accessorized the garment to within an inch of it's life and you need the sketch anyway.)

I will take a technical sketch over fancy packaging or interesting card stock any day.  Because to me the technical sketch is not "window dressing" but an essential source of information that allows me to decide if a pattern is worth my time and effort. The only thing more important to me* then the sketch, is decent drafting of the pattern.
*List of importance should be pattern drafting, instructions, then technical sketch but my priorities are skewed cause I never read directions. How else am I gonna sing "I did it my way?" 

Soapbox rant over, now on to the good stuff

Pattern
Elisalex and Simplicity 2444, original review on the Simplicty part here.
Now for the pros, I do think that there is quality pattern drafting on the Elisalex dress.  Those of us on the upper end of the size range might find the arms too tight, but that's a common problem in grading up to the larger end. Both the front and back neckline are gorgeous and I was very pleased to find that I didn't need to move the princess line seams around to hit my bust apex.
Pic 2
Fabrics used
Mid weight stretch cotton purchased from Gertie's Etsy store this summer.  I had just enough bits of her siri lining laying around to line the bodice.

Pattern changes/alterations
1. I generally like patterns with minimal ease but it can bite you in the ass if you have ...ahem "full" upper arms. (I wanted to say meaty here, but that just makes me think of dinner options) Both the armhole portion of the dress and the sleeve were very snug on my muslin. My fix was to drop the armhole 1/2" and add 1/4" to each side of the sleeve underarm seam for a total of 1/2" additional width.  Since I was working with a stretch woven this seemed to be enough additional ease.
Pic 4

2. Normal 1/2" forward shoulder adjustment.  I also did the forward sleeve adjustment on the cap as discussed in the last blog post.

3.  My bust fullness is low set so I took in the top of the front princess line seams 3/8".
Princess seam
4. Also took in the middle portion of the back princess line seams 3/8" cause it's sway back city in that location.

5. I added 5/8" length to the entire bodice and then an additional 3/8" to just the CF part of the bodice.  I don't have a waist there (thanks post baby gut) so visually it looked better to have that area a tad longer.

6. I took in the bottom of the front princess line seams 1/4" to fit on the Simplicity 2444 skirt.  The two patterns were very similar in size in the waist so only a little minor tweaking was needed. Hooray!
Waist pleats

Confessions/Advice
1. I edge-stitched the neckline and then graded and notched the seam allowance to get the curves to sit nicely.

2. I did not line the skirt portion since I didn't think it needed it and there wasn't enough siri left over anyway.  The lining is slip stitched at the waist and overlocked at the armholes.
Lining

Husband Comment
"Hey that's pretty and it has pockets. Nice."

My Final Thoughts
I really like this dress!  There was a bit of concern about this fabric being a little too thick for something that was not pants or a jacket. Thankfully the simple lines of the two patterns worked just fine with the weight. Now all I have to do is decide what pair of red heels to wear with it!
Pic 5

Archer Addict

10.02.2013

Hey look it's another Archer, number 5 if you're wondering.
No, no I don't have a problem. I can stop making them at any time.  I'm not frantically searching the internet for cotton flannel or anything. *Closes browser tabs* I don't have another mid process in a box...um yeah I do, sooooo never mind that.  
OK fine, I do have a "problem".... lack of closet space for all my Archers.  Do you think we can get a tardis closet, bigger on the inside and all that?  With it's own Archer room, Yes?  Do you think "The Doctor" subcontracts? Do you think he likes red pants?
While I'm looking for "The Doctors" number let me tell you about this fabric.  I found it during one of my numerous Etsy searches for vintage fabric. My brain immediately thought it would make a fantastic Archer. Gingham and ikat, it's double the awesome! I didn't buy it right away it because it wasn't a bargain and 2.5 yards might not be enough.  But gradually the though of someone else owning "MY" gingham ikat caused me to click the buy button and I can't say I regret it. 
When the fabric arrived I realized it had to be a hand woven textile. The hand of the fabric was kind of spongy and the design had lots of fun irregularities.  However fun irregularities do make plaid matching a big PITA, here are the the issues I had.

1. The size of the checks were not the same though out the whole fabric.  I didn't realize this until sewing and found one of my button bands matched perfectly and the other only half haphazardly. The first band was cut next to it's corresponding front and the other in a different location.  Doh!  Thankfully the one that matches the front is the one with the button holes.
2. The fabric next to the selvages was very biased so all pieces needed to be cut about 2" inward. Talk about a nail bitter when you're trying to match the gingham and only have 2.5 yards.

3. I forgot that I need to match the gingham and ikats motifs.  On my pockets the gingham matches perfectly but the ikat motifs are not the same.  Guess who didn't notice this until 2 days after the shirt was finished...this girl.
4 There was a weaving error/fiber flaw in the fabric where the fibers broke and created a "run" in the ikat. Thankfully I noticed it before starting and was able to lay everything out in a way where I didn't need this area. 

It took a little dubious gingham matching in some locations, but I was just able to squeeze out an Archer in the yardage available.  On the plus side, this hand woven cotton is super comfy to wear. So so cozy, it feels like my Archer is gently hugging me while I wear it.  I love you too Archer, never change.

Well I'm having no luck getting in touch with "The Doctor." about my closet situation.  Guess I'm gonna have to manufacture an emergency situation.  GRRRRARRRRR, I will eat you all and take your fabric. Nom, Nom, Nom.

My Sew-A-Long Mae

9.23.2013

What do you get when you cross polka dots, birds, and my favorite color red?  You unlock triple amounts of awesome that make up my sew-a-long Mae.
I had to take part in the Mae sew-a-long cause A - I like this pattern, B - chance at prizes, C- I bought a card of bakelite buttons that had just the right number for Mae.
Changes to this version.
1. The neckline is the one Abby drafted and not my modified larger one. They both look good so why not switch them up.
2. Took off the extra ease I'd added in the sleeve area during my lazy fix adding extra east to the entire side seam.
3. Increased the width of the button placket an 1/8" because these buttons were a bigger and I needed more width for the button holes
I also underlined this version with some siri lining, because you could clearly see the black polka dots through the white areas. Facing shadows, no thank you!  Putting in an underlining is a pain, but you do get the added bonus of being able to sew down all those facings.  I whip stitched down the armhole facings since sometimes they want to flash people. Dirty, dirty armhole facings.
The fabric is from Gertie's Etsy store this summer, a cotton with a touch of spandex in it. The underlining cancels out the stretch factor but that's OK, I've got enough ease to be comfy.
Also from Etsy the cute embroidered felt bird patch.  Check out Dahlia Soleil if you're looking for something like this.  She has many different designs - plants, animals, etc and you can chose from different colors of felt. I ordered an iron on patch but ended up hand sewing it on for a more vintage look.
"Tweet, tweet, I'm making your blouse that much more awesome." Right you are red bird, even the 3 year old thinks you're the bee's knees.  Already got complements in this version while running errands, so all around a great make. Hooray for Mae!

Hey Baby, Nice Buttons - The Mae Blouse

9.11.2013

Hello All, once again I'm strutting around in some vintage inspired goodness from Bluegingerdoll. This time it's the new Mae blouse.
After my love affair with the Billie Jean dress, it should come as no surprise that I jumped on the pattern as soon as it was released.  I have a bit of a thing for scalloped details on tops so that pretty much sealed the deal. Scallops are detail I find very pretty and I can actually wear without looking like a grown women trying to dress like a 6 year old. (Yeah I'm looking at you peter pan collars.)
So I bought the pattern and then bought new fabric instead of going into the stash.  GASP, don the ribbons of shame! But really I couldn't help it cause Mae is the perfect pattern for a 2-2.5 yard cuts of 36" vintage cotton.  The kind of cotton I might be amazing a small stockpile of. (It's vintage and pretty, Wheeee! I love you Etsy.)

Pattern
Mae button back blouse from Bluegingerdoll.

Fabrics used
Some vintage quilting cotton purchased off of Etsy.  Strawberries on a navy background. How could I say no? This was a 2.5 yard cut of 36 wide cotton and I was able to cut out the larger size of the pattern and still have some left over.

Pattern changes/alterations
1. I started with the same 12/14/16 that I used with the Billie Jean dress.  Shoulders 12, waist 14, hip 16, and traced the size 14 dart. The muslin was the right shape for my body but was too tight through out the torso.  Decided to do a quick fix of adding 3/4" to the entire side seam.

2. Did my normal 1/2 forward shoulder adjustment.

3. Cut the neckline back 5/8" by tracing pattern edge of the upper scallops and making the ones in the center larger.  I adjusted the back neckline at the shoulder to match the front but did not make the back neckline lower.  The facings were then adjusted to match the new neckline.

Confessions/Advice
1. Since this was my first time ever making any kind of button back garment I actually read the directions.  Then my brain was all, "I don't want to assimilate this new information," so I had to remind it who was the boss.  And bribe it with cookies.   The silly thing is that it's really just the same as putting buttons in the front but my brain was all Duhhhh?

2. Way back in 2009 when I made my first garment with scallops, I found marking the valley between each scallop really helpful when sewing.  That way you know exactly where to pivot the needle and your scallop size doesn't get all irregular.  You can mark the seam allowance directly on the fashion fabric with a clear ruler and a disappearing marker/chalk.

3. Instead of clipping all the curves on the neckline, I graded the seam allowance and just clipped at the valley point.  This technique also worked well for getting the scallops to look nice after pressing.
4. The buttons in the back stop about 5" above the hemline so you get some extra hip ease when moving around.

Husband Comment
"Hey this has vents, no wait they're buttons.  Are these supposed to be on the back?"

My Final Thoughts
This was a fun little project other than my routine cursing at the buttonhole attachment. (Some day buttonhole attachment, bang zoom straight to the moon!)  The neckline takes little time to press nicely, check Abby's blog for details, but other than that zoom zoom and you're done. It's a cute little number and I'll be sewing another one for the sew-a-long....which starts today. I better hurry up and pick a fabric!

P.S. I've paired the Mae blouse with a pencil skirt that was hacked from the Billie Jean dress.  Next post I'll show you the changes I made and how to draft a curved waistband. Ohhhh exciting...maybe.

Maria Denmark Edith Top - You'll be Retro Fabulous.

8.12.2013

Hello fellow sewcialists, some of you know I've been drooling over the Maria Denmark Edith blouse since first seeing the prototype garment. It pretty much has everything I like in a summertime button down blouse.
Kimono sleeve...check, collar...check, darts galore...check.  Can I make this up in that narrow vintage cotton I have in the stash, YES I CAN!

So I dropped everything and whipped one up just in time for a trip to the in-laws.  One must put decorative landscaping/fences to good use after all.  Thankfully they don't ask questions when I break out the tripod.
This was the first pattern I used since Maria redesigned the formatting for her PDF downloads and I loved the change.  Every page had a nice red dotted line where the pieces should overlap.  It was easy peasy putting the whole thing together.

Now on to the proper review....
Pattern
The new Edith top/dress from Maria Denmark.  I used a combination of size 42/44.

Fabrics used
Some vintage cotton snagged on Etsy.  This was probably quilting cotton but I liked the cherry gingham print and decided to purchase it for a top.  (Shop is Leona's Old Linens, if you're interested.)

Pattern changes/alterations
1. My usual 1" drop and diagonal tilt of the bust dart.  I've found through past trial and error that this placement works best for me.
2. Dropped the top point of the front fish eye dart 3".
3. Increased the dart intake of the back fish eye dart 1/4".
4. The collar felt a little tight and the bottom of the armholes were digging into my underarms. It fix this I took 1/2" off the shoulder seam at the outer edge and graded it into nothing at the collar side.  Then I dropped the bottom of the armhole 1/2".  This took care of both my fitting problems and put the blouse waist at my natural waist.
5. Normal 1/2" forward shoulder adjustment.
6. Added 1/4" more ease to the hips.
7. Slightly curved the hem at the side seam on both the front and the back.

Confessions/Advice
1.  I used a bias band finish for the armholes.  It was a bit tricky since kimono sleeves have a tighter curve at the bottom than a normal sleeveless blouse. I'm still pretty pleased with the finish.
2. Next time I'd make the front facing slightly wider so I don't feel like it wants to flip out.
3. I never do sway back adjustments on blouses with back fish eye darts but it's probably something I should do.
4. There is no button placement on the pattern so what I did was to put on the shirt and decide where the bust level button should go. Then divide the space evenly for 5 buttons.  On my shirt the top button is 14" from the hem and the rest are spaced 2 1/4" apart.
5. My version has a shirt tail hem in the contrasting hot pink top-stitching....which I seem to have forgotten to take a photo of.

Husband Comment
"You did a really good job on the hems. What are these, cherries?"   I did unpick and redo that hem, so husband points for noticing.

My Final Thoughts
I feel all Bettie Draper put together when wearing Edith with some Colette Clovers.  Now I just need to work on my Nordic bitch stare while sucking on some menthols. "No one likes a liar Sally, now make me a drink."
In closing I think this is a great little pattern and would recommend it to anyone comfortable with making buttonholes.  So make yourself one and find a fence to pose in front of....maybe your husband will photobomb you too.
Proudly designed by Mlekoshi pixel perfect web designs