Showing posts with label Burda. Show all posts

Sewing with the Pattern Stash - The Frankenpattern

3.09.2015

In the last post I talked about a few ways to sew with patterns that are already in the stash. Like many of you, this is an area that I have problems with. A brand new pattern often seems more exciting than a pattern bought last year. That new pattern doesn't have any "planning baggage" yet or been mentally sewn it up in my head several times.* It's new and shiny and I love it soooo much, until the next thing comes along.....and there's always a next thing. Ummmmmm, it's a bit problematic.

Since I'm the Stash busting theme host it seemed only fair to put my "money where my mouth is" and sew only stashed pattern this month. Luckily for me a really fun Frankenpattern idea popped into my head and got the ball rolling. Let me present a mash up of the Elisalex bodice and Burda 6834 flounce skirt. It's business time flamingo dancer.
Now you all know my fabric stash is large, but I have a pretty good memory about what's in there. Rarely do I stumble across something that I have no memory of purchasing.  However during this fabric cull I found 2 yards of red wool crepe that was a complete surprise. As frog is my witness I did not buy this fabric. Most likely it came from my grandmother's insanely large stash and she sneakily stuffed in a box for me. Well played grandma, well played. Also you knew what I liked and I wish you were still around to give me side eye about what I pay for fabric. Grandma didn't pay retail, she bought auction lots. Lots of them.
Grandma's wool crepe knew what it wanted, just like grandma, and told me to combine these two patterns. Not that I needed to be talked into it. Slim red dress with a fun flounce? Yes please! Since both patterns have princess line seams they were pretty easy to fit together.  Here's how I went about it.....

1.  The first version of Burda 6834 I made sits below my natural waist. It seemed prudent to add some additional length to the pattern if it was going sit higher. Two inches of length was added to all the skirt pieces at the lengthen/shorten line. (I could have gotten away with half that length.)

2. The Elisalex bodice was walked along the waist seam of the skirt to compare the princess lines seams. The skirt princess line seams were moved to match the bodice's.  The front skirt matched without any changes and the back needed a slight tweak.

3. After the princess lines were adjusted, the side fronts/backs were walked along the waist seam. A sizable amount, around 3/4", needed to be removed from the skirt side seam.

4. The skirt has an angle in the princess line as a design feature. I decided to smooth this out into a curve by adding a bit to the side front seam line and removing a little from the center front seam line.
After doing that bit of pattern making work, the two patterns matched perfectly.  I had very little trouble sewing the dress, other than some goofy mistakes sewing back skirt pieces in the wrong way. Oh the hazards of fabric with no wrong side and late night sewing. If the flounce seams hadn't lined up oddly I might have never noticed the problem.
This baby looks great in photographs, but there are a few confessions that need to be made......

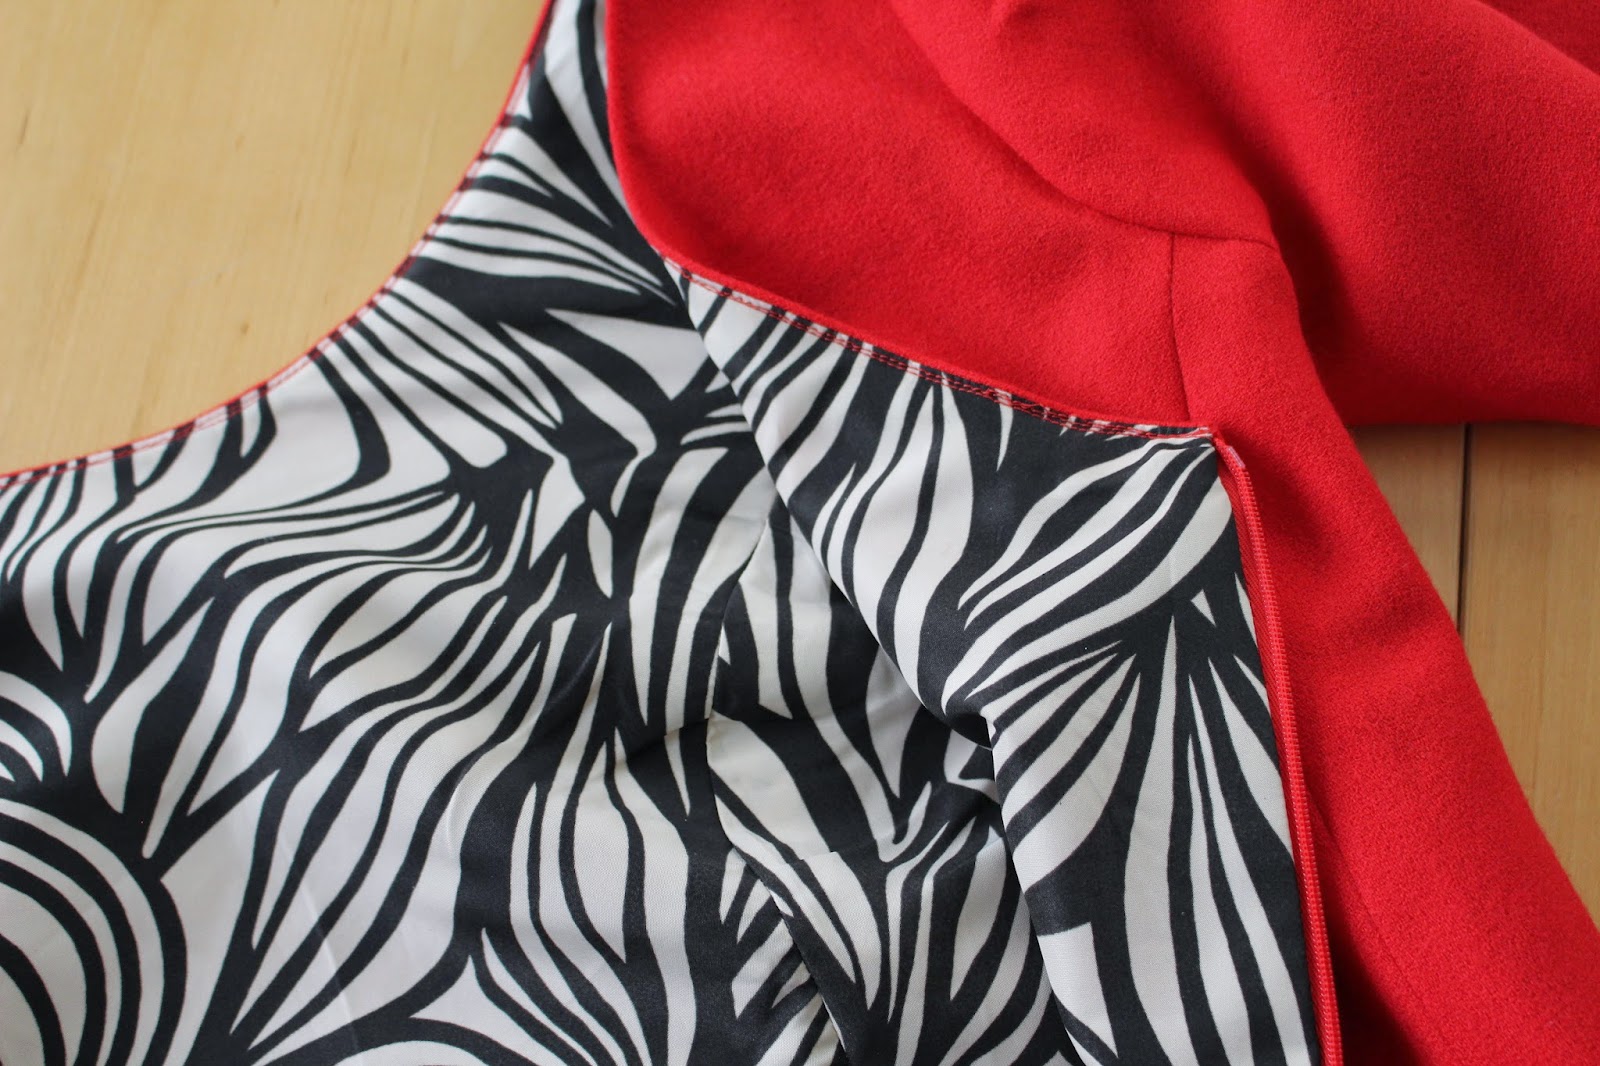
1. The lining shows through.
I didn't even think to check this since there were no issues with lining my Christmas dress. It's not too noticeable in the photographs, but in real life you can clearly see it.  As fate would have it, the see through affect wasn't noticed until the entire dress was almost finished. At that point I decided it was a "design element," like a lace overlay or something.  Yeeeeah, I know the lining should be switched out but I'm not gonna do it.
2. Not all fitting changes were transferred to the pattern.
OK here's the deal. The Elisalex bodice was made in a larger size for the red roses dress in October 2013. Some time last year I'd traced a smaller size and "thought" I'd sewn it up into some garment. Wrong, the smaller size never got sewn up till now and I certainly forgot to transfer over some armhole adjustments. The armhole is very tight and lining it didn't help the situation. Oops.

3. Stretch woven and non stretch woven do need different amounts of ease.
Another big oops on my part since this fact didn't cross my mind pre cutting.  Both of these patterns had previously made with a stretch woven, but I'd forgotten that fact. When I put on the red dress there was a moment of, "Why is this tight across the back and the hips.....oh yeahhhhh no extra stretch."  In hindsight I should have muslined this dress to double check the fit in a regular woven.

4. No amount of under stitching, clipping or pressing would keep the lining from rolling out of the neckline.
I finally had to top-stitch the edge of the neckline to stop the lining from peeking out.  Growl. Having top-stitching in one location seemed odd. I decided to top-stitch the sleeve hems and skirt hem to balance out the garment.
So that's the knitty gritty on my slight fitting fails. What I should take away from this is to always muslin pattern mash-ups just to be sure. Now you know why I make all those muslins and have a quality control Frog. Wait....shouldn't he have told me to drop the armholes? Lazy frog.

Other than a bit of tightness in the arm holes, the fit isn't that far off. It's probably only something I'd be concerned with. "Oh no, it's 1/4" too tight, The Horror!" This dress is still going in the win column since it makes me want to do something like this all the time. Wheeeee dancing!
Hope everyone who is participating with the theme is having good luck so far. Many of you commented with excellent plans. May the sewing goddess bless you with plenty of machine time to crank out these projects.

*Why doesn't mental sewing result in a real garment? Science get working on that. Not like you need  to cure cancer or anything. Sewing is now your Top Priority.

Last Bit of Fall Sewing

11.16.2014

There are 2 more sewing weeks left before the Fall Essentials Sew-a-long is over, but boy is my schedule packed. This week is going to be all tutorial writing, pattern testing, blogging already finished makes and maybe a little Christmas sewing. The following week is going to be spent baking and then visiting relatives far away from the mini sweat shop. How's a girl supposed to plaid match a shirt dress with all that going on?   Gotta get myself a gaggle of sewing elves to continue garment production in my absence.

Before we get into reviewing my FES report card, I do have one more item to show you. One gray pleated "school girlish" skirt.
This pattern is from Burda Sewing magazine - issue 11/2009, pattern number 116. I liked the cluster of side pleats and thought it might be less bulky looking than an all over pleated skirt.  Burda 116 is a "front is the same as the back" affair with an invisible zipper on the side seam. No lining, no pockets, no darts, pretty much a beginner type of skirt.
If this fabric looks familiar it's because it's the "gray denimy stuff that must have wool" fabric that was originally earmarked for a shirt dress.  I had second thoughts about wearing this next to my skin and decided it would work better in a lined skirt.

Since this design was free through out the hips, I skipped the usual muslin stage and fit it on the fly. Started with the size 44, basted down all the pleats, basted one side seam and then tried it on.  The skirt needed around 1/2" removed for each side seam. Then it was easy to cut down the waist seam allowance a bit and apply the same change to the waistband.  Excellent! Froggie was pretty sure not making that muslin was going to haunt me.

I also made a few personal design choices on this skirt.
1. Burda tells you to draft a rectangular waistband for this. No thank you, I'll pull out my trusty self drafted curved waistband instead.
2. As drafted the finished length of the skirt is 31.5", which would be around mid calf on me.  I was pretty sure this would be really dowdy looking and reduced the skirt length to 24".
3. Added a lining to the skirt by cutting the Front/Back piece in lining and shortening the length by 1.5".
If I could tell past Heather to make one change, than it would be to remove the pleats from the lining to reduce weight. Both the self and lining fabric are light weight, but it adds up to one heavy skirt. Yikes! Every time I take it off the skirt hanger I'm slightly concerned for the health of the invisible zipper. Hang in there buddy. You've got your friend hook and eye to help you out.
Overall this skirt is comfortable and kind of fun to wear when you swirl it about.  However does add more bulk to the waistline area than I'd prefer. I'm not unhappy about making the pattern, but it's not going to be one that gets a remake.

OK. Now that I've squeaked the last garment in there, let's see how well this easily distracted sewcialist stuck to the Fall sewing list.
Fashionable Foundations
1.  Black denim pencil skirt - Completed. Already a little faded due to a poor washing decision. Probably should re-dye it black.

2. Wool circle or pleated skirt - Completed. As if you didn't know. ;)

Chic Chemises

1.  Ysolda's Chickadee out of stashed yarn - Completed.  It's been worn weekly so excellent wardrobe planning there.

2. One or two long sleeve Netties - Completed.  I sewed a solid green, solid black and a leopard print Nettie. You'll just have to take my word about the unblogged ones.

3. Vogue 8747 - Completed. Though I should take in the side seams a bit because it's yet to be worn.

Fabulous Frocks
1. McCall's 6696 - Not Sewn.  When I decided that the gray denimy wool was too itchy for a dress this got put on the back burner.  I've since bought some plaid shirting that would be an excellent shirt dress......if there is enough. I got the bolt in so instead of a full 3 yards there is only 2.5 which might not work with plaid matching.

Tender toesies
1. Hand knit socks Completed. Finished the "on the needles" sock project in plenty of time. Hooray!

Those Cozy Nights
1. Laura Lounge pants Not Sewn. Never bought fabric to make another pair of Laura Lounge pants. With my fabric buying track record that's not the worst thing.

Baby it's cold outside
1. Ottobre coat - Not Sewn. Couldn't get around to starting this before it go really cold, which was this weekend. Right now the plan is to make this a first of the year sort of project.

2. Hand knit berets - Had to frog.  I did knit a red beret using Ysoda's rose red pattern. I'm not into swatching for hats and sometimes that does bite me in the ass. In this case the finished beret is much to too and needs to be be reknit on smaller needles. No black beret was started so I only get half points for effort.


There was also the Fall Essentials addendum list which included:

1. Snow leopard top
2. Cobalt skirt or pants
3. Magenta top or skirt
4. Anything hot pink
5. Black and white striped raglan
I sewed everything on this list with the exception of the cobalt skirt/pants. Can't bring myself into cutting into the 2 yards of cobalt sateen in the stash. Maybe in the new year.

Out of 15 planned projects, 10 were completed. This might be a personal record for this girl who thinks sewing lists are just bossy pieces of paper. :). For that I'm forever grateful to Sarah who did the hosting work for this sew-a-long this year. Thank for giving me the "push" to finally make some of those basic pieces I really needed. 

Oooooo Witchy Woman, she got the flounce in her skirt.

10.31.2014

Happy Halloween everyone! Do you have any fun plans cooked up for tonight? We're planning on taking Desmond for his first real door to door trick or treat experience. Previous years he's been ecstatic about sitting on the door step handing candy to other kids. His brain might implode with pure joy when someone hands him candy instead. What ever happens I'm looking forward to raiding his candy stash later. We all know he's not gonna eat those Almond Joy's.
This year I was in the mood to sew a costume, but didn't feel like spending the money to buy materials for something that would hardly get any use. The extent of my Halloween celebrations are hiding in another room while my husband is on the candy distribution duty. Can't let those adorable kiddies have the chance to pass their germs on to me. I see you hiding that bubonic plague under your Iron man mask! Never trust a cad like Tony Stark.

So instead of a costumy costume I took a page from some Halloween lovers on instagram and hatched a plan to "Dress like a witch." Well not a Wizard of Oz witch, or a Hocus Pocus witch, or even a Stevie Nicks witch. No disrespect Stevie, I can't carry off a shawl like you. Instead I decided to focus on the basics, the color black and some stripes thrown in.  Everyone know witches love stripes, right? Probably cause they make your eyesight vibrate until your pupils go all crossed. Once you can see again it's too late, you're in the witch's sack. Muhhaaa! Cannibalistic Treats!
For my quasi witch outfit I chose the Kitschy Coo trifecta top and Burda 6834 for the skirt.  I've made the trifecta top a couple of times in more sweatery knits and liked the fit.  In this bamboo knit the upper sleeves and bust area seemed to be too baggy.  I went back and removed 2" total at the underarm and tapered that out to the waist and elbow area. The neckband was also reduced in width to 1/2".
Burda 6834 is basically a princess line pencil skirt with a flounce sewn to the hem. Mine is sewn in some light weight wool suiting that was laying in the stash. I'd been toying around with the idea of drafting some sort of flouncy skirt when JoAnn's had sale on Burda patterns. Natch, drafting averted! Now I can use my free time to carve intricate jack'o lanterns.
I do owe a big thank you to a lot of my lovely sewing friends on Instagram.  My first muslin of this pattern was less than stellar looking on me.  I wasn't sure what the problem was, but figured a picture on instagram couldn't hurt. Immediately you guys told me to shorten the flounce length and just like that the skirt was 100% times better. Thank you all!!!!

My final flounce length is between the two specified in the pattern.  I used view B's cut line as the hem turn line. A 5/8" hem was added on so that I could finish the skirt with a machine rolled hem. Might as well take advantage of black hiding everything and give Froggie the night off from hemming.  His paws were covered in chocolate anyway.

Pattern
Burda 6834 - Used a combo of size 16 for the waist and size 18 for the hips. People with normal sized rear ends most likely wouldn't to bump the size up in the hips.

Fabrics used
Shell - Lightweight stretch wool suiting.
Lining - Polyester lining.

Pattern changes/alterations
- Took in the back princess line seam 1.5".
- Cut down the front waist 3/8".
- Used the flounce cut line for view B as my skirt length. Added 5/8" hem allowance for a small rolled hem.

Confessions/Advice
- Instructions tell you to interface the top of every pattern piece.  I used a roll of fusible stay tape pressed into the seam allowance for this.

- I skipped hemming the lining because it is so far up into the skirt no one is ever going to see it.

- Skirts without waistbands are not my preferred construction. Would add one if I make this pattern again.

Husband Comment
"It's sexy and professional!" Now I feel like naming this look "Profession witch."

My Final Thoughts
OK, so I thought, "This is gonna be a special occasion type of skirt." NOPE! Gonna wear it allllll the time. Basic black, you always do right by me. However.....if I was to make another one in a bright color which one should I go with? Just don't say orange or brown because then Froggie will have to slap you. Sorry it's a house rule. The other house rule we have is "EAT ALL THE CHOCOLATE!" Hand over the bag of assorted snicker varieties and no one gets an evil hex placed upon them.  Happy Halloween!

Once more with feeling

10.15.2014

This is the part where I would make some further "Buffy" reference if I'd watched more than one season of that show. I tried guys but it was too much teen angst for this 35+ lady. Truth is that "Firefly" is always gonna be my go to Joss Whedon series. This girl was raised on sci-fi and cowboy movies and the marriage of those two genres fills me with glee.
Also on my personal scale of hotness Nathan Fillion is an 11, whereas David Boreanaz is too vaguely neanderthal like to be anything higher than a 2. Sorry David, at least you have that "Bones" money to keep you warm.

Anyway I thought the title of the "Famous/infamous" musical Buffy episode was perfect for today's post because I've got sewing repeats to share. Yes you've seen these garments on me before but not with leather jackets and switch blades. OK, maybe not with switch blades either. Mal told me to misbehave but that seemed to be taking it a bit too far.

First up the denim Beignet I mentioned making back in August. Look dudes, actual follow through on blog plans. I owe it all to my Frog task master who dug around the stash and found an oddly narrow piece of stretch denim. It turned out to be the perfect amount for a Beignet skirt.
Worn with Nettie, a Target Scarf and that Leather jacket I sewed back in 2012
The sewing process went a lot faster the second time around. Partly because all the pattern pieces were traced and partly cause I knew how all the parts fit together.  The only construction change was to piece the pockets together with a lighter weight fabric to cut down on bulk. The pocket was cut about 2" away from where it connects with the side seam. Seam allowance was added to both sides of the cut and, Ta Da, a two piece pocket. I used a scrap of cotton/rayon for the majority of the bag and the self fabric at the edge.
image
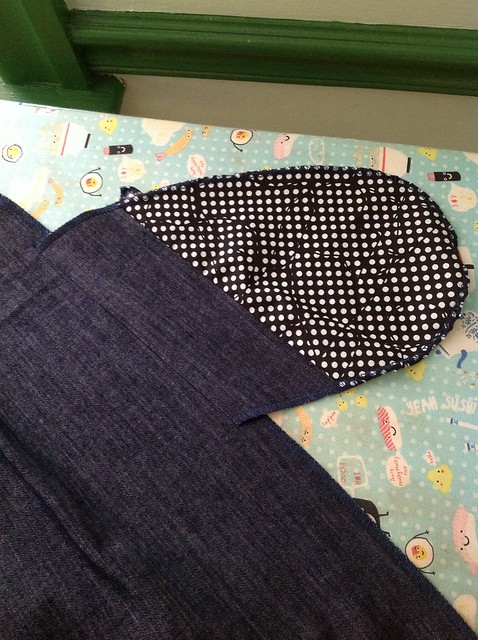
The lining used on this Beignet is also a repeat from the stash. Is it an animal print? Is it a mod leaf print? You decide. Just know that you'll be seeing it again because it seems to be regenerating back in a dark corner of the stash cave. Wonder if it will teach this trick to certain other pieces of fabric.
One other thing to discuss, turns out that when covering buttons with stretch denim the color gets lighter. Maybe I should have tried interfacing the denim to see if that limited the amount of stretch. Oh well, that smart idea just occurred to me now instead of presenting itself to Past Heather. Curse you brain with your tardy brain storms! 
Enough about my anal retentive issues with button shades which no one else will care about. How cute is this with tights and boots? It's exactly how I'd pictured it. Guess Froggie knew what he was doing by making sure I followed through on my sewing plans.

But wait there's more, on to skirt number two. Remember how I put a black denim pencil skirt on the Fall Essentials Sew-a-long?  No, yes, no? Well I went with remaking Burda 127 pencil skirt with my hacked "lips" waistband.
Worn with a Target sweater, luxulite brooch, and a RTW suede jacket.
This denim is also medium weight so the facing was switched out with, gasp, more of the polka dot remnant. What can I say, that polka dot fabric is a shameless hussy when it come to jumping to the top of the scraps box. Only thing I'd change on the waistband is to use a heavier weight interfacing to help keep the "lips" standing up. One side always seems to be flopping over when ever I peek in the mirror.
I used stretch denim again so this is nice and comfy even with the heavier weight fabric. I fear for the state of my invisible zipper every time I pull it over the waistband seam hump, but otherwise this is an easy wear item. You'll have to take my word for it that the skirt has nice top stitching on the princess seams and the waistband. I wouldn't skimp on top stitching like I would on photos.
I'm starting to make decent inroads on the Fall Essentials Sew-a-long list now that everyone's immune systems have stabilized. But we can talk about that on a later date when the males of the household aren't looking at me longingly hoping I'll magically make some food appear. The small one warns me that I'm arresting his development and that it's a serious issue. Better start dinner before he calls child services on me.

What's the Expiration date on that TNT?

7.07.2014

Last week I decided to whip up a quick pencil skirt and reached for an old TNT. It was Burda 127 (Issue 1/2008) a pencil skirt with princess line seams in the front and back. Suddenly a giant robot came out of the wall screaming, "Danger, Heather B, Danger, this TNT has expired!"  Alright that didn't happen, but it would have saved me a lot of seam ripping.  Upside is that I don't have to clean oil stains out of the carpet. 

Despite not getting a robot red flag, the warning signs of TNT expiration where there. Like the fact that the I last made this Burda pattern was in 2009. Shortly after that I gained about 60 lb while gestating the hungriest fetus ever. (Code name - Sir Snacks a lot)  Losing that weight doesn't mean it comes off on all the same places. Looking at you post baby fat shelf. Also past Heather wasn't quite the sticker about fitting like the current version is. It's OK, she didn't know any better at the time....lazy snitch.
Confession - I'm kind of making a mountain out of a mole hill. After finishing the skirt and trying it on, the only major fitting problem was that the back of the waistband was gaping horribly.  I could have slid Froggie in there for trips around town, except I don't need to draw more attention to my rear end.  

The gaping shouldn't have been a surprise considering the pattern is finished with a narrow, straight waistband. Straight waistbands and my tilted waist/sway back don't mix well.  Back in the aughts I didn't know why my waistbands never fit and solved the problem by covering them up with shirts.  However with my current bodysuit craze, Hail Hydra Nettie, a better fitting waistband was needed.  I decided to draft a new one wider waistband to suit my current tastes.
Using the same method outlined here I drafted a curved waistband with the finished width of 1 3/4".  To give it a little more visual interest, the lips waistband shape was traced off BlueGingerDoll's Peggy skirt pattern. Even skirts need sexy red lips.
Having already done the sewing penitence of ripping out a prettily stitched waistband and zipper, I went whole hog and top-stitched all the princess line seams.  The new waistband was attached and also top-stitched.  What can I say, that new to me blind stitch hem foot doubles as a really nice top-stitching foot. Bonus, a machine stitched hem fit right in with all that top-stitching. Froggie says, "Top-stitch all the things, then bring me a cookie!"
So yes I was irked about having to "un-finish" a finished project.  The sewing list is long and I don't want to earn demerits from my frog overlord.  Buuuuuttt sometimes you've got to put the seam ripper time in to get something you'll actually wear.  That's why we're sewing things in the first place, isn't it?  Well I'm sewing for that reason and to accumulate all the fabric I can get my hands on.
*Bonus bodysuit notes for fellow addicts.* I'm modeling version 3 of my Nettie bodysuit changes here feel like it's the perfect version for me.  In v3 the front neckline back to it's original drafted position, having been raised in v2. The Lady skater armhole I'd subbed in seemed a bit large so I took out 1/2" of ease.  To make the original Nettie sleeve fit the new armhole, I split the entire pattern down the center and added 1/2" of additional width. Think I needed the extra width for my upper arm as well. The sleeve now fits snuggly but does not ride up. Hooray.  

Even with my waistband changes I still finished this skirt in time to wear it to the dentist. Because in your late 30's getting good news about your gum health is a reason for celebration.  Don't tell them about the cake I had afterwards. That's our little secret.
Nettie bodysuit in Bamboo
Burda 127 from Issue 1/2008 in stretch cotton sateen
Luxulite mini cherry brooch
Miss L fire Cherry Pop sandals
Besame Lipstick colors Red Velvet over Besame Red

Motorcycle Momma* - Burda 135

10.10.2013

*No motorcycles were harmed or even photographed in this blog post. This blogger is only a Faux-Badass and the mere though of climbing onto such a vehicle makes her back away slowly until she reaches her knitting and cooking eating chair. Mmmm chocolate chip.

I don't want to jinx anything, but this might be the first FO of a jacket/coat extravaganza that might rival the "legendary" summer of dresses. Or maybe I just have tons of stashed coating taking enormous amounts of space in the fabric cave.  MOAAAR COATS IN EVERY COLOR OF THE RAINBOW!!!!!  Ok, Ok, let me calm down a bit and talk about Burda 135 first. Then we can get into Jacketrama/Coatpaloza....name pending.

In the spring I was being a good little stash buster and looking for patterns to pair with stashed fabrics.  Burda 135 caught my eye because I'm a sucker for a pattern with interesting design elements. This one has a three piece front, quilted elbows/hip area and fun eppulates   It seemed like the perfect thing for the lightweight wool/cashmere coating I'd bought on a whim/epic sale.  I was going knock this out right away but got stuck in the "the pants fitting cycle of hate" until the weather warmed up.  (spoiler, I ended up not making pants but making a gazillion dresses instead.) Well the weather's back to being cool and this baby finally got sewn up.

Now are you all excited to see photos of a jacket where all the interesting details are obscured by the color?   Yes? To compensate I lurked around one of my neighbor's fences to give you a new background to stare at.  PS. I've always said I don't like 80's fashion yet here I am wearing leggings and tunicy sweater. You win fashion cycle, you win.
I'm sassy cause I got my skull stud booties on. It's just a matter of time until I start putting studs on everything.
Obligatory back shot showing that I once again shirked my sway back adjustment. Seems wishing that I don't have one never works.

Pattern
Burda 3/2013 #135 Here's the technical drawling again since my photos don't do the design justice. Not shown in this drawing is that all the princess line seams are top-stitched which makes them even sharper looking.

Fabrics used
The shell is wool/cashmere herringbone coating from Fabricmart.com.  I bought this last December during one of their giant sales and was displeased to find it was rather thin.  A little stash marination and actually sewing with the fabric improved my opinion of it.  The quality of the blend is great and it worked up perfectly for a transitional weather jacket.

The lining is a roll end I picked up from Hot Patterns while they were doing a bit of fabric selling.  I loved that pattern so much that I conveniently "forgot" that ivory looks hideous next to my skin.  The fabric was labeled as a cotton but thankfully is very slippery and works great as a lining. Ivory problem solved!
Lining in coat cause I like flashing my linings *wink, wink*

Pattern changes/alterations
1. I started with the size 42 and graded up the waist and hip area using the method described here.
2. Normal 1/2" forward shoulder adjustment.
3. Sleeve cap forward shoulder adjustment also of 1/2".  Miss Leila clued me in on this trick for one piece sleeves and it works like a charm on two pieces sleeves as well.  Basically you cut the sleeve cap and move it forward the same amount as you did the shoulder seam.  Then cut down the over hang on the front and add to the gap in the back.  I promise to write a post on this with decent step by step pics, but for now just look at my sleeve post change.
5. After making up the shell in the real fabric I found there to be waaaaaay too much ease for the design aesthetic.  In my opinion, which you may take with a grain of salt, a motorcycle jacket should be rather trim and sit close to the body.  Instead the jacket was baggy like a duffle coat, which is fine if you were making a duffel coat, but so great for this jacket.  I took in both side seams removing 4" of ease. I know 4", that's cray cray!
6. This meant each armhole was 2" smaller so I had to get a little creative with sleeves to get them to fit into the new armhole.  I took in the underarm seam about an 1" and then eased in the rest in my sleeve cap gathers. Go wool, enabling my bad sewing!!!
7. The pattern calls for snaps to hold down the eppulates.  I only had gold and colored snaps on hand so I ransacked the button stash for some black buttons.

Confessions/Advice
1. I didn't do a sway back adjustment because of sheer laziness and I "thought" the muslin looked fine without one.  In retrospect I would put a small 1/2" adjustment in at my lower back area.

2. If I had took in the side seams at the muslin stage then I would have reduced the height of the sleeve cap to compensate for the smaller armhole.  Thankfully the black wool disguises that the sleeve heads are puffier than they should be.

3. I feel that the princess line seam on the front is too far away from the bust apex to give you any good bust shaping.  This makes the front boxier than I though it would be looking at the technical drawing. Not a deal beaker but it's a good thing to be aware of.

4. I was thinking about not quilting the hip area but the fusible batting is very thin and did not add much additional bulk to my already bulky hip areas.

4. I've made a decent number of Burda patterns and am generally fine with their basic directions and minimal notches. But on this pattern you had to trace together two shell pieces for the lining.  If I wanted to draft my own lining I would.  When I'm paying for a pattern that says it has a lining I expect to have the pieces drafted for me. Grrrr

Husband Comment
"It would be perfect if it had pockets."  What can I say, the man loves pockets and I did find myself trying to put my hands in the non-existent pockets during pictures. Hey sewing mice, magic me some pockets on here!

My Final Thoughts
I was a little heart broken when I put this on in the middle of the process and realized it was huge.  Thank god my on fly fitting mods were able to size it down without ruining the whole thing.  Now that it's all finished I think it's super cute and can't wait to wear it out.  Another bonus, other than the fusible batting needed for the quilty parts all other supplies were from the stash!  Ahhh such a good feeling to actually use things you half haphazardly spent money on.  Um I mean I successfully executed a project that I planned and bought supplies for.....yeah that's it.
Hey construction guys, what you looking at?  Haven't you ever seen a women set up a tri-pod and take about 50 pictures of herself before? No?

Burda 102 Dress - The Appendix

8.26.2013

I've got two more little "helpful" tidbits related to Burda 102 dress that I'm gonna talk about today.  Both of these seemed a little too big to stuff under the Confessions/Advice section of the review, so I've split them out to this extra blog post. Open up your brain hatches cause I'm about to drop some learning on you.

Tidbit 1 - How to grade up pattern pieces using nested sizes.
In my review post of Burda 102 I mentioned that my figure is a size 42 on top but a bigger size on the bottom. According to the Burda size chart my bottom half is a size 46, which is considered a plus size. So what patterns do you sew if only half of your body is plus?  Thanks to a handy tip I picked up on the PR boards years ago, you can pick the "regular" size and grade up the areas that need it.   (My thanks to the person who originally posted this tip, who's name I have long since forgotten.)

This method works if...
a. You only need to grade up a few sizes.
b. The original pattern comes with multiple sizes.

I'll be demonstrating this technique on the front skirt of Burda 102. Now on to the knitty gritty!

1. Trace the largest size of the pattern including all darts, notches and other markings. For this pattern it's size 42 which is the solid line.
2. Take your traced side seam line and move it over the number of sizes you need to grade up.  I need to grade up 2 sizes so I'll be moving the traced line over to the size 38 which is a short/long dashed line.
3. Trace the solid line side seam line again.
4. In this pattern the side seam is graded 3/8" but the dart is graded 3/16".  Moving the side seam line to the size 38 puts the dart at a size 34.  If you wanted to grade that area up 2 sizes move the dart over to the size 38 after tracing the new side seam.  My figure needs more room in that location so I traced the new dart without re-positioning the side seam effectively grading the dart location up 5 sizes.
5. Scribble out or X out the original dart placement and, if it's a Burda, add your seam allowance. Then you're ready to make a muslin.
For this pattern I graded up the front skirt, back skirt, front and back insets this way.  Then the very bottom of the bodice needed to be increased so that the underbust seams match.  For that seam I just added 3/8" to the bottom of the side seam and blended it into the rest of the piece.
If you try this process I strongly recommend making a muslin to make sure that all the pieces fit together. Occasionally I just forget to grade one piece up, but the muslining process always catches this before real disaster strikes.

Tidbit 2 - How to fold the sleeves on this dress.  
If you were hoping for more video of me then your wish has been granted!  I couldn't find a way to get a good close up on the sleeve, since it's just me working the camera. So for reference here's a pic of the sleeve clearly showing it's markings.
Now on to my "instructional video".
Proudly designed by Mlekoshi pixel perfect web designs