Showing posts with label McCall's. Show all posts

Polka Dots are Forever

6.18.2016

Hi folks, you might have noticed that the blog has been rather quiet as of late.  Back in May I stopped taking blog pics on Sunday mornings and have yet to find a new day and/or time that works. Gah! I'm also one of those people who can't write a blog post if the pictures aren't already taken. For some reason my brain needs to be staring at the garment to write about it.  It's like all pattern related files are auto deleted as soon as a garment is finished.  Brain's like, "Got to get rid of all this sewing crap. I need more room for remembering new song lyrics." Anyway, plenty of sewing has been happening, so I'm hoping to get back into a picture taking/blog writing grove soon. Cross your fingers for me and send some blinders to keep me from being distracted by shiny new things.

You may remember way, way, way back in January that one of my sewing goals this year was to make some 40's style blouses. At the time I didn't have any patterns, but that was soon rectified in the blouse buying extravaganza of Easter Break 2016. It was a cold spring people, a girl has to cope somehow.  Out of all the blouses purchased McCall's 4265 was by far my favorite.  Probably because I'd lustfully started at it on The Blue Gardenia website for a few months before pulling the trigger.  The red polka dot blouse filled my dreams for many nights. It had to be mine!!!
Since the technical drawing is minuscule on the envelope, let me quickly describe the design.  The blouse has a front yoke with 2 pleats. There are tucks in the waist area on both the front and back. The collar is an interesting construction, one long rectangle that is sandwiched between the cut on facing. Finally the shoulder caps are darted to give the strong 40's shoulder. Basically lot of nice little touches that made me itch to get this pattern on the sewing machine.

Luckily for me the stash already contained many yards of red polka dot shirting, so I set off to copy the good taste of the fashion illustrator. Polka dots are forever....words to live by or a lesser known James Bond film. Anyway, this blouse whipped up in a jiffy thanks to well behaved cotton and my desire channel my inner Minnie Mouse.  OK Mouseketeers, start singing the theme song!
Actually no one has made a Minnie Mouse reference yet and I've worn this blouse a ton.  It makes me happy so I get complements instead of mouse jokes. :) I really love the collar and the lowish button placement which is flattering with my whole low bust situation.  For some reason I also like the tucks in this garment when they usually bother me.  Might be that they complement the yoke pleats and so the extra ease seems more balanced. What ever the reason I'm very pleased with this project and have already started sewing up another one in rayon. Huzzah!

Pattern
McCalls 4265 (Envelope pic above...of course)

Fabrics used
Stretch cotton shirting originally from Elliott Berman Textiles.

Pattern changes/alterations
1. 1/2 Forward shoulder adjustment to the shoulder and sleeve.  I needed to change the angle of the some of the shoulder cap darts after the adjustment. The new ones are in purple ink.

2. Added 1/2" extra ease in the waist area.

3. Added one extra button to the front below the two shown in the illustration.

Confessions/Advice
- This project was the first time I decided to make shoulder pads from scratch with the pattern pieces provided. While it wasn't a bad learning experience, I'm not 100% happy with the way they feel when wearing the blouse. My homemade ones are kind of heavy and non flexible when compared to the nice one's I buy from the semi local Steve's Sewing. Probably will go back to covering store bought ones in future versions.


Husband Comment
"Looks good. Polka, polka, polka dots.  Why are they called that anyway?" (According to google -  "It is likely that the term originated in popularity of Polka dance at the time the pattern became fashionable, just as many other products and fashions of the era also adopted the "polka" name.")

My Final Thoughts
Glad I finally listened to my gut and bought this pattern before it slipped away. It's pretty much everything I want in a 40's blouse.......not that I'm going to stop buying blouse patterns. That's just crazy talk.
P.S. - The very faint writing on the pattern envelope says, "Dorthy, please make my blouse pattern B (Short Sleeves) Mrs. Gassmann."   Do you think Dorthy will put the buttonholes in my rayon blouse when she's done with Mrs. Gassmann's garment?  One can only hope.

The Return of the McCalls Shirtdress

7.16.2015

Two sewing repeats back to back? Tsk, tsk. Someone needs to plan my life better so this sort of thing doesn't happen. In fact let me just get a ghost blogger so I can focus all my attention on my real loves, cake and toy frogs. :)  But not toy frog cake because that would be weird.
Anyway, let's just blame Roisin for pattern repeat number 2 and move on.  She's been cranking out McCall's 6696 like clockwork and with every post my desire to sew another has increased. There was even a moment where I thought, "My wardrobe really needs a M6696 sewn in Liberty Carline," forgetting that I'd already sewn one. Derp. To be honest though two Carline shirtdresses would not be a bad thing.

Not having any other colors of Carline in the stash, I did the next best thing and chose a Liberty Lawn in a different print.  It's name did not lodge itself in my head, but it's the one with all the different colored pears. When purchasing this fabric I thought, "OOOOHHH FRUIT PRINT ON SALE!" and grabbed 3 yards. This probably would have been more than enough fabric for most garments if a. The print wasn't directional and b. The pears are set up in stripes so you have to stripe match if you don't want the garment to look like a pile of dog poop. I did luck out was able to fussy cut most of the garment correctly  One button band had to be squeezed out without any regard to pattern placement, the inside waist facing is pieced and my skirt side seams aren't perfectly aligned. But the center front looks pretty great which is what's really important...right...right? *twitches slightly when looking at sideways pictures*
This dress was cut out at the end of May, a few days before we took a trip to my in-laws.  The plan was to get most of the machine sewing parts done and then do all that tedious hand sewing at their house. No machine no problem, I'm still making garments!!!  Well the fly in the ointment is that my hand sewing is slow and even with the assistance of audiobooks,  incredibly boring. At the end of that weekend only half of the sewing was done. The stash busting contest started in June and this poor dress sat around in a tote bag for most of that time.  I finally picked it back up during/after? our long term power outage and finished up all the fiddly handiwork. 

There are a few minor pattern alterations to this version. After pulling last year's dress out of storage and putting it on, the bodice length felt too short.  I went back and removed my bodice length alteration of 1/2" and sewed this one as drafted.  The waist hits where I want it now, but it seems like this change makes the back puffer.  That's my current theory anyway since the fabrics are exactly the same.
My preference for skirt length as also changed in a year, so I added 3 3/4" to the pattern to make it 27" long. This change was also made to the button band because you want all those pieces to fit together. ;)  On this dress I gathered the edge to ease in the extra fullness and catch stitched a 1 3/4" hem.

In any future versions I'd tweak the back gathers a bit. They may just need to be distributed over a larger area since I do like the feel of that much ease across my broad upper back. I'd also make the pockets bigger, a change that had to be skipped on this is dress due to fabric yardage concerns.
All in all it was a good stash busting project to crank out since I didn't need to buy a thing to sew this dress. Isn't it nice when all your hoarding pays off in the future. There was even a pear brooch already lurking in my collection. (Somehow not surprising thanks to my brooch addiction.) Though I'd like to go back in time and tell past Heather to buy these sandals in navy too. Still kicking myself about that years later.

In parting I'll leave you with a picture from a different location in the park.  The house in the background is an office space for some of the local government employees, but hasn't lost any of it charm....if we ignore the AC units. It might also amuse you to know that a family found my photo taking entertaining enough to stand around watching for about 10 minutes.  In truth watching me try to climb up this wall before the camera stopped responding to the remote probably was hilarious. Climb overly dressed women, climb!

Plaid Madness Insues

6.23.2015

Say you haven't sewn with plaid in years. You are well aware that your plaid matching skills are rather rusty and things could get a little dicey. Because of this you're entirely sensible and choose a simple pattern. Maybe a pull over top with a side seam zipper so you only have to plaid match across the shoulders and at the side seams. You get a little plaid matching refresher without tearing your hair out. Pleased with yourself you celebrate with cake.

Or you could think, "My plaid matching skills are a little rusty. Maybe I should sew a shirt dress with a big collar and a bias cut skirt. Don't have to plaid match across the waist seam. WINNING!" Fixated with this fact you fail to think about all those seams that do need to be plaid matched, some of them on the bias. Oh no, this project is going to be a "Piece Of Cake", you think while eating cake.
Now that you've seen a picture, it's pretty clear the direction I went in. Sensibility is not my strong point and I did think a bias cut skirt would be a piece of cake. I told myself that this worry over plaid matching was silly and everything would be fine. FINE. Thusly prepared with fake confidence I went forward to cut plaid fabric.

The plaid cutting technique I used was drawing a line on the pattern and lining it up with one of the white plaid lines. When pattern pieces were labeled cut two, the first piece was placed on top of the fabric to assist matching the second. This was most likely a fine cutting technique if I'd been a bit more careful.  But I got a little sloppy and though, "That's close enough and I'll be about to make it work."
I also flat out made a cutting mistake. When cutting the second front, I plaid matched the white plaid lines but not the red ones.  But that was an error that wasn't caught until much, much later. Well get to that in detail in a bit.

My order of assembly was to sew up the bodice first. All the darts, facings, shoulders and one side seam were stitched.  I even went so far as to hand sewed the sleeve facings in place.  All that went smoothly other than realizing that I hadn't plaid matched across the shoulders. Oh well, no use losing sleep over that detail now that the fabric was all cut.
After completing all those details the only thing left was sewing the bound buttonholes. I wasn't in the mood to tackle those yet. Sewing bound button holes is one of those things that always provokes a mild panic attack.  Matching plaid on the bias skirt seams would be much easier...right?  The first seam, CF, took one whole hour to sew. "Oh Crap! What have I gotten myself into and why are some of the plaid lines matching and some aren't?" After much trial and error it was discovered that the plaid intersections were just as important to getting good chevrons as just getting the colors to line up.  Did I mention that my plaid matching skills were pretty rusty?

On the CF seam my cutting was almost correct.  With just a little fudging of the 5/8" seam allowance I was able to get good alignment of the plaid.  The rest of the seams wouldn't be so fortunate.  The other 3 skirt seams had to be sewn at crazy seam allowances to get the correct match. One side would be 1/4" and the other would be at 3/4".  I went back and trimmed down the larger side down to 1/4" so that the finished seam looked a little better.  If any future seamstress looks at this dress they will probably wonder what the hell was going on. Maybe I shouldn't get so uppity about some of my vintage hand sewn dresses.

But back to our plaid matching saga, it is far from over.  At this point I'd done a pretty good job during cutting keeping the repeats matched horizontally. Three skirt panels were sewn together with only a 1/4 or so of mismatch at the hem. It wasn't until panel number 4 that there was a big problem. I found that it needed to be shifted upwards an inch to get the side seams to match correctly. Eeeeep!  A small thank you was said to vintage pattern drafters for using super deep hem allowances as I shortened the other 3 panels to match.

With the skirt finished it was time to finally tackle those bound buttonholes.  I did refresh my brain on sewing those by rewatching the Sew Retro Starlet Jacket class on Craftsy. At least part of me learned something about doing proper prep work on this project.  The bound buttonholes were a slow go, with plenty of ripping out.  At least there weren't any horrible cutting mistakes and the finished holes looked pretty good. I moved on to the facing windows and then hand stitched the two layers together. Feeling pretty pleased with all my hard work, I went to baste the bodice pieces together and saw this.
NOOOOOOOOOOO!!! A thousand scream emojis have just been born. I thought, "OK, let's not freak out. The non buttonhole side can be replaced. Wait, which side matches the back?"  You guessed it, the non buttonhole side.  At this point I started manically laughing in the way crazy people do before they flip out and start stabbing everyone.  I...Have....To...Redo....All....The...Buttonholes. Perhaps I should just fall on my sewing shears instead.

At that point my husband arrived home and said, "Time to go to the church picnic." This turned out to be a good thing because I couldn't lounge dramatically on picnic benches crying about mismatched plaid in front of near strangers. "No, no, you don't understand! They were bound buttonholes, bound! I have to dissemble half my work!" *Cue manic sobbing.* By the time we returned home I'd calmed down a bit and was able to deal all the work that had to be redone. There was some fabric left and I was able to cut a new front and facing that did match the other side.  Praise the sewing goddess! She also made sure that second set of bound buttonholes sewed up a lot faster. Or it could have been all that practice bound buttonhole practice I'd just had. Bodice fixed, it was attached to the skirt which magically still fit. Thanks bias cut! The final bit of magic was that the skirt stretched before hemming and was no longer an inch shorter than I'd intended.


Pattern
McCall's 7977. Haven't seen this one floating around before purchasing my copy. This project counts as #vintagepledge number 5.

Fabrics used
Cotton shirting (May have a bit of poly in it. It was from my grandmother's stash and I didn't feel like doing a burn test.)

Pattern changes/alterations
- Added 1/2" through the waist and hips. For the hips I actually added the 1/2" throughout the length of the skirt.

- Shortened the bodice 3/8"

- Shortened the skirt 5.5" (Think as drafted this would have been a maxi skirt on me.)

One alteration I would go back and do is to take in the shoulders about 1/2 -3/4"  Even with shoulder pads sewn in that area is a little big. You can see that the CF is collapsing a bit and it's from the excess in the shoulders. The actual bodice length is correct. (It took me completing the whole dress to finally figure out this issue.)

Confessions/Advice
- Make sure your plaid matches across center front before putting in bound buttonholes. Duh.

- This shirting was a bit more sheer than I'd anticipated before sewing it up. I've worn a red slip underneath the dress for the photos.

- I slapped some ready made shoulder pads in this dress at the last minute. I should go back and either use the shoulder pad pattern pieces provided or cover the ready made ones in self fabric.

- The belt and buttons were a vintage deadstock set I stumbled across on Etsy.

- Covered belt enthuses rejoice, I ran across an internet source for belt backing!  Sew-Biz Fabrics has a lots of widths available. Their website might be a little dated looking, but they shipped promptly and I was pleased with the backing in real life.

Husband Comment
"Hey look, you got all the lines to match. Oooo, they go up or down depending on how you look at them. I also like your belt buckle. But you didn't make that, just strapped it on there."

My Final Thoughts
With all the cutting snafus this project should have ended up in the trash can as an unfixable wadder. Maybe Grandma had my back on this one making sure it worked out in the end. I can tell you that she would have given me an earful about that bodice cutting error. She didn't hand out sympathy for being a dumbass and not paying attention.  ;)  She still would have made me 3 different things for lunch because she rocked.
So I've talked about plaid matching at length, but not about the actual pattern.  Please forgive me lovely pattern, I'm still a bit shell shocked from making you.  In a solid or non directional print this dress would be a snap to sew up.  It has several design details that look as nice on a real body as they do in the fashion illustration. That's always nice since fashion illustrations don't have to worry about gravity or real life bust/waist/hip ratios. In recap, great pattern, fraught construction, awesome final dress. Now excuse me I have to stare at my skirt seams while eating cake. Ooooo plaid.

Bettie Drapering It Up - McCall's 6696

8.18.2014

Being Don's wife is hard work. All those cigarettes to smoke, wine to drink, all while actively ignoring the children.  "Shut up Sally and stop shoving food in your face." God knows how I find the time to make bitchy comments with Francine. Just the other day I got so fed up with everything that I shot a few of the neighbor's pigeons. At least Sally and Bobby made sure to keep my wine glass topped up that night. Don finally came home and said I look pretty in my new dress. Guess I'll grace him with a smile tonight.
This post could be alternately titled, "Clare made me do it." McCall's 6696 wasn't a pattern I'd noticed when it came out.  I only skim big 4 offerings when they release. If something doesn't grab me then right then it gets forgotten. Well Clare went and remade this pattern, reminding me that I wanted this dress as well as her legs and her Don robot. I contented myself with only purchasing the pattern.
My plans for a straight skirt version where quickly abandoned after realizing that the full skirt view would go great with the Carline Liberty Lawn in the stash.  That fabric was supposed to be a shirt dress anyway, the one from Gertie's first book.  Long story short, fitting that particular pattern was a nightmare. "What Is Wrong With This Bodice?!  Do my arms come out at weird angles or something. AHHHHHHH!" The Gertie shirt dress ended up sewn in lobster quilting cotton and the Liberty went back into the stash cave.

As much as I'd love to hoard Liberty lawn forever, it stuck me that McCalls 6696 had the right details for my taste.  I took the plunge and put scissors to those luscious red roses. Eck! Even having a well fitting muslin doesn't take the sting out of cutting into Liberty. "What if I screw this up? The sewing goddess will surely curse me forever." However once you get over that hump, sewing with Liberty is such a joy. I start wondering why can't I be filthy rich and have bolts of it? Who wants to plan a Liberty lawn heist with me? Hashtag #LLheist. I'm sure there's no way they can trace it back to this blog.
Anyway let's put my criminal plans aside and get back to sewing.  Great things about this pattern include, a two piece collar, pretty gathers in the back, pockets and an inset waist band that make sewing belt loops on a snap.  With the different views it's easy to get shirt dress with either a retro or modern feel.  Props to the design department for giving you options like that. I'll probably sew the straight skirt version with sleeves in denim for fall. (Seems everything is denim this fall.)
Bad thing about this pattern, or maybe just view A, is that it takes a shit ton of hand sewing. So Much Hand Sewing....what have I done? Save me from the needle's wrath! Finishing the dress was a slog and the only thing keeping me going was staring at red roses and Stephen King's Dark Tower series on audio book. Ahhh yeah, scratch my science fiction/western itch.

Pattern
McCall's 6696 - View A. Henceforth referred to the view of copious hand sewing.

Fabrics used
Liberty Tana Lawn in the discontinued Carline print. Dear Liberty, how can I convince to start reprinting this design again? Cookies? Buying more lawn? Not planning to rob your store? Let me know. Smooches

Pattern changes/alterations
1. I excitedly bought the larger size nest without looking at the measurements on the envelope.  Turns out that the 36" bust size 14 is in the smaller size nest. Doh! Since I needed the size 16 for my lower body I decided to do a little fast and loose grading on the top half of the pattern rather than exchange the pattern.  I used the method of grading using the existing sizes explained in this post. But instead of grading up, I did the opposite and graded down.

2. This was my first time using a McCall's pattern that had the different cup size options. Since I wear a DD US/E European bra size I traced the D cup bodice.  When I mocked up the dress I found a fitting problem that I'd never encountered before.  The neck/shoulders, which had been graded down, fit perfectly. The hip area also fit perfectly. But in the bust/waist area I literally had inches of extra ease. I'm going to guess that the different cup sizes have FBA adjustments already made to them.  Since I rarely need one of those, using the D sized bodice might not be the best fitting option for me.  To fix the ease problem I took 3/4" out of the side seam of the entire bodice and waistband. The top of the skirt was nipped in 3/4" to match the waistband and then graded out to zero at the hip.

3. The bodice was shortened 1/2" and the waist dart shortened 1".

4. Standard dropping of the side seam dart an 1".

5. Standard 1/2" forward shoulder adjustment made.

In retrospect, it would have been a lot less work to start with the size 14 and just grade out the hip a bit.  Oh well, I couldn't have foreseen this unless someone explicitly mentioned it in a PR review. (I didn't bother to check before plunging into the project.)

Confessions/Advice
1. Confession - I hated sewing this dress because it was about 50% hand stitching. The first half of assembly is fine and then suddenly you find yourself doing yards and yards of hand stitching with one machine seam in between.  If you make view A you will have to hand stitch, the waist band facing, the giant hem, both button band facings, both armhole bias bindings, and finish with sewing on 12 buttons.  I did most of this with a head cold, which did not improve the process.

2. The shoulder strap piece for the included slip does a fine job doubling as bias binding piece for the armholes. You know if you had a brain fart and thought it actually was a bias binding pattern piece and already cut the fabric.  I did use a 1/4" seam allowance to sew the strip on due to the width of the piece.

4. There was some sort of nonsense in the directions about turning the hem up 2 + inches and then trimming it down. I guess a wider hem would be a nice design element in a semi-see through fabric like the eyelet they used in there pattern sample. I wanted the hem a little longer anyway so my dress has a 1 1/4" hem that did not need to be eased in. The button band was plenty long enough to accommodate this with out any adjustment.

5. I heard, through the grapevine, about some people feeling there was too much ease in the back.  For me this wasn't an issue, probably because my upper back is wide. I was able to skip my standard width adjustment since there was already plenty of ease to move my arms around.

Husband Comment
"It's got a collar and buttons. Do those buttons open up? Does it have pockets? Well that's convenient. Are you wearing a belt with that? Does the collar chafe your neck? No? OK that's good. It looks stylin'." *Then the spelling of styling was specified.*

My Final Thoughts
Even though I was cursing my lot during the hand sewing, I knew it was going to be fine in the end.  I could tell from the muslin that this would be a comfortable dress and easy to accessorize. The style of pattern is "me" or at least me at this current moment. (Damn changeable whims.) The Carline print was a perfect match and I admit enjoying the flurry of instagram liking while making this dress. None of you can resit the fabric's charms....and I don't blame you.  Roses goooood.

Coincidentally Mary just made this pattern too. Linking over so you can get a look at another lovely version. That's 3 shirt dresses for the price of one, cause I'm not trying to brain wash you into buying the pattern or anything. (Buuuuuuy Ittttt.)

Me-Made-May Day 13 - Personal Assistant

5.13.2013

Ahh the life of a personal assistant to a famous rock star...
Hmmm I think Mr. Jub Jub needs some serious financial advice.

Me mades today, Short sleeve V-neck Renfrew and McCall's 6519 with mods.  I have to go sleep now, it's been a long morning getting yelled at because Mr. Jub Jub was not happy about the type of cookies in his dressing room.

Me-Made-May Day 9 - I Hate Snakes

5.09.2013

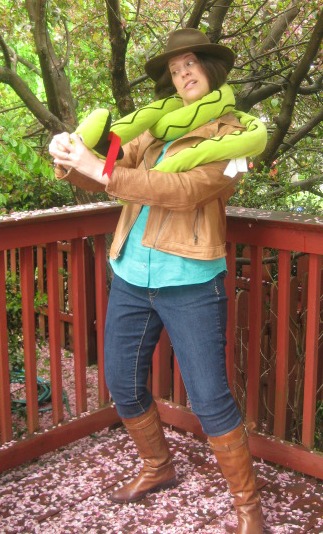
What do you do when you find an "Indiana Jones" like hat in the bag of hats your mom brought you and you already own a giant stuffed snake?  Stage crazy pictures that's what.
Mr. Snake and I are actually friends and I'm pretty sure you'll see him again this month. Muhaaaaaaa!

Today's me mades...OOP McCalls 5138 and modified Burda 111.  Now if only I had a toy whip and a fake idol.

My TNT fitted buttondown - McCalls 5138

3.30.2013

Hey All, it's time to round out Button Down March with a fitted button down. This one was inspired by the PR fitted blouse contest and the fact that I already had a properly domesticated pattern.

McCalls 5138 and I went 12 rounds last year but in the end I was able to beat it into submission. Then I lifted my arms in the air and yelled Adrian!!!!   Umm no wait, then I made a Joan Holloway inspired blouse. For all the gory details on that, check out this post

And now for the photos of me trying to look nonchalant in my front yard as neighbors walked by with their dogs. Laa laaa laaa, pay no mind to the self obsessed women next to the hedge....damn it's cold out here.
I call this one, Hey is that a plane....or maybe Superman!
While I have a strong preference for two piece collars, the combination of the one piece collar and no button band gives this pattern a vintage feel that I love.  Full flickr set here for more detail shots.
The linen was a Marcy Tilton purchase from last year.  She cleverly sent a book of linen swatches with another order and I was hooked. Why didn't I buy the metallic gray color too!

An now a final shot of this shirt properly styled for the current weather with past FO Burda leather jacket.
 Hey there ladies, just leaning up against a tree. Wanna come over and talk about sewing?

March Begins with Button Downs

3.04.2013

It's only the 4th day of March and I already have at least 5 sewing projects planned for the month.  Send help, or maybe someone to explain that space/time can not be folded like in Dr. Who.
Random stack of fabric.
Right now I'm working on two button down shirts in tandem.   First a second McCall's 5138 out of some stashed linen that was earmarked for this project. Since I'm all about entering PR contests right now, this one is for the fitted blouse contest. I'm hoping that this TNT pattern will be a quick sewing project. (Famous Last Words)
Linen in the front. Original shirt in the back.

Second shirt is a Grainline Studio Archer cause Jen is great and I can not resist her patterns.  Can Jen quit her real job and make me more patterns?  No?
You will be mine, my pretty.

I've planned a couple of posts on the Archer shirt since it's new and will need my standard fitting changes.  Not sure if I'll get my version done before the official Archer sew-a-long starts but either way it will be fun.

The Slim Blazer version 1 - McCalls 6519

9.16.2012

How cute is McCall's 6519 with it's little one piece collar, roll up cuffs, and patch pockets?  Even better it's an easy no dart or lining affair, just finish the seams and you're good to go.


Or you could decide that it needs a lining, welt pockets and some darts. Cause why not complicate matters.
Do you like my pockets flaps? You know you do.
I did not plan on making any of these changes when this project began. But give me a couple days to think and I'll come up with a way to "improve" things.  (OK, this time it totally worked out but it could have very easily been a wadder.)

I started out with the usual fitting changes.....
-1/2" forward shoulder adjustment.
- Blending the size 16/18 together for more ease in the hip.
- 1/2" sway back adjustment.
- Increased width across the upper back by 1", adding shoulder dart to take care of the excess at the shoulder seam.

Pulled out my long stashed navy wool suiting (using stash Yeah!) cut out the pieces and got the shell all sewn up complete with the patch pockets.   About this time I decided this jacket really did need a lining because the wool suiting was unraveling all over the place.  So I popped on over to Grainline Studio and used Jen's lovely tutorial.  I also drafted facings for the hem and the back neck, just trace those areas of the pattern and cut them down to the width you want.

I'm trying on the shell, checking to see if my fitting changes are good and the jacket just looks blah.  Got that horrible feeling that you've just spent a bunch of time making something you're never going to wear. Uh Ohhhhhhh!  In an uncharacteristic moment of clarity I realized the collar and sleeves were great but the body of the jacket was bringing the whole garment down.  The patch pockets looked too small for the size 18 and the boxy cut just wasn't working with my large bust. 

The patch pockets were ripped off and immediately the jacket looked better.  Sigh of relief, now I know we're on the right track.  Then I thought, "What if I fudge the look of a princess line seam by putting a long dart where a princess line seam would be."  Took out a burda pattern with princess line seams I'd just traced (118 from issue 1/2010) and used that as a guide for dart placement.  The front darts are 1/2" wide (1/4" dart intake) and 9 3/4" long, the back darts are also 1/2" wide but are 17" long.  The burda pattern also had welt pockets with flaps so I borrowed them for the McCalls jacket. 
Yes we did take 2 hours to sew on.  You must work for your flap happy welts.

I'm really happy with the pocket switch-a-roo, but I did find it impossible to get the welt corners to press flat.  There are so many layers of wool that a crease seems to get pressed in.  Maybe I need some special pressing tool.

Sewed in the super fun animal print lining, added a little top stitching to the collar and this jacket was perfect!
Business on the outside, party on the inside.

Complete flicker set here and my pattern review here if you want a few sewing notes.  Now it's time to sew my Salme jacket muslin which I forgot to add seam allowance too.  Haahaa, I'm an idiot.

Mad Men Inspired Blouse - McCall's M5138

7.05.2012

Joan's fabulous even when blurry.
While watching Mad Men I secretly labor under the delusion that I can wear whatever Christina Hendricks does.  She's the only reason I bought Colette's clover pattern, because if Joanie looks good in cigarette pants than maybe I can pull that off too.

This season I was completely taken with this short sleeve button down shirt Joan wears after telling her husband to take a hike. (See sadly blurry photo to right.) My brain said, "wait there's a pattern almost exactly like that just sitting in the stash. All it needs is a little sleeve redraft."
Most of the hard fitting work on this pattern had been done last year then I was trying to make a banded collar blouse with ruffles.  I got bored with that project and moved on, but not before hammering out a pretty decently fitting blouse.

Alterations made included....
1. Full bust adjustment with an additional lowering of the bust dart.
2.  Forward shoulder adjustment of about 1/2".
3.  Lowering the armhole around 3/4".
4. Adding a little extra width to the back armhole.
5. Moving the location, length and width of all the fish-eye darts.
6. Shorted the 3/4 length sleeve and added a sewn on cuff.
7. Adding almost an 1" to the side seams in the hip area.
8. Reducing the sleeve cap ease about an 1".

The worst part of the fitting process was getting the darts right. The back darts seemed too close to the side seams.  I moved them some what closer to center back.  Because of my sway back the dart intake was increased and the leg of the dart lengthened. On the front the dart intake had to be reduced to almost nothing.  Truth is I don't really need a dart in this location but like the look of one.

As great as Joan looks in rosebud gingham that's something I couldn't pull that off, so out came this long stashed cotton blouse weight. 
Blurry cherry blossoms from Emma one sock years and years ago.
It must have been meant to be because there was just enough yardage in the roll end cut to make this blouse.

Ta Daaaa,  the finished product.....
Front and back view worn with Colette Clover Capri length pants.
A few style changes were made, I lengthened the blouse and retained the shirt tail hem from the pattern.  A cuff was added to the sleeves because they needed a little something to keep them from looking dowdy.

A little detail montage. All photos can be seen larger on flickr http://www.flickr.com/photos/froggiegirl/sets/72157630363323714/

I'm already thinking this pattern needs to be made in a solid color with patch pockets!

Proudly designed by Mlekoshi pixel perfect web designs